
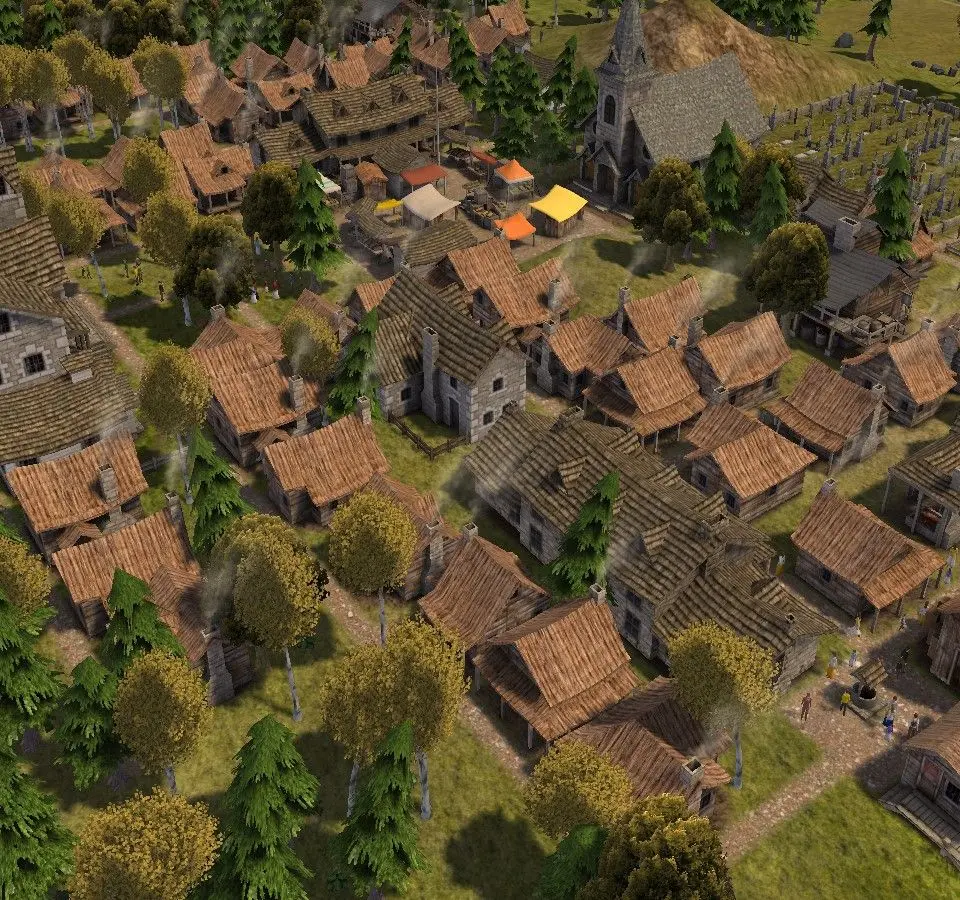
Establishing Basic Infrastructure
The initial moments in Banished are critical for setting the foundation of a thriving settlement. A well-planned start can prevent resource shortages, starvation, and even the collapse of your fledgling community. This section will guide you through the essential steps for establishing your basic infrastructure, focusing on efficiency, resource management, and long-term sustainability.
Initial Survey and Pause
As soon as your game begins, immediately pause the game (Spacebar). This gives you invaluable time to assess your starting location without your villagers consuming precious starting resources or wandering aimlessly. Look for the following:
- Forest Density: Prioritize areas with dense, mature forests. These will be your primary source of wood and food (berries, nuts) in the early game.
- Water Access: A large body of water (river or lake) is essential for fishing and future trade. Ensure your starting area has good access.
- Flat Land: Building on flat terrain is faster and more efficient. Avoid excessively hilly or mountainous regions for your initial settlement core.
- Resource Nodes: Identify nearby stone and iron deposits. While not immediately critical, knowing their location will inform future expansion.
Once you've identified a suitable suitable central location, unpause briefly to select your starting villagers and then pause again.
Core Resource Production Buildings
Your first construction priorities should be focused on food, wood, and shelter. These are non-negotiable for survival. Aim to place these buildings strategically to minimize travel time and maximize output.
- Gatherer's Hut:
- Placement: Build this deep within a dense forest, ideally where the green circle indicating its collection radius covers as many mature trees as possible. This ensures a steady supply of berries, nuts, and mushrooms. Avoid placing it too close to the edge of the forest or near clearings, as this reduces its efficiency.
- Workers: Assign 4 workers immediately. This is its maximum capacity and will ensure the highest possible food yield from the surrounding forest.
- Output: Provides a diverse and reliable food source (berries, nuts, mushrooms, roots), crucial for early game survival. It's often the most stable early food source.
- Strategy Tip: The Gatherer's Hut is most effective in old-growth forests. Do not clear-cut the trees within its radius unless absolutely necessary, as this will reduce its output. To maximize long-term food production, consider placing a Forester Lodge nearby set to "Plant Only" to ensure the forest within the Gatherer's Hut's radius remains dense and mature.
- Hunter's Cabin:
- Placement: Also place this within a dense forest, preferably overlapping with the Gatherer's Hut's radius. Hunters benefit from undisturbed forest areas where wildlife is more abundant. Ensure its radius covers a large forested area.
- Workers: Assign 2-3 workers. While 3 workers maximize output, 2 can be sufficient if you are short on labor initially.
- Output: Provides meat (food) and hides (for clothing later). Meat is an excellent food source, and hides are essential for the production of leather clothing by a Tailor.
- Strategy Tip: Hunters will deplete local wildlife over time. Consider building a second Hunter's Cabin in a different forested area once your population grows and food demands increase. Ensure there are no roads or buildings directly within the hunting radius, as this can scare away wildlife.
- Forester Lodge:
- Placement: Position this adjacent to or slightly within the same dense forest area as your Gatherer's Hut and Hunter's Cabin. The Forester's primary role is to replant trees, ensuring a sustainable wood supply, and to harvest mature trees. Its green radius indicates the area it manages.
- Workers: Assign 2-3 workers. Initially, 2 workers are often sufficient, but 3 will ensure faster replanting and harvesting cycles.
- Behavior Setting: Upon construction, set its behavior to "Plant and Cut". This ensures that foresters will both plant new saplings and cut down mature trees within their radius, creating a self-sustaining forest. Avoid "Cut Only" unless you need a large, immediate influx of logs, as it will quickly deforest the area.
- Output: Ensures a renewable source of logs for your Woodcutter and construction. A well-managed Forester Lodge is the backbone of your timber industry.
- Strategy Tip: To maximize efficiency, ensure the Forester Lodge's radius is as full of trees as possible. Avoid building other structures or roads extensively within this radius, as it reduces the number of trees that can grow. Consider placing it near a Stock Pile for quicker log storage.
- Woodcutter:
- Placement: Build this relatively close to your Forester Lodge and Storage Barn to minimize log transport time. Proximity to the Forester Lodge means less travel for logs, and proximity to the Storage Barn means less travel for firewood to be stored.
- Workers: Assign 1-2 workers. One worker is usually sufficient for a small starting population, but two will produce firewood faster, which is critical as winter approaches.
- Output: Converts logs into firewood, essential for keeping your villagers warm during winter. Each log produces 4 units of firewood. Without firewood, villagers will freeze to death.
- Strategy Tip: Monitor your firewood supply closely. Aim to have a surplus before winter hits. If you see your firewood stock dwindling, assign an additional worker or build a second Woodcutter. Firewood is also a valuable trade good later in the game.
- Storage Barn:
- Placement: This is arguably the most critical early building. Place it centrally, within easy reach of your Gatherer's Hut, Hunter's Cabin, and future farms/orchards. This minimizes travel time for villagers dropping off food and resources. A central location reduces the distance workers have to travel to deposit their goods and for other villagers to collect them.
- Workers: None directly, but its proximity to producers is key. Villagers will automatically move goods to and from the barn.
- Capacity: Stores all food, tools, clothing, and other processed goods. It has a finite capacity, so monitor it as your town grows.
- Strategy Tip: Prioritize building this first, ideally immediately after your initial food producers. Without a Storage Barn, harvested goods will sit on the ground and spoil or be inefficiently transported, leading to significant waste and potential starvation.
Storage and Housing
Efficient storage and adequate housing are vital for preventing spoilage and maintaining villager morale.
- Stock Pile:
- Placement: Place this immediately adjacent to your Storage Barn. This is where raw materials like logs, stone, and iron are stored. Grouping it with the Storage Barn creates a central hub for all resources.
- Workers: None directly. Laborers will automatically move raw materials to the Stock Pile.
- Capacity: Stores raw materials. Unlike the Storage Barn, its capacity is theoretically infinite, but its physical size on the map determines how much it can hold in a compact area.
- Strategy Tip: You can designate multiple Stock Piles for different resources or in different areas of your map as your settlement expands. However, for the early game, one large, central Stock Pile is most efficient. Ensure it's large enough to accommodate initial log and stone harvests.
- Stone Houses (3-4):
- Placement: Build these near your Storage Barn and other essential workplaces. Villagers prefer shorter commutes, which increases their productivity and happiness. Grouping houses also makes fire suppression easier.
- Workers: None directly. Villagers will move into them once built.
- Benefits: Provides shelter, increases villager happiness, and allows for reproduction. Stone houses are more durable and require less maintenance (less firewood consumption, no need for repairs) than wooden ones, making them a better long-term investment even if they cost more initially (requiring stone in addition to logs).
- Common Pitfall: Do not build too many houses too quickly. Each house requires firewood and food for its inhabitants. Overbuilding can lead to critical resource shortages, especially firewood during winter. Aim for 3-4 initially to accommodate your starting families and allow for some population growth, then expand as your population grows and resources stabilize. A good rule of thumb is to have 1-2 empty houses available for new families.
Essential Utilities and Infrastructure
- Well:
- Placement: Build your first Well centrally within your housing cluster. Water is essential for villagers and, more critically, for fire suppression. A well-placed well can prevent a small house fire from engulfing your entire settlement.
- Workers: None directly. Villagers will automatically use it.
- Benefits: Provides water for consumption and acts as a vital fire safety measure. Villagers will draw water from wells to put out fires. Build additional wells as your town expands, ensuring all residential and critical production areas are within a reasonable distance of a well.
- Strategy Tip: Wells are cheap to build and can save your town. Don't skimp on them. Build one as soon as you have a small cluster of houses.
- Roads:
- Placement: Immediately begin laying down dirt roads connecting your Storage Barn to your Gatherer's Hut, Hunter's Cabin, Forester Lodge, Woodcutter, and houses. Prioritize roads between high-traffic areas.
- Workers: None directly, built by laborers.
- Benefits: Significantly reduces travel time for all villagers, boosting overall efficiency. Villagers move faster on roads. Prioritize roads for resource gatherers and transporters, as their travel time directly impacts your resource income.
- Strategy Tip: While dirt roads are cheap, consider upgrading high-traffic routes to stone roads later in the game for even greater speed bonuses. Roads also help define your settlement layout and can prevent villagers from taking inefficient paths through forests.
Worker Assignment Strategy
Effective worker management is paramount in Banished. Your initial population will be small, so every villager's role is critical. Here’s a prioritized approach:
- Laborers (Initial Priority): Start with a significant portion of your population as laborers (e.g., 8-10 out of 10-12 starting adults). Laborers are responsible for clearing land, gathering initial resources (logs, stone, iron), and constructing buildings. Without enough laborers, your initial build-out will be painfully slow.
- Food Production (Immediate Transition): As soon as your first Gatherer's Hut and Hunter's Cabin are built, assign workers to them (4 to Gatherer's, 2-3 to Hunter's). Food is the most immediate concern.
- Wood Production (Crucial for Winter): Once food production is stable, assign workers to the Forester Lodge (2-3) and Woodcutter (1-2). Firewood is essential for winter survival.
- Construction & Resource Gathering (Ongoing): Keep a small pool of laborers (2-4) available for ongoing construction, clearing, and gathering of raw materials like stone and iron. These resources are needed for houses and tools.
- Flexibility is Key: Be prepared to reassign workers based on immediate needs. If food stocks are low, pull a laborer to the Gatherer's Hut. If winter is approaching and firewood is scarce, assign another worker to the Woodcutter.
Common Pitfalls and How to Avoid Them
Even experienced Banished You can fall into these traps. Being aware of them can save your settlement:
- Overbuilding: Building too many structures too quickly, especially houses, can deplete your resources (logs, stone, iron) and labor force. Each house requires villagers, who in turn require food and firewood. Build incrementally and only as needed.
- Neglecting Firewood: Winter is a harsh mistress. If you don't have a sufficient supply of firewood (aim for at least 100-200 units per household before winter), your villagers will freeze to death. Always prioritize firewood production before the cold months arrive.
- Poor Placement: Placing production buildings far from storage or residential areas leads to excessive travel time, reducing efficiency. Always consider the "flow" of goods and people when placing buildings.
- Ignoring Laborers: While specialized workers are crucial, don't neglect your laborers. They are the backbone of your construction and raw material gathering. A lack of laborers can halt all progress.
- Monoculture Food Production: Relying on only one type of food source (e.g., just hunting) is risky. Crop blights, animal migrations, or resource depletion can quickly lead to starvation. Diversify your food production early with Gatherers, Hunters, and eventually Fishing Docks and Farms.
- Not Pausing: The pause button (Spacebar) is your best friend. Use it frequently to plan, assess, and make decisions without the pressure of real-time resource consumption.
By following these guidelines, you will lay a strong foundation for your Banished settlement, ensuring your villagers survive the initial challenges and thrive into a prosperous community.