
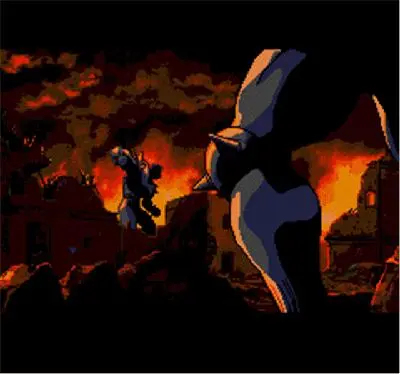
Shaft (Stage 7)
Shaft, Dracula's enigmatic dark priest, serves as the penultimate boss of Castlevania: Rondo of Blood. This encounter takes place in Stage 7, a foreboding chamber within Dracula's Castle. Shaft does not directly engage in physical combat; instead, he floats menacingly, summoning a relentless barrage of enemies and unleashing potent magical attacks. Mastering this fight requires keen observation, precise movement, and strategic use of sub-weapons.
Recommended Sub-Weapons & Key Items
- Richter Belmont:
- Cross: Arguably the most effective sub-weapon for Richter in this fight. Its wide arc and multi-hit properties allow it to strike Shaft multiple times, even when he's floating high, and can clear out groups of summoned enemies simultaneously.
- Holy Water: Excellent for ground-level damage against Shaft when he descends, and for quickly dispatching enemies that spawn close to the floor.
- Axe: Useful for hitting Shaft when he's at a higher elevation, though less versatile than the Cross.
- Stopwatch: Can provide brief windows of opportunity to deal damage without interruption from summoned enemies, but consumes many hearts.
- Maria Renard:
- Doves: Maria's standard projectile is highly effective due to its rapid-fire nature and homing capabilities, allowing consistent damage to Shaft.
- Dragon: An incredibly powerful sub-weapon that deals massive damage to Shaft and clears out summoned enemies with ease. Prioritize having this for its Item Crash potential.
- Cat: While less direct, the Cat can bounce around the arena, potentially hitting Shaft and enemies.
- Turtle: Provides a temporary shield, which can be useful for mitigating damage from summoned enemies or the energy orb, though it limits offensive output.
- General:
- Hearts: Crucial for using sub-weapons and Item Crashes. Ensure you enter the fight with a healthy supply.
- Roast Chicken/Meat: If available, these healing items can be a lifesaver, especially during prolonged fights.
Shaft's Attack Patterns & Summoned Enemies
Shaft primarily employs two types of attacks:
1. Summoned Enemies
Shaft will frequently summon various enemies to overwhelm you. These summons are not random; he cycles through a specific set. Anticipating these can help you position yourself for optimal evasion or attack.
- Bone Pillars: These stationary enemies appear on the ground, spitting fireballs. They are a nuisance and should be dispatched quickly, especially if they block your path.
- Axe Armors: Heavily armored knights that throw axes. Their axes can be tricky to dodge, especially when combined with other threats. Prioritize taking them out.
- Fleamen: Small, agile creatures that jump erratically. They are annoying due to their unpredictable movements and can be hard to hit.
- Medusa Heads: Fly in predictable wave patterns but can petrify you if you touch them. Avoid contact at all costs.
- Wights: Floating, ghostly figures that move slowly but can be difficult to hit with ground attacks.
- Skeletons: Basic enemies that walk and throw bones. Easily dispatched but can add to the chaos.
Strategy for Summons: Always prioritize clearing out the most immediate threats. Area-of-effect sub-weapons like Richter's Cross or Maria's Dragon are invaluable for managing the crowd. Don't let yourself get cornered by multiple enemies.
2. Energy Orb
Shaft's primary magical attack involves summoning a large, rotating orb of dark energy. This orb is highly damaging and has distinct patterns:
- Initial Summon & Rotation: Shaft will typically float to the center or upper-center of the screen to summon the orb. It will then begin to rotate around him.
- Expanding & Contracting: The orb will often expand its radius, then contract, making its trajectory unpredictable.
- Horizontal/Vertical Sweeps: Sometimes, the orb will move in a more linear fashion, sweeping horizontally across the screen or moving vertically.
- Tells: Shaft will usually glow or perform a distinct casting animation before the orb appears. Pay attention to his position and the initial movement of the orb to predict its path.
Strategy for Energy Orb:
- Richter: Utilize your backflip (jump + back) for quick evasion. The slide can also be effective for getting under the orb if it's high enough. Timing your jumps and whips to avoid contact is crucial.
- Maria: Her double jump is a significant advantage here, allowing her to easily clear the orb or adjust her position mid-air. Her faster movement speed also aids in dodging.
- General: Maintain a safe distance from Shaft when he's casting. Focus on dodging the orb first, then look for openings to attack. The orb itself is invulnerable.
Richter Belmont Strategy
Shaft is Dracula's dark priest and the penultimate boss. He floats around the arena, summoning various enemies and casting spells. His main attack involves summoning a large, rotating orb of energy. The key is to attack him whenever he's vulnerable, usually after he finishes summoning or casting, or when he briefly descends. He has no invincibility frames after being hit, so continuous damage is possible.
- Opening: Shaft typically begins by summoning a few enemies. Use this time to get a few hits in with your whip or a well-placed Cross.
- Prioritize Shaft: While summoned enemies are a threat, your main goal is to defeat Shaft. Look for windows of opportunity to strike him directly.
- Cross Sub-Weapon: The Cross is incredibly effective here. Throw it when Shaft is high, as it will hit him multiple times on its arc. It also helps clear out some of the summoned enemies, providing crucial breathing room.
- Holy Water Utility: If Shaft descends to a lower position, a well-timed Holy Water can deal significant damage. It's also good for clearing ground-based enemies.
- Item Crash (Cross): Conserve hearts for the Cross Item Crash. This attack deals massive damage to Shaft and clears the screen of most enemies, providing a valuable respite and a huge chunk of damage. Use it when you need to quickly end the fight or clear an overwhelming number of enemies.
- Evasion: Focus on dodging Shaft's energy orb. Use your backflip and slide to avoid contact. Don't get trapped between the orb and summoned enemies.
- Patience: This can be a war of attrition. Don't rush, but keep the pressure on Shaft whenever possible.
Maria Renard Strategy
Maria's speed, double jump, and powerful sub-weapons make this fight potentially easier than for Richter, especially with the right sub-weapon. Her continuous offense can quickly whittle down Shaft's health.
- Aggressive Offense: Maria's normal attack (Doves) is fast and can hit Shaft consistently. Maintain constant pressure.
- Dragon Sub-Weapon: If you have the Dragon, this fight becomes significantly easier. The Dragon's attacks deal immense damage to Shaft and clear out summoned enemies with ease. Its Item Crash is devastating.
- Doves for Consistency: If you don't have the Dragon, Maria's regular Doves are still very effective. Their homing nature means you can focus more on dodging while still dealing damage.
- Double Jump for Evasion: Utilize Maria's double jump to its fullest. It allows for superior aerial maneuverability, making it much easier to dodge Shaft's energy orb and the various projectiles from summoned enemies.
- Item Crash (Dragon/Doves): Maria's Item Crashes are incredibly powerful. The Dragon Item Crash can decimate Shaft's health bar. Even the Doves Item Crash (if you have enough hearts) can deal substantial damage and clear the screen. Use it strategically to shorten the fight or escape a tight spot.
- Manage Summons: While your primary focus is Shaft, don't let the summoned enemies overwhelm you. Maria's quick attacks and sub-weapons can manage them effectively.
- Stay Mobile: Maria's high mobility is her greatest asset. Keep moving, jumping, and double-jumping to avoid attacks and find openings.
Common Pitfalls & Tips
- Getting Cornered: The arena is relatively small. Avoid getting trapped in a corner by Shaft's orb or a cluster of summoned enemies.
- Ignoring Summons: While Shaft is the target, ignoring the summoned enemies can lead to overwhelming damage. Clear immediate threats.
- Running Out of Hearts: Sub-weapons are crucial. Manage your heart supply and try to collect any dropped hearts during the fight.
- Predicting Orb Movement: Take a moment to observe the energy orb's initial movement. It often follows a pattern for a short duration, allowing you to anticipate its path.
- Patience vs. Aggression: For Richter, a balanced approach is best – patient dodging combined with aggressive sub-weapon use. For Maria, a more consistently aggressive approach is often rewarded due to her higher damage output and mobility.
- Know Your Character: Understand the strengths and weaknesses of Richter and Maria. Richter excels with powerful, single-hit sub-weapons and precise whip attacks, while Maria thrives on rapid-fire projectiles and superior aerial control.