
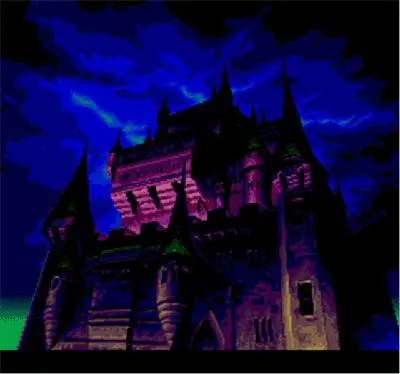
Stage 4': The Library
Welcome to Stage 4': The Library, a sprawling labyrinth of knowledge and danger. This alternate path from Stage 3' offers a unique challenge with its multi-layered architecture, magical adversaries, and hidden secrets. Unlike the more straightforward Stage 4, The Library demands careful exploration and precise platforming. Expect to encounter several spectral and magical foes, making sub-weapon management crucial.
Stage Layout and Environmental Hazards
The Library is characterized by its numerous bookshelves, elevated platforms, and often precarious drops. While there aren't traditional "traps" like spikes, the environment itself can be a hazard:
- Falling Books: In certain sections, particularly after defeating specific enemies or hitting certain blocks, stacks of books will fall from shelves. These deal minor damage but can interrupt jumps or knock you into other enemies. Keep an eye on the ceiling.
- Bottomless Pits: Standard Castlevania fare. Many jumps require precision, especially when dealing with airborne enemies or those that push you back.
- Collapsing Platforms: A few sections feature platforms that crumble shortly after you land on them. Identify these by their slightly different texture or a subtle shaking animation. Plan your jumps accordingly.
- Tight Corridors: Some areas are narrow, making it difficult to avoid projectiles or multiple enemies simultaneously.
Enemies Encountered
The Library is home to a distinct set of enemies, many of whom use magic or ranged attacks:
- Spell Book: These floating grimoires are a staple of the stage. They typically float in place or patrol small areas, firing slow-moving magical projectiles. They are easily dispatched with a whip or a single Holy Water toss.
- Strategy: Holy Water is exceptionally effective against groups. The Cross sub-weapon can also clear them out quickly.
- Lesser Demon: More formidable than their name suggests, these winged demons fly erratically and often swoop down to attack. They can be a nuisance in tight spaces.
- Strategy: Time your whip attacks carefully. The Axe sub-weapon can hit them when they are above you.
- Ghost: Simple, slow-moving specters that float across the screen. They are easily defeated but can sometimes appear in inconvenient locations.
- Fleaman: These small, agile creatures leap around erratically, making them difficult to hit. They deal minimal damage but can be annoying.
- Strategy: Use the whip's extended range or a well-placed sub-weapon like the Knife or Holy Water.
- Medusa Head: The classic Castlevania nuisance. They fly in a sine wave pattern and can be hard to hit without getting hit yourself.
- Strategy: Prioritize them, especially over bottomless pits. The Knife or Cross can be useful.
- Bone Pillar: Stationary enemies that shoot fireballs. They are often placed in strategic locations to guard passages or make jumps more difficult.
- Strategy: Destroy them quickly with multiple whip strikes or a strong sub-weapon.
Recommended Sub-Weapons
For The Library, several sub-weapons stand out:
- Holy Water:
Highly Recommended. Its flame pillar effect is devastating against groups of Spell Books and Fleamen, and it can hit enemies on different elevations. It's also excellent for clearing out areas before advancing.
- Cross:
Good for clearing the screen of projectiles and weaker enemies. Its boomerang effect can hit multiple times.
- Axe:
Useful for hitting airborne enemies like Lesser Demons and Medusa Heads, especially when they are above your whip's reach.
Walkthrough and Secrets
-
Initial Ascent: The stage begins in a grand hall. Head right, dealing with Spell Books and Ghosts. You'll need to make several jumps up platforms. Be mindful of falling books in some sections.
-
First Branching Path: You'll soon reach a point where you can go either up or continue right.
- Going Up: Leads to an area with more Spell Books and Fleamen. This path often has more hearts and potentially a sub-weapon drop.
- Continuing Right: Generally the more direct route, but can be more challenging with denser enemy placement.
-
The Hidden Turkey (Full Health Restore): This is a crucial secret for maintaining your health.
- Location: Progress through the stage until you reach a large, multi-tiered room with several bookshelves and platforms. This room is identifiable by having a long, relatively open vertical shaft on the left side, with platforms leading upwards. On the right side of this room, you'll find a stack of bookshelves that appear slightly different from the others – specifically, look for a tall, dark brown bookshelf that extends from the floor almost to the ceiling, located directly to the right of a small, elevated platform. This bookshelf is usually guarded by a Spell Book or two.
- Action: Approach this specific tall, dark brown bookshelf and whip it repeatedly. After several hits, it will break apart, revealing a hidden passage.
- Reward: Enter the passage to find a Turkey, which restores your health completely. This is invaluable, especially if you're struggling or preparing for the boss.
-
Navigating the Upper Levels: After the Turkey room, you'll continue upwards, encountering more Lesser Demons and potentially Bone Pillars. Be careful of Medusa Heads over pits.
-
The Grand Staircase: Towards the end of the stage, you'll ascend a long, winding staircase. This area often features a gauntlet of Spell Books and Fleamen. The Holy Water sub-weapon shines here.
Boss: Dullahan
The boss of Stage 4' is Dullahan, a headless knight wielding a massive axe and shield. He is a formidable opponent with predictable but powerful attacks.
Dullahan's Attack Patterns:
- Axe Swing: Dullahan will swing his large axe in a wide arc. This attack has decent range and can be difficult to avoid if you're too close.
- Axe Throw: He will occasionally throw his axe across the screen. The axe travels in a straight line and then returns to him like a boomerang.
- Shield Bash/Charge: Dullahan will sometimes lower his shield and charge across the screen, attempting to ram you. This attack is fast.
- Head Toss: His most iconic attack. Dullahan will remove his head and toss it in an arc. The head will bounce a few times on the ground before returning to him. While his head is detached, he is more vulnerable.
Strategy and Weaknesses:
- Vulnerable Spot: Dullahan's primary weakness is his head. When he throws it, he becomes more susceptible to damage. However, you can also damage his body.
- Sub-Weapon Recommendation:
- Holy Water: Excellent for consistent damage. Toss it at his feet when he's close, or when he's recovering from an attack. The flame pillar hits multiple times.
- Axe: Can hit his head when it's in the air or when he's standing tall.
- Cross: Good for hitting him multiple times as it passes through.
- Dodge and Weave:
- For his Axe Swing, stay out of range or jump over it.
- For the Axe Throw, duck under it if it's high, or jump over it if it's low. Be mindful of its return path.
- The Shield Bash/Charge is best avoided by jumping over him or sliding under him if you have the ability.
- When he performs the Head Toss, focus your attacks on his body or the head itself. This is your best opening for sustained damage.
- Aggressive Openings: After he completes an attack, there's a brief window where he's open. Use this to get a few whip strikes in or land a sub-weapon hit.
- Patience is Key: Don't rush. Learn his patterns and attack during his recovery frames.
Post-Stage Rewards
Upon defeating Dullahan, you will receive the standard stage clear bonus and proceed to Stage 5'.
Common Pitfalls and Tips:
- Don't Underestimate Falling Books: They can knock you into enemies or pits.
- Manage Sub-Weapon Hearts: The Library has many enemies that drop hearts, so don't be afraid to use your sub-weapons liberally, especially Holy Water.
- Prioritize Medusa Heads: Over pits, they are a major threat.
- Explore for the Turkey: Finding the hidden Turkey is a game-changer for your health, ensuring you go into the boss fight fully prepared.