
Boletarian Palace (1-1): The Gates of Hell
Welcome, Slayer of Demons, to the perilous lands of Boletaria! The Boletarian Palace (1-1) serves as your brutal introduction to the world of Demon's Souls. This guide will meticulously walk you through every treacherous step, ensuring you uncover its secrets, overcome its challenges, and emerge prepared for the trials ahead.
Walkthrough: Navigating the Crumbling Walls
Upon spawning at the Gates of Boletaria Archstone, you'll immediately face the game's core mechanics. Take your time to understand blocking, parrying, and the importance of stamina management. The enemies here, primarily Dreglings and Soldiers, are designed to teach you these fundamentals.
- Initial Courtyard & First Dreglings:
- From the Archstone, proceed forward. You'll encounter your first two Dreglings. These basic enemies are slow and easily dispatched. Practice your lock-on and basic attacks.
- Item Pickup: To your immediate left, near the wall, you'll find a Soul of a Lost Undead.
- The First Soldier & Barricade:
- Continue up the path. You'll see a Soldier (Spear) behind a wooden barricade. This enemy has a shield and a spear, teaching you about guarded attacks. Either break his guard with a strong attack or circle around for a backstab.
- Item Pickup: Behind the barricade, collect a Soul of a Lost Undead.
- The Watchtower & Crossbowmen:
- Ascend the stairs. You'll encounter a Soldier (Sword). Be wary of the Crossbowman on the watchtower to your left. Prioritize ranged threats.
- Strategy Tip: Use the environment for cover or rush the Crossbowman quickly.
- Item Pickup: At the top of the first set of stairs, before the watchtower, look for a Soul of a Lost Undead.
- Item Pickup: Inside the watchtower, defeat the Crossbowman and collect Light Crossbow Bolts (x10) and a Light Crossbow.
- The Dragon's Breath & Shortcut:
- Proceed across the bridge. You'll see a large gate ahead. As you approach, a Red Dragon will sweep across, incinerating enemies and potentially you.
- Common Pitfall: Do not linger on the bridge or the area directly after it. Sprint through the dragon's path.
- After the dragon passes, immediately turn right into the small alcove. This is a crucial shortcut. Kick down the wooden barricade to open a path back to the Archstone. This allows for quick returns to the Nexus or farming.
- Item Pickup: In the alcove before the shortcut, you'll find a Soul of a Lost Undead.
- The Upper Ramparts & Item Haul:
- From the shortcut, head back towards the dragon's path, but this time, go left through the archway into the upper ramparts.
- You'll encounter several Dreglings and Soldiers. Be cautious of a Soldier (Spear) hiding around a corner.
- Item Pickup: On the ramparts, near a broken wall, you can find Latex Talisman (for Faith builds) or a Wooden Catalyst (for Magic builds). Your starting class determines which one appears. This is a vital early-game item for spellcasting.
- Item Pickup: Further along, near a corpse hanging over the edge, grab Hardstone Shard (x2).
- Item Pickup: Before descending the next set of stairs, check the corner for a Soul of a Lost Undead.
- The Treacherous Stairs & Ballista:
- Descend the stairs. You'll encounter more Soldiers. Be aware of a Soldier (Sword) playing dead at the bottom of the stairs.
- Common Pitfall: A Ballista is firing bolts from across the courtyard. Use the pillars and walls for cover as you advance.
- Item Pickup: Near the bottom of the stairs, behind a pillar, find Half Moon Grass (x2).
- The Ballista Operator & Prisoner:
- Carefully make your way towards the Ballista. Defeat the Soldier (Sword) operating it.
- NPC Encounter: In a cell nearby, you'll find Ostrava of Boletaria. He's trapped and asks for your help. To free him, you need to find the key.
- Item Pickup: Near Ostrava's cell, collect Hardstone Shard (x2).
- The Key to Ostrava & The Tower Knight's Archstone:
- Continue past Ostrava's cell. You'll enter a small courtyard with more Soldiers.
- Item Pickup: Look for a corpse hanging over the edge of the wall near a broken section. This corpse holds the Iron Key Ring, which unlocks Ostrava's cell.
- Return to Ostrava and free him. He will reward you with a Talisman of God (if you don't have one) and some lore.
- Important: Ostrava will now move to the next area. You can find him again in 1-2.
- Proceed through the gate Ostrava was facing. This leads to the fog gate for the Phalanx boss.
Notable Items & Collectibles
Here's a quick reference for key items found in 1-1:
- Wooden Catalyst / Latex Talisman: Essential for early magic/miracle users. Found on the upper ramparts.
- Light Crossbow & Bolts: Useful for ranged combat, especially against the Phalanx. Found in the first watchtower.
- Iron Key Ring: Frees Ostrava of Boletaria. Found near Ostrava's cell.
- Talisman of God: Reward for freeing Ostrava (if you don't have one).
- Hardstone Shards: Early upgrade materials for basic weapons.
- Half Moon Grass: Your primary healing item.
- Soul of a Lost Undead: Consumable souls for leveling up.
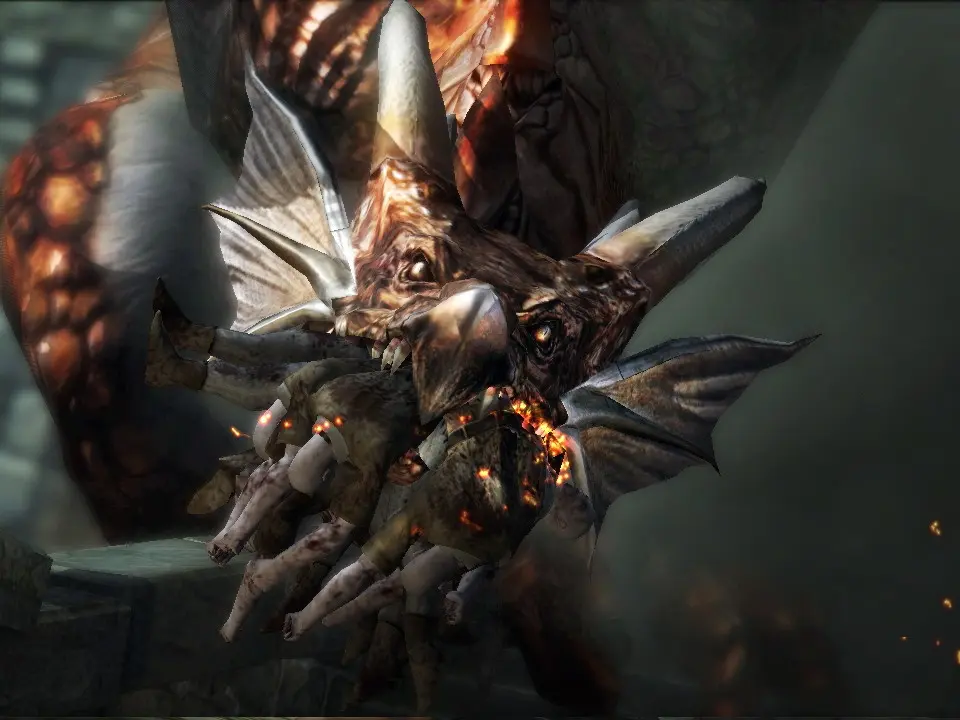
Boss Strategy: Phalanx
The Phalanx is your first true boss encounter, designed to test your understanding of enemy weaknesses and environmental tactics. It's a relatively straightforward fight if you come prepared.
Boss Weaknesses:
- Fire: The Phalanx and its Hoplites are extremely vulnerable to fire damage.
- Piercing Damage: Spears and thrusting swords are effective against the Hoplites' shields.
Recommended Loadout:
- Weapon: Any weapon will do, but a spear or thrusting sword is ideal for dealing with Hoplites.
- Consumables:
- Firebombs (x10-15): Crucial for quickly dispatching groups of Hoplites. You can buy these from the Dregling Merchant in 1-1 or find them as drops.
- Pine Resin / Turpentine (x3-5): Apply to your weapon for significant fire damage. Turpentine is found in 1-1.
- Half Moon Grass: Stock up on healing.
- Shield: A 100% physical block shield is always recommended.
Strategy:
- Initial Engagement & Positioning:
- As you enter the arena, the Phalanx will be surrounded by numerous Hoplites (smaller, shielded enemies).
- Immediately retreat slightly to the entrance of the arena. This creates a choke point and prevents you from being surrounded.
- Dealing with Hoplites (Fire is Key!):
- The Hoplites are the primary threat. Their shields make direct melee attacks difficult.
- Option 1 (Firebombs): Lock onto a Hoplite, throw a Firebomb. The splash damage will often hit multiple Hoplites, causing them to flail and exposing their soft, gelatinous bodies. A few Firebombs can clear a large group.
- Option 2 (Turpentine/Pine Resin): Apply Turpentine to your weapon. When a Hoplite is exposed (after a Firebomb or after they attack), strike them with your flaming weapon. This will deal heavy damage.
- Option 3 (Piercing Attacks): If you lack fire, use a spear or thrusting sword to poke through their shields. Alternatively, wait for them to attack, then counter-attack their exposed body.
- Attacking the Phalanx Core:
- Once a group of Hoplites is defeated, the Phalanx's core will be exposed. It's a large, immobile blob.
- Rush in and unleash your strongest attacks on the core. If you have Turpentine applied, this will be incredibly effective.
- After taking some damage, the Phalanx will summon more Hoplites to re-shield itself.
- Repeat & Conquer:
- Repeat steps 2 and 3. Clear the Hoplites with fire, then attack the core.
- Maintain situational awareness. Don't get surrounded. Use the pillars in the arena for cover if needed, but the entrance choke point is generally safer.
- The Phalanx itself has no direct attacks, only the Hoplites.
Reward for Victory:
- Lead Demon's Soul: Can be consumed for 15200 souls or used to forge unique weapons later.
- Archstone of the Small King: Unlocks the next area, Boletarian Palace (1-2), and provides a new warp point.
Congratulations, you've conquered Boletarian Palace (1-1)! Take your Lead Demon's Soul back to the Nexus, level up, and prepare for the challenges that lie ahead.