Mission: Kilika Island Conflict
Chapter: Chapter 1
Upon your arrival in Kilika Island during Chapter 1, you'll find yourself immediately thrust into the heart of a burgeoning conflict between the Youth League and New Yevon. This mission, "Kilika Island Conflict," is crucial for understanding the political landscape of Spira and offers opportunities to significantly impact your completion percentage and future interactions. Your primary objectives are to mediate the escalating tensions, investigate mysterious sphere activity within Kilika Temple, and ultimately retrieve the valuable Garment Grid hidden within.
Be prepared for a mix of dialogue choices, strategic combat encounters, and some light environmental puzzle-solving. Successfully navigating this mission requires careful consideration of your responses and efficient battle tactics.
Walkthrough: De-escalating Tensions and Temple Exploration
- Arrival at Kilika Port:
- As the Celsius docks, you'll witness the immediate tension between the Youth League and New Yevon.
- Head towards the main path leading into the village. You'll encounter a group of New Yevon soldiers blocking the way.
- Dialogue Choice: When prompted, you'll have a choice of how to respond to the soldiers.
- Option 1: "We're here to help." (Slightly increases New Yevon's favor, minor impact on completion percentage, may lead to slightly different dialogue later.)
- Option 2: "Step aside." (Slightly increases Youth League's favor, minor impact on completion percentage, may lead to slightly different dialogue later.)
- Recommendation: For maximum completion, it's often beneficial to try and balance your responses throughout the game, or lean towards the faction you wish to gain favor with for specific rewards or story paths. For this initial encounter, either choice is acceptable and won't lock you out of anything critical.
- Meeting Dona:
- Proceed into Kilika Village. You'll soon find Dona, the leader of the Youth League faction on Kilika, near her house.
- Speak with Dona. She will express her concerns about New Yevon's presence and the recent sphere activity.
- Dialogue Choice: During your conversation, you'll be asked about your intentions.
- Option 1: "We're with the Youth League." (Boosts Youth League favor.)
- Option 2: "We're neutral." (Maintains neutrality, often the safest for overall completion.)
- Consequence Example: Choosing "We're with the Youth League" here, followed by similar choices, can lead to Dona being more cooperative in later chapters, potentially offering unique side quests or items that might be harder to obtain if you alienate her. This choice itself doesn't directly affect Chapter 1 completion, but sets a precedent.
- Meeting Barthello:
- Barthello, the leader of the New Yevon forces, can be found further into the village, often near the docks or the entrance to the temple path.
- Engage Barthello in conversation. He will present New Yevon's perspective, emphasizing order and control.
- Listen to both sides to gain a full understanding of the conflict.
- Entering Kilika Temple:
- After speaking with both leaders, head towards the Kilika Temple entrance. It's located at the northern end of the village.
- Be prepared for combat as you enter the temple grounds. The fiends here are slightly tougher than those encountered in Besaid.
- Recommended Dresspheres: Gunner (for ranged attacks and elemental shots), Warrior (for strong physical damage), Thief (for stealing valuable items).
- Enemies:
- Yellow Element: Weak to Water.
- Killer Bee: Weak to Ice.
- Valaha: Strong physical attacker, consider using Dark Knight's Darkness or Warrior's Power Break.
- Temple Puzzle: The Shifting Platforms:
- Inside Kilika Temple, you'll encounter a series of platforms that need to be activated to progress. This is one of the "light puzzles" mentioned.
- Puzzle Description: In a specific chamber, you'll see several circular platforms on the floor. Standing on certain platforms will cause others to rise or fall. Your goal is to create a path to the exit or a higher ledge.
- Solution Hint: Look for visual cues, such as glowing lines connecting platforms. Often, you need to step on a platform, then quickly move to another that has risen before the first one descends. Experiment with different sequences. One common pattern involves activating a central platform, then quickly running across the newly raised platforms to the next stable point. Don't be afraid to fall; you'll simply restart at the beginning of the puzzle room.
- Locating the Sphere:
- Continue navigating through the temple, defeating any fiends that block your path.
- Eventually, you will reach the Chamber of the Fayth, where the mysterious sphere is located.
- Upon reaching the sphere, a cutscene will trigger, revealing its nature and importance.
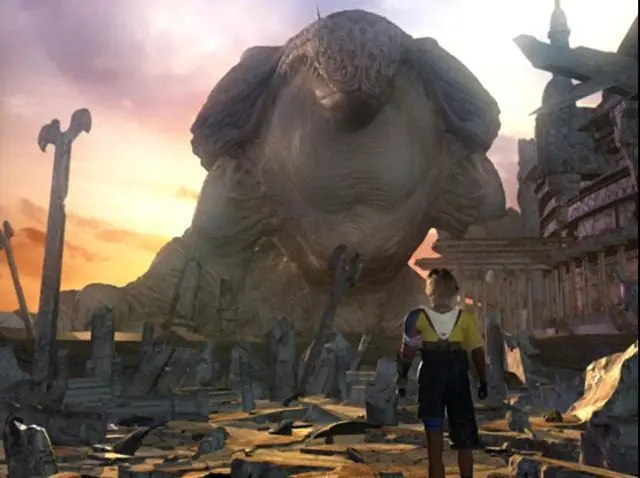
- Boss Battle: Daeva
- After the cutscene, you'll be confronted by the boss of Kilika Temple, Daeva.
- HP: Approximately 800-1000
- Weaknesses: Fire, Holy
- Resistances: None significant
- Immunities: None
- Strategy:
- Recommended Dresspheres:
- Gunner: Use Fire Shot for consistent damage.
- Black Mage: Cast Fira or Fire.
- Warrior: Use Power Break to reduce its physical attack.
- Daeva primarily uses physical attacks and some minor magical attacks. Keep your HP up with Potions or White Mage's Cure.
- Focus fire on Daeva with your strongest Fire-elemental attacks.
- Consider using accessories that boost Magic or Strength, depending on your primary damage dealers.
- Recommended Dresspheres:
- Mission Completion:
- Defeating Daeva will conclude the active portion of the "Kilika Island Conflict" mission.
- You will automatically acquire the Floral Fallal Garment Grid as a reward.
- A final cutscene will play, summarizing the immediate aftermath of your actions on Kilika.
Rewards and Completion Percentage
Successfully completing this mission, including defeating Daeva and retrieving the sphere, contributes a significant percentage to your overall Chapter 1 completion. The exact percentage can vary slightly based on your dialogue choices and whether you explored every nook and cranny, but the core completion is tied to the main objectives.
Key Rewards:
- Floral Fallal Garment Grid: This Garment Grid is obtained automatically upon defeating Daeva. It's an excellent early-game grid that offers stat bonuses and useful abilities.
- Potions, Hi-Potions, Phoenix Downs: Found in treasure chests throughout the temple.
- Gil: Dropped by defeated enemies.
Common Pitfalls & Missables
- Missing Treasure Chests: Kilika Temple has several hidden paths and ledges. Take your time to explore thoroughly to ensure you don't miss any valuable items.
- Dialogue Choices: While no single choice in this mission will irrevocably lock you out of 100% completion for the entire game, consistent choices favoring one faction over another can influence later interactions and side quests. For a balanced approach, try to remain neutral or alternate your responses.
- Under-leveled: If you rush through Besaid and Kilika without engaging in enough random encounters, you might find Daeva challenging. Ensure your party is at least Level 5-7 before tackling the boss.