
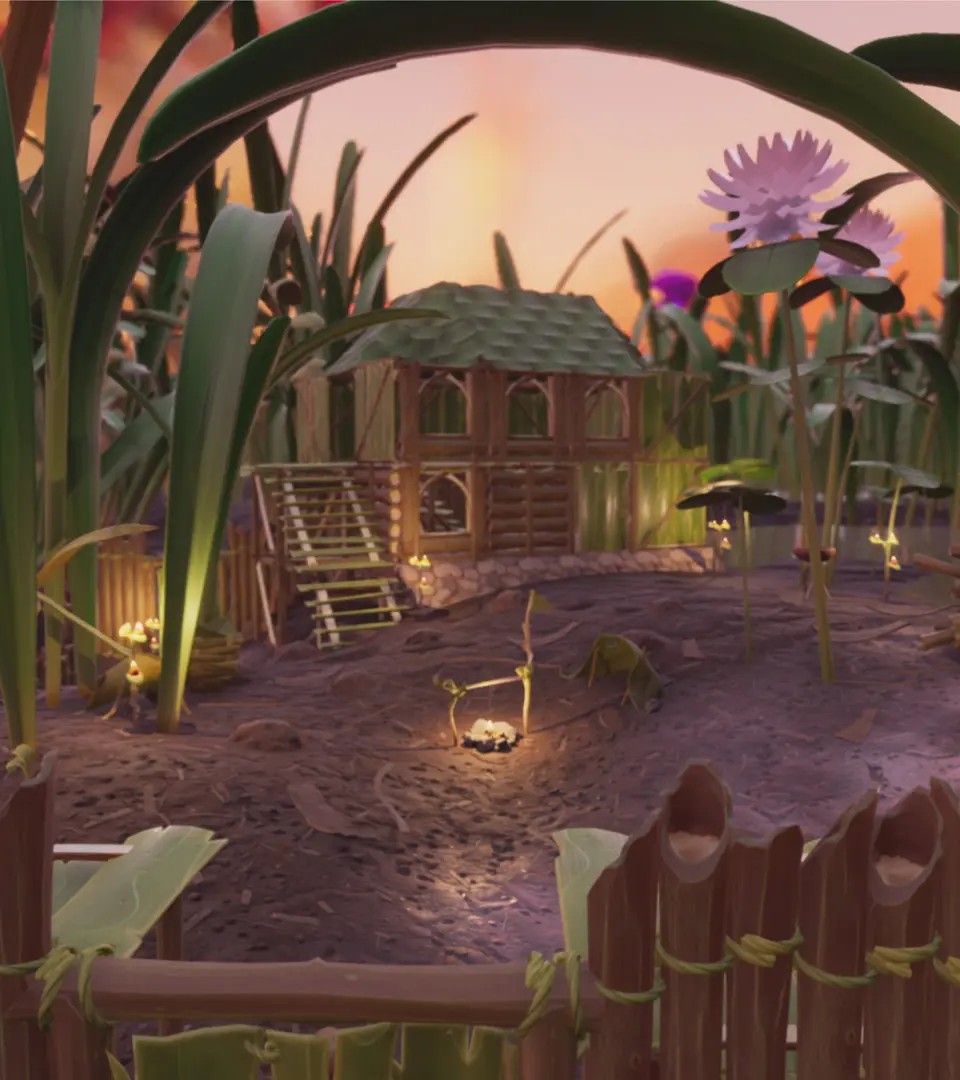
Exploring Points of Interest
The vast backyard of Grounded is not just a pretty backdrop; it's a sprawling, interconnected ecosystem teeming with unique landmarks and hidden areas. These Points of Interest (POIs) are crucial for progression, offering not only rare resources and unique enemies but also rich environmental storytelling that deepens your understanding of the game world. Mastering their exploration is key to uncovering all of Grounded's secrets, from advanced crafting recipes to powerful gear.
Each POI presents its own set of challenges and rewards, often requiring specific gear, preparation, or combat strategies. Understanding what to expect before venturing into these perilous zones can significantly improve your chances of survival and success.
General Exploration Tips
- Preparation is Key: Always bring ample food, water, healing items, and repair glue. Consider carrying a full set of spare tools and weapons, especially for longer expeditions.
- Scouting Ahead: Use binoculars or a high vantage point to survey the area before committing. Identify potential threats, resource nodes, and escape routes.
- Environmental Awareness: Pay attention to the sounds and visual cues of the environment. Rustling leaves might indicate a lurking spider, while buzzing sounds could lead to valuable nectar.
- Base Building: For distant or particularly dangerous POIs, consider establishing a small, temporary forward operating base nearby. This can serve as a respawn point, storage, and crafting hub.
- Night vs. Day: Some creatures are more active or aggressive at night. Plan your exploration accordingly, or equip a headlamp for better visibility.
- Resource Management: Prioritize collecting resources that are unique to the area or are in high demand for your current crafting goals. Don't overencumber yourself with common items.
Notable Points of Interest and Their Secrets
The Sandbox
Located in the western part of the backyard, the Sandbox is a scorching, arid wasteland that presents a significant environmental challenge: extreme heat. This area is a mid-to-late game destination due to the "Sizzle" debuff and the formidable creatures that inhabit it. Proper heat protection is absolutely essential.
Sandbox Hazards & Mitigation
- Environmental Hazard: The "Sizzle" debuff will rapidly drain your health if you are not adequately protected.
- Mitigation:
- Craft and equip the full Antlion Armor set (requires Antlion parts). This provides significant Sizzle protection.
- Consume Sizzle Protection Smoothies (e.g., Green Machine, Liquid Gills) for temporary resistance.
- Stay in shaded areas (under rocks, discarded toys) or submerged in water (if available) to temporarily alleviate the heat.
- use the Cool Drink effect from certain consumables.
- Mitigation:
Sandbox Enemies & Strategies
The Sandbox is home to some of the most dangerous creatures in the backyard, requiring specific combat approaches.
- Antlions: The signature creature of the Sandbox. These large, aggressive insects burrow through the sand and emerge to attack. They have strong armor and powerful melee attacks.
- Strategy: Antlions are vulnerable to Fresh damage. Use Fresh-infused weapons like the Mint Mace, Mint Staff, or Fresh Scythe. Block their burrowing attacks and counter-attack when they emerge. Be wary of their ranged sand-spit attack.
- Drops: Antlion Part, Antlion Head, Antlion Mandible (rare). Essential for Antlion Armor and advanced Fresh weapons.
- Black Ox Beetles: Though less common, these heavily armored beetles can be found patrolling the edges or deeper parts of the Sandbox.
- Strategy: Vulnerable to Salty damage. Use a Salty Club or Salty Scythe. Their attacks are slow but powerful; perfect parries are highly effective. They have a charge attack that can knock you back.
- Drops: Black Ox Horn, Black Ox Part. Used for the Black Ox Hammer and other advanced tools/armor.
- Orb Weaver Jr. (rare): Occasionally found in shaded crevices or under debris. Treat them like regular Orb Weavers.
Sandbox Resources & Loot
- Quartzite: Found in large veins, especially in the deeper, rockier sections. Crucial for upgrading tools and weapons. Requires a Tier 2 or higher pickaxe.
- Salt Crystals: Scattered across the sand, providing Salty resources for crafting and weapon upgrades. Can be harvested with any pickaxe.
- Sunken Bones: Often partially buried in the sand, these provide Bone Fragments. Requires a shovel to dig up.
- Buried Treasure: Keep an eye out for sparkling spots in the sand, indicating buried treasure chests. A Shovel is required to dig these up. These can contain Raw Science, rare trinkets, or even unique weapon parts like the Coaltana parts.
- Raw Science: Numerous clusters are scattered throughout, often near landmarks or under large rocks.
Sandbox Environmental Storytelling
Scattered throughout the Sandbox are discarded toys, broken sandcastles, and other remnants of human activity, hinting at the children who once played here. These often contain lore notes or data drives that expand on the game's narrative, providing context for the shrinking experiment and the backyard's mysteries.
General Difficulty: High. Requires significant preparation and mid-to-late game gear. Not recommended for early-game players.
The Picnic Table

Dominating the eastern side of the backyard, the Picnic Table is a towering structure that offers both vertical exploration and unique challenges. Reaching the top requires parkour skills and often, specific tools. The rewards, however, are well worth the effort, including critical BURG.L chips and rare resources.
Picnic Table Ascent & Tools
- Initial Ascent:
- Start by using the leaning shovel as a ramp to reach the first level.
- Navigate across various objects like a cooler, books, and a frisbee. Look for ledges, ropes, and small gaps to climb through.
- The path is often linear but requires careful jumps and stamina management.
- Recommended Tools:
- Bouncy Mushroom: Can be strategically placed for easier access to certain ledges or to create shortcuts once you've reached higher points.
- Zipline Anchor & Zipline Rope: Invaluable for creating quick descent paths or connecting the Picnic Table to a nearby base once you've reached the top.
- Gas Mask: While not a primary hazard, some areas around the base of the table might have small pockets of Haze, especially if near the Haze zone.
Picnic Table Enemies & Strategies
- Black Ants: Numerous Black Soldier Ants and Black Worker Ants patrol the lower sections and the path leading up.
- Strategy: Vulnerable to Spicy damage. Use a Spicy Coaltana or Spicy Staff. Be careful not to get swarmed, as their numbers can be overwhelming.
- Drops: Black Ant Part, Black Ant Head, Black Ant Mandible. Used for Black Ant Armor and advanced tools.
- Ladybug Larva: Can be found in the dirt around the base. Easily dispatched.
- Orb Weavers: Occasionally found in the shaded areas beneath the table or in the surrounding grass. Be prepared for their web attacks.
Picnic Table Resources & Loot
- BURG.L Chips: One of the most important finds! A specific BURG.L chip is located on top of the Picnic Table, essential for unlocking new recipes and quests.
- Raw Science: Numerous clusters are scattered across the table's surface and ledges, often requiring careful platforming to reach.
- Berry Leather: Berries can be found in the bushes surrounding the table, providing Berry Chunks for crafting Berry Leather.
- Mushroom Chunks: Abundant on the table itself, useful for food and crafting.
- Mint Chunks: Occasionally found in the cooler or near spilled drinks on the table.
- Candy: Various candy pieces (e.g., Mint, Spicy, Salty) can be found, offering unique buffs and crafting materials.
Picnic Table Environmental Storytelling
The Picnic Table is littered with human artifacts – board games, spilled drinks, discarded food wrappers. These items provide clues about the children who used to play here, often with humorous or slightly unsettling implications. There are also notes and drawings that contribute to the overarching narrative, hinting at the events that led to the shrinking of the protagonists.
General Difficulty: Medium to High. The climb itself is a puzzle, and the enemies can be challenging, especially in groups. Good stamina management and platforming skills are essential.
The Trash Heap (Haze Lab Entrance)

Located in the western part of the yard, near the Sandbox, the Trash Heap is a toxic, hazardous zone that serves as a primary entrance to the Haze Lab. The air itself is deadly, making proper protection non-negotiable. This area is central to the game's main storyline and contains critical lore and resources.
Trash Heap Hazards & Mitigation
- Environmental Hazard: The "Haze" debuff will quickly kill you without proper protection. This is a persistent effect throughout the entire Haze zone.
- Mitigation: You MUST wear a Gas Mask (requires Weevil Nose, Gnat Fuzz, and Woven Fiber) to survive in the Haze. Ensure it is in good condition and carry repair glue. Without it, your health will rapidly deplete.
Trash Heap Enemies & Strategies
The Haze is home to infected variants of common creatures, which are significantly more dangerous.
- Infected Weevils: Common, but easily dispatched. They explode upon death, dealing minor damage and spreading a small amount of Haze. Keep your distance.
- Infected Mites: Small, fast, and numerous. Can quickly overwhelm an unprepared player. Use area-of-effect weapons or wide swings.
- Infected Larva: More aggressive and durable than regular Larva. They also explode on death.
- Infected Ladybugs: A formidable foe. These large, mutated Ladybugs are extremely aggressive and hit hard. They have a powerful charge and ground pound attack.
- Strategy: Vulnerable to Fresh damage. Use a Fresh-infused weapon. Their attacks are powerful but telegraphed. Perfect parrying is crucial. Maintain distance when they charge.
- Drops: Infected Ladybug Head, Infected Ladybug Part. Used for advanced armor and mutations.
- Infected Wolf Spiders (rare): The most dangerous inhabitants. These are highly aggressive and deal massive venom damage. They are often found guarding key areas or within the Haze Lab itself.
- Strategy: Vulnerable to Salty damage. Use a Salty Club or Salty Scythe. High-tier armor (e.g., Black Ox, Roly Poly) and a shield are highly recommended. Be prepared for a tough fight, using perfect blocks and dodging. Consider bringing healing items with venom resistance.
- Drops: Infected Wolf Spider Fang, Infected Wolf Spider Fuzz.
Trash Heap Resources & Loot
- Fungal Growth: Abundant throughout the Haze, especially on the infected plants and ground. Essential for crafting Fungal Growth-based recipes, explosives (e.g., Bomb), and certain mutations.
- Toadstool: Found growing on the infected ground, provides valuable food and crafting materials.
- Raw Science: Numerous clusters are found within the Trash Heap and leading into the Haze Lab.
- BURG.L Chips: The Haze Lab itself contains critical BURG.L chips for story progression and unlocking advanced recipes. These are often guarded by powerful infected creatures.
- Lab Parts: Various broken lab equipment can be salvaged for useful components.
Trash Heap Environmental Storytelling
The Trash Heap and the Haze are central to the game's main storyline. The discarded trash, scientific equipment, and notes found within the Haze Lab reveal the origins of the shrinking experiment and the mysterious infection that plagues the backyard. This area is a key location for understanding the game's lore and advancing the main questline. Expect to find numerous data drives and research notes detailing the events that led to the current predicament.
General Difficulty: Very High. Requires a Gas Mask, mid-to-late game gear, and strong combat skills. Not recommended for early-game players.
The Pond
Located centrally in the backyard, the Pond is a massive aquatic biome that introduces a completely new dimension of exploration. It's a dangerous but resource-rich environment, requiring specialized gear for underwater survival and combat. The Pond is crucial for accessing advanced crafting materials and uncovering hidden lab sections.
Pond Hazards & Mitigation
- Environmental Hazard: Drowning is a constant threat. Your oxygen meter will deplete rapidly underwater.
- Mitigation:
- Craft and equip the Bubble Helmet (requires Pond Moss, Water Flea Carapace) for extended underwater breathing.
- use the Gill Tube (requires Water Flea Carapace, Eelgrass Strand) for a slight oxygen boost.
- Consume Liquid Gills Smoothies for temporary, significant oxygen regeneration.
- Look for air bubbles rising from the bottom or pockets of air within structures to replenish oxygen.
- Mitigation:
- Predatory Fish: Koi Fish are passive but can be dangerous if you get too close or disturb them. Diving Bell Spiders are aggressive and territorial.
Pond Enemies & Strategies
- Water Fleas: Small, numerous, and annoying. They deal minimal damage but can interrupt actions.
- Strategy: Easily dispatched with any weapon. Use wide swings or ranged attacks.
- Drops: Water Flea Carapace. Used for Bubble Helmet, Gill Tube.
- Diving Bell Spiders: Highly aggressive, territorial, and fast underwater predators. They deal significant damage and can apply a venom debuff.
- Strategy: Vulnerable to Fresh damage. Use a Fresh-infused weapon like the Mint Mace or a Spear. They are fast, so perfect blocking is challenging. Try to isolate them or use ranged attacks from a safe distance.
- Drops: Diving Bell Spider Chunk, Diving Bell Spider Fang. Used for advanced underwater weapons and armor.
- Tadpoles: Passive and harmless. Can be harvested for food.
- Larva: Can be found near the edges of the pond.
Pond Resources & Loot
- Pond Moss: Abundant on the bottom and sides of the pond. Essential for crafting the Bubble Helmet and other aquatic gear.
- Eelgrass Strand: Found growing in patches on the pond floor. Used for crafting the Gill Tube and other tools.
- Algae: Similar to Pond Moss, used for various recipes.
- Sunken Bones: Scattered on the pond floor, providing Bone Fragments. Requires a shovel.
- Raw Science: Numerous clusters are found underwater, often near landmarks or within the Pond Lab.
- BURG.L Chips: The Pond Lab contains critical BURG.L chips for story progression and unlocking advanced recipes.
- Sunken Treasure: Keep an eye out for sparkling spots, indicating buried treasure chests containing Raw Science, rare trinkets, or unique weapon parts. A Shovel is required.
Pond Environmental Storytelling
The Pond contains the remains of a submerged research facility, the Pond Lab. Exploring this lab reveals crucial information about the shrinking experiment, the researchers involved, and the events that led to the current state of the backyard. Data drives, notes, and environmental clues within the lab provide significant lore insights and advance the main storyline. The sheer scale and detail of the underwater environment also tell a story of a vibrant, albeit dangerous, ecosystem.
General Difficulty: Medium to High. Requires specialized gear for oxygen management and underwater combat. Not recommended without proper preparation.
The Red Anthill

Located in the southeastern part of the backyard, the Red Anthill is a massive underground network of tunnels, chambers, and resource nodes. It's an early-to-mid game POI that offers valuable resources, a safe haven from surface predators, and a unique combat experience against its numerous inhabitants.
Red Anthill Hazards & Mitigation
- Environmental Hazard: Getting lost in the maze-like tunnels is a primary hazard.
- Mitigation: Place torches or glow-shrooms to mark your path. Use the map frequently. Consider building temporary markers.
- Ant Aggression: While Red Worker Ants are generally passive unless provoked, Red Soldier Ants are highly aggressive and will attack on sight.
Red Anthill Enemies & Strategies
- Red Worker Ants: Generally passive, but will attack if you harm them or their eggs.
- Strategy: Easily dispatched. Can be a good source of Ant Parts early on.
- Drops: Ant Part, Ant Head.
- Red Soldier Ants: Aggressive and numerous. They deal moderate damage and can quickly swarm you.
- Strategy: Vulnerable to Spicy damage. Use a Spicy Coaltana or Spicy Staff if available. Otherwise, focus on perfect blocks and crowd control. Avoid getting surrounded.
- Drops: Ant Part, Ant Head, Ant Mandible (rare). Essential for Antlion Armor and advanced tools.
- Larva: Occasionally found in the outer tunnels.
- Grubs: Can be found burrowing in the dirt walls. Harvest them for Grub Hide and Grub Goop.
Red Anthill Resources & Loot
- Ant Eggs: Found in specific chambers, often guarded by numerous Red Soldier Ants. Essential for crafting Bombs and other explosives.
- Ant Parts: Abundant from defeated ants. Used for Antlion Armor (early game) and various tools.
- Quartzite: Small veins can be found throughout the anthill, especially in deeper sections. Requires a Tier 2 or higher pickaxe.
- Clay: Found in wet areas, useful for building.
- Pebblets: Abundant, useful for early-game tools.
- Raw Science: Numerous clusters are scattered throughout the tunnels and chambers.
- BURG.L Chips: The Red Anthill contains a BURG.L chip, often in a well-guarded chamber.
Red Anthill Environmental Storytelling
The Red Anthill provides insights into the behavior and social structure of ants in the backyard. Discovering their egg chambers, food storage areas, and intricate tunnel systems offers a glimpse into their daily lives. Lore notes and data drives can sometimes be found, hinting at past human interactions or experiments related to the ant colonies. It's a prime example of the game's detailed environmental design, where even common insects have complex societies.
General Difficulty: Medium. The sheer number of ants can be overwhelming, but individual ants are not overly strong. Good for early-to-mid game resource gathering and combat practice.