Objective: Acquire Charge Beam
Following your investigation of the Main Reactor and the unsettling discovery of the X Parasite's capabilities, your mission objective has been updated. The computer will now direct you to the Data Room to retrieve the crucial Charge Beam upgrade. This powerful weapon enhancement is essential for dealing with the evolving threats on the B.S.L. station and is a fundamental step in your journey to reclaim control of the facility.
Navigating to the Data Room (Sector 1 - Main Deck)
While the computer simply states to head to the Data Room, the path isn't a direct return to your previous route. You'll need to utilize your growing understanding of the station's layout to find this vital upgrade. The Data Room is located within Sector 1 (SRX), which is accessible from the Main Deck. This sector is characterized by its distinctive blue-themed doors and environment, indicating its role as a tropical habitat simulation.
Here's a detailed, step-by-step path to the Data Room from the Main Reactor area, ensuring you don't miss any crucial turns or encounter unexpected obstacles:
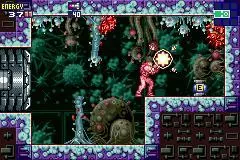
- Exit the Main Reactor Chamber: From the room where you defeated the first Core-X and absorbed the Power Bomb data, head back out through the door you entered. Retrace your steps through the short corridor to the large, vertical shaft that leads down from the Navigation Room.
- Ascend the Main Shaft: Begin climbing the long, vertical shaft upwards. You'll pass several doors and platforms. Keep an eye on your map; this shaft is a central artery of the Main Deck.
- Reach the Navigation Room Level: Continue upwards until you reach the level where the Navigation Room is located (marked as "NAV" on your map). Instead of entering the Navigation Room, proceed past it to the left.
- Proceed Left through Corridor: Move left through the corridor immediately past the Navigation Room. You'll encounter a door that was previously inaccessible or simply not the correct path for your prior objectives. This corridor will lead you towards the western side of the Main Deck.
- Enter Sector 1 (SRX) Access: Continue moving left through a few more rooms. You will eventually reach a distinctive blue-colored door. This door signifies entry into the access corridor that leads directly into Sector 1 (SRX). The map will update to show you are now in a new, distinct area.
- Locate the Data Room within Sector 1 (SRX): Once inside the Sector 1 access area, proceed through the initial corridor. The Data Room will be clearly marked on your map (often as a distinct, larger room with a terminal icon) and is usually one of the first significant rooms you encounter upon entering a new sector. It's typically a prominent room with a large central terminal inside.
Applying Your Newfound Knowledge: As you traverse the station, pay close attention to the map. The computer's instructions often imply that new paths have opened or that previously blocked routes are now accessible. In this instance, the "different path" refers to a route within the Main Deck that leads specifically to Sector 1, which houses the Data Room. You're looking for the blue-colored doors that signify entry into Sector 1. Remember to use your map frequently (select button) to orient yourself and confirm your direction. If you encounter any enemies, a quick shot from your basic beam will dispatch them, but conserve your missiles for tougher encounters.
Acquiring the Charge Beam
Once you successfully reach the Data Room:
- Interact with the Terminal: Approach the central terminal within the Data Room. Samus will automatically initiate the data download sequence. This process is usually quick and seamless.
- Charge Beam Acquired: Upon completion, the Charge Beam data will be integrated into your Power Suit. You'll see a visual confirmation and hear the familiar upgrade sound effect.
Charge Beam Capabilities and Immediate Impact: The Charge Beam is a fundamental upgrade that significantly boosts your offensive capabilities and is crucial for progression. By holding down the 'B' button, Samus can charge her arm cannon, indicated by a glowing effect around her arm. Releasing the button unleashes a more powerful, concentrated blast. This charged shot deals substantially more damage than a regular shot and is often required to open specific types of doors (known as Charge Beam Blocks, often marked with a distinct symbol) or destroy certain environmental obstacles that were previously impervious to your basic beam. It also allows you to defeat many standard enemies in fewer hits, conserving your health and time.
Mastering its use will be crucial for the challenges ahead. This upgrade is not just a damage boost; it's a key tool for progression, allowing you to overcome enemies and barriers that were previously insurmountable. Get accustomed to charging your shots, as it will become a core part of your combat strategy, especially against tougher foes and bosses. You'll find yourself relying on charged shots for efficiency and power in almost every combat scenario moving forward.