
Navigating Hooktail Castle
Welcome, intrepid adventurer, to Hooktail Castle! This ancient, crumbling fortress is your first major dungeon in Paper Mario: The Thousand-Year Door, and it's crawling with new enemies, tricky puzzles, and valuable treasures. Don't let its imposing facade intimidate you; with this guide, you'll conquer Hooktail's domain and rescue the second Crystal Star.
Enemies of Hooktail Castle: Strategies and Weaknesses
You'll encounter several new enemy types within Hooktail Castle. Understanding their strengths and weaknesses is key to conserving your HP and FP for the challenges ahead.
- Paratroopa: These winged Koopas fly, making them immune to standard hammer attacks. Use Mario's Jump attack or Koops' Shell Toss to knock them out of the air. Once grounded, they become regular Koopas.
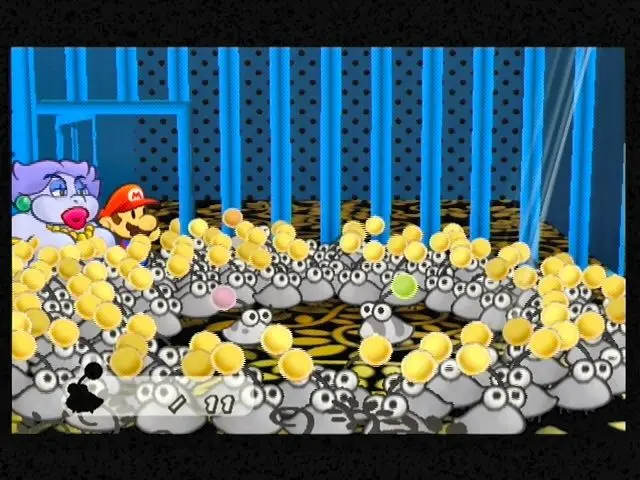
- Dull Bones: Skeletal Koopas that often appear in groups. They have low HP but can reassemble themselves after being defeated, unless you use a move that deals fire damage (like Mario's Fire Drive, if you have it, or a Fire Flower item) or a multi-hit attack that finishes them off in one turn. Koops' Shell Toss is excellent for hitting multiple Dull Bones.
- Red Bones: Similar to Dull Bones, but with higher stats and a fire-based attack. They also reassemble unless defeated by fire or a multi-hit attack. Be wary of their fire breath!
- Spiky Goomba: A standard Goomba wearing a spike helmet. Do NOT jump on these! Use Mario's Hammer or Koops' Shell Toss.
- Dark Koopa: Stronger versions of regular Koopas. They have more HP and attack power. Treat them like standard Koopas, prioritizing jump attacks or Koops' Shell Toss.
Recommended Partners: Koops will be your primary partner for navigation and many puzzles. For combat, Koops is excellent against grounded enemies and for hitting multiple foes. Goombella's Tattle ability is always useful for checking enemy stats and weaknesses.
Important Items and Badges to Find
Keep an eye out for these valuable pickups as you explore:
- Power Plus Badge: Found in the room with the first "skull" switch. Increases Mario's attack power by 1.
- HP Plus Badge: Located in a hidden block in the room with the second "skull" switch. Increases Mario's max HP by 5.
- FP Plus Badge: In a hidden block near the entrance to the main Hooktail battle arena. Increases Mario's max FP by 5.
- Star Pieces: Several are hidden throughout the castle. Look behind pillars, under blocks, and in obscure corners.
- Coins: Break every block and hit every invisible block you find. You'll need coins for badges and items later!
Step-by-Step Walkthrough: Conquering Hooktail Castle
Upon entering Hooktail Castle, you'll be in the main foyer. Head right.
- The First Room & Cracked Wall:
- Go right from the entrance. You'll encounter some Dull Bones.
- In the next room, you'll see a large cracked wall on the right. Use Mario's Hammer to break it open.
- Proceed through the opening.
- The Spike Room & Black Chest:
- This room has a floor covered in spikes. Use Koops' Shell Toss ability to hit the yellow switch on the far right. This will temporarily retract the spikes.
- Quickly run across to the right side before the spikes return.
- Here, you'll find a mysterious Black Chest. Open it to receive the Paper Mode ability, allowing Mario to turn sideways and slip through narrow gaps.
- Use your new Paper Mode to slip through the crack in the wall to the right.
- The First Skull Switch & Power Plus Badge:
- You'll emerge in a small room with a large skull switch on the wall. Hit it with your hammer. This is the first of three switches you need to activate.
- Before leaving, check the blocks in this room. One contains the Power Plus Badge.
- Go back through the crack in Paper Mode, then cross the spike room (hitting the switch again if needed).
- Reaching the Upper Levels:
- Back in the main foyer, head left this time.
- You'll find a staircase leading up. Take it.
- In the next room, you'll see a gap. Use Koops' Shell Toss to hit the blue switch on the other side, extending a bridge. Cross it.
- The Second Skull Switch & HP Plus Badge:
- Continue through the next few rooms, battling Paratroopas and Dull Bones.
- You'll eventually reach a room with another large skull switch on the wall. Hit it with your hammer. This is the second switch.
- In this same room, jump to hit the invisible block above the skull switch to reveal the HP Plus Badge.
- Proceed through the door to the right.
- The Third Skull Switch & Hidden Path:
- You'll be in a room with a gap and a moving platform. Time your jumps to cross.
- In the next room, you'll see a series of blocks and a yellow switch on a ledge. Use Koops' Shell Toss to hit the switch, causing a staircase to appear.
- Climb the stairs. At the top, you'll find the third and final skull switch. Hit it with your hammer.
- After hitting the switch, a new path will open up in the main foyer.
- Return to the main foyer. This might involve backtracking or dropping down from ledges.
- The Main Door & Skull Puzzle:
- Once back in the main foyer, you'll notice that the large, ornate door in the center is now accessible.
- On the wall next to this door, you'll see three small skull reliefs. These correspond to the three skull switches you just activated.
- To open the door, you need to hit the skull reliefs in a specific order: Left, Right, Center.
- Hit the leftmost skull with your hammer, then the rightmost, then the center. The large door will creak open.
- Approaching Hooktail:
- Enter the newly opened door. You'll be in a long corridor.
- Before entering the final room, look for an invisible block near the entrance to the boss arena. It contains the FP Plus Badge.
- Heal up and save your game at the Save Block. Prepare for the boss battle!
The Reversible Staircase (Post-Chapter 5 Secret)
While not required for your first trip through Hooktail Castle, there's a secret here that becomes accessible much later in the game (after Chapter 5, once you've acquired Bobbery as a partner). Merlon will hint at a "reversible stair" and a "black chest" in the "house of the dragon."
- After Chapter 5, return to Hooktail Castle.
- Go to the room where you obtained the Paper Mode ability (the spike room with the Black Chest).
- Head to the far right side of this room. You'll notice a crack in the wall that wasn't there before, or perhaps you just couldn't interact with it.
- Switch to Bobbery and use his ability to blow up the cracked wall.
- Enter the newly revealed room. Inside, you'll find a blue '!' block. Hit it to reveal a small chest containing an Up Arrow.
- Take this Up Arrow back to Merlon in Rogueport. This will allow him to upgrade your partners to Ultra Rank, significantly boosting their abilities!
By following these steps, you'll navigate Hooktail Castle with ease, collect valuable items, and be fully prepared to face the fearsome dragon herself!