Raccoon City Police Department (RPD)
Following the harrowing encounter with Nemesis in the streets, Jill Valentine finds herself seeking refuge within the familiar, yet now desolate, halls of the Raccoon City Police Department. For players of previous Resident Evil titles, the RPD will evoke a sense of déjà vu, but for newcomers, it's a critical, albeit brief, hub for progression. This section will guide you through your objectives and the dangers lurking within this once-safe haven.
Overview of the RPD Visit
Unlike its extensive role in Resident Evil 2, Jill's time in the RPD in Resident Evil 3 is relatively short and focused. Your primary goal here is to acquire specific items needed to advance, while also gathering any available resources. Be warned: even these familiar corridors are not entirely safe, and the lingering presence of the T-Virus has left its mark.
RPD Layout and Key Locations
Upon entering the RPD, you'll find yourself in the Main Hall. Take a moment to observe the surroundings; the once bustling station is now eerily quiet, a testament to the city's collapse. Your immediate objective is to locate the S.T.A.R.S. Office to retrieve a crucial item, and then to solve the clock puzzle to acquire the Battery needed for your escape.
Main Hall
The central hub of the RPD. From here, you can access various offices and corridors. It's also a safe zone for inventory management.
- Item Box: Located near the entrance, allowing you to store and retrieve items. Essential for managing your limited inventory space.
- Typewriter: Positioned next to the Item Box, providing a crucial opportunity to save your game. Always save before venturing into new areas or after completing significant objectives.
- Exits: Double doors to the East Office corridor, double doors to the West Office corridor, and the main entrance (currently locked from the outside).
East Office Corridor
Accessed from the Main Hall's eastern doors. Leads to the East Office and the Waiting Room.
- Enemies: Typically a few zombies.
East Office
A small office with several desks. Often contains useful files and items.
- Files: Look for the "Fax from the Chief" on a desk, which provides context about the RPD's situation. Unlike RE2, there isn't a specific "Marvin's Report" here.
- Items: Often contains Handgun Ammo or a Green Herb.
Waiting Room
Connected to the East Office corridor. Contains a fireplace and some seating.
- Items: Check for a Green Herb or Handgun Ammo.
West Office Corridor
Accessed from the Main Hall's western doors. Leads to the West Office and the S.T.A.R.S. Office.
- Enemies: Expect a few zombies.
West Office
Another office area, similar to the East Office. Often contains resources.
- Items: Usually holds Handgun Ammo or a First Aid Spray.
S.T.A.R.S. Office
The iconic office of the Special Tactics and Rescue Service team. Your primary destination within the RPD for a key item.
- Enemies: Generally clear upon first entry.
- Key Item: The S.T.A.R.S. Card is found on the desk in the back of the office. This card is used to unlock the S.T.A.R.S. Office itself if you exit and re-enter, or to access specific lockers within the office. It is NOT used to exit the RPD.
- Weapon & Ammo: Depending on your difficulty and previous actions, you might find a Magnum or Magnum Ammo in the weapon locker. This is a powerful weapon that can be invaluable against tougher enemies.
- First Aid Spray: Often found near the weapon locker or on a shelf, providing much-needed healing.
- Files: Look for the "Operation Report" file, which details the S.T.A.R.S. team's last mission.
Dark Room (Save Room)
Located near the S.T.A.R.S. Office. A safe haven for saving and item management.
- Item Box: Yes.
- Typewriter: Yes.
- Items: Often contains Film (for developing photos) or a Green Herb.
Clock Tower Puzzle Room (2F)
Accessed via stairs from the Main Hall. This room contains a crucial puzzle.
- Puzzle: The large clock in this room requires you to set the correct time to activate it. The solution is usually found in a file or by observing the clock's state. Once activated, it will drop the Battery.
- Reward: Battery – This item is essential for activating the electronic door leading out of the RPD to the back alley/streets.
Outside the RPD (Back Alley)
The exit point from the RPD. Requires the Battery to open the electronic door.
- Exit Mechanism: Use the Battery on the electronic door panel to power it and open the way forward.
Step-by-Step Walkthrough: Navigating the RPD
- Initial Entry & Main Hall:
- Upon entering, you'll be in the Main Hall.
- Immediately locate the Item Box and Typewriter. Save your game and manage your inventory.
- East Office & Waiting Room:
- Head through the double doors on the east side (right from your entry point) into the East Office corridor.
- Deal with any zombies you encounter.
- Enter the East Office. Collect the "Fax from the Chief" file and any other items (e.g., Handgun Ammo, Green Herb).
- Optionally, check the Waiting Room for additional items.
- Return to the Main Hall.
- West Office & S.T.A.R.S. Office:
- From the Main Hall, proceed through the double doors on the west side (left from your entry point) into the West Office corridor.
- Neutralize any zombies.
- Enter the West Office. Collect any items (e.g., Handgun Ammo, First Aid Spray).
- Continue through the West Office to reach the S.T.A.R.S. Office.
- Inside the S.T.A.R.S. Office:
- Collect the S.T.A.R.S. Card from the back desk.
- Open the weapon locker (if applicable) for the Magnum or Magnum Ammo.
- Grab the "Operation Report" file and any other items (e.g., First Aid Spray).
- Dark Room (Optional Save):
- If you wish to save or manage inventory, head to the Dark Room located near the S.T.A.R.S. Office.
- Use the Typewriter and Item Box.
- The Clock Puzzle & Battery:
- Return to the Main Hall.
- Ascend the stairs to the second floor.
- Enter the room with the large clock.
- Clock Puzzle: Examine the clock. The goal is to set the hands to a specific time. The exact time can vary slightly between playthroughs or versions, but it's often related to a file found elsewhere or a visual clue. A common solution involves setting it to 7 o'clock (7:00). Interact with the clock mechanism to input the time.
- Once solved, the clock will activate, and the Battery will drop. Collect it.
- Exiting the RPD:
- With the Battery in hand, descend to the Main Hall.
- Head towards the main entrance doors (the ones you used to enter).
- Just before the main entrance, there's an electronic door leading to the back alley.
- Use the Battery on the electronic panel next to this door.
- The door will now open, allowing you to exit the RPD and continue your journey towards the Clock Tower Plaza.
Key Items and Rewards in RPD
| Item | Location | Purpose / Notes |
|---|---|---|
| S.T.A.R.S. Card | S.T.A.R.S. Office (on desk) | Used to unlock the S.T.A.R.S. Office door itself, or specific lockers within. Not for exiting RPD. |
| Battery | Clock Tower Puzzle Room (2F) | Essential for powering the electronic door to exit the RPD. |
| Magnum / Magnum Ammo | S.T.A.R.S. Office (weapon locker) | Powerful weapon for tough enemies. Availability may depend on difficulty/actions. |
| Handgun Ammo | Various offices (East, West, corridors) | Standard ammunition. Conserve for weaker enemies. |
| Green Herb | Various offices, corridors | Restores a small amount of health. Combine for greater effect. |
| First Aid Spray | West Office, S.T.A.R.S. Office | Fully restores health. Use sparingly. |
| "Fax from the Chief" File | East Office | Provides lore and background information. |
| "Operation Report" File | S.T.A.R.S. Office | Details the S.T.A.R.S. team's last mission. |
Enemy Encounters & Strategies
While your visit is brief, the RPD is not entirely devoid of threats:
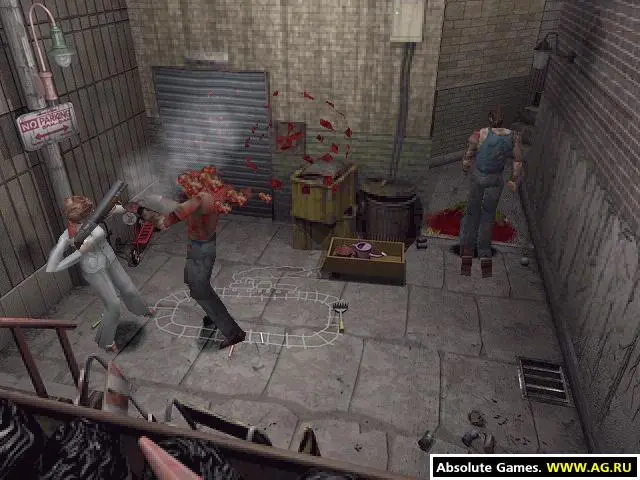
- Zombies: Expect to encounter several standard zombies, particularly in the corridors and offices leading to the S.T.A.R.S. Office. They are generally slow but can overwhelm you if you're not careful. Prioritize headshots or use the quick turn to avoid them if conserving ammo.
- Cerberus (Zombie Dogs): In some playthroughs or depending on your actions, you might encounter a Cerberus in the Main Hall or surrounding corridors. These are fast and aggressive, so be prepared to dodge or take them down quickly with a shotgun if available, or precise handgun shots.
- Nemesis: Thankfully, Nemesis does not pursue you into the RPD during this segment, offering a genuine, albeit temporary, reprieve from his relentless pursuit. This is a good opportunity to regroup and prepare for the next encounter.
Important Considerations & Tips
- Inventory Management: use the Item Box in the Main Hall (and Dark Room) to store any unnecessary items and ensure you have space for key items like the S.T.A.R.S. Card and the Battery. Remember to retrieve essential healing items and weapons before leaving.
- Conserve Ammo: Your time in the RPD is short, and resources are precious. Try to avoid unnecessary confrontations. If you can run past a zombie without taking damage, do so. Save your more powerful ammunition for Nemesis or other significant threats.
- Map Usage: The RPD layout is familiar, but don't hesitate to use your map (L2 on PlayStation, or equivalent on other platforms) to navigate efficiently and ensure you haven't missed any areas or items. The map will also highlight accessible and inaccessible doors.
- Blue Gem Puzzle (Shotgun): While not strictly necessary for progression, a notable side puzzle in the RPD involves acquiring the Shotgun. This requires finding two Blue Gems. One is typically found in the Waiting Room (East Office corridor) and another in the Dark Room (near S.T.A.R.S. Office). These gems are then used on a specific display case in the Main Hall to unlock the Shotgun. This is a highly recommended acquisition for its power against multiple zombies and tougher enemies.