
Escape the University (Hellfire Scenario)
The harrowing Hellfire scenario culminates in a desperate dash for survival as the entire university campus is engulfed in flames. Your primary objective is to reach the designated escape point: the rooftop helipad. This is not a simple sprint; you'll need to navigate a collapsing structure, clear perilous pathways, and contend with a final, relentless surge of mutated creatures.
The environment itself becomes your most formidable enemy. Expect the university to be a maze of burning debris, unstable floors, and impassable routes. Teamwork is paramount here, as certain obstacles will require cooperative effort or specific items to overcome. Be prepared for a high-stress, time-sensitive escape.
Phase 1: Navigating the Burning Campus
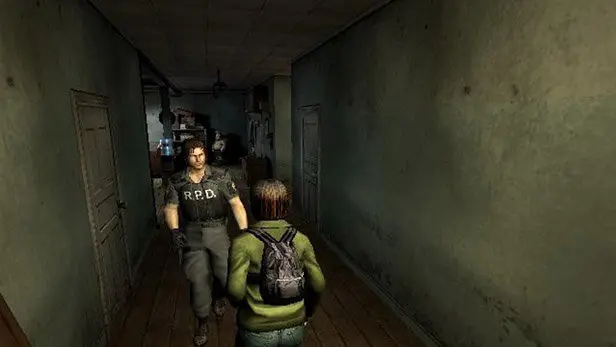
Upon receiving the evacuation order, your first task is to make your way from your current location (likely the Main Hall or a nearby classroom if you've completed previous objectives) towards the East Wing. The most direct route may be blocked, forcing you to find alternative paths through areas you might not have fully explored yet.
- Main Hall to East Wing: If the main staircase is blocked by fire or debris, look for alternative passages through the Faculty Office or Library on the ground floor. These areas often contain useful healing items or ammunition.
- Enemies: Expect a mix of Zombies and the more agile Lickers. The Lickers, in particular, are dangerous in tight, smoke-filled corridors. Conserve ammunition where possible, but don't hesitate to eliminate immediate threats.
- Environmental Hazards: Watch out for falling ceiling panels and exploding gas pipes. These can cause significant damage or even instant death. Listen for creaking sounds or visual cues like sparking wires.
Phase 2: Clearing the East Wing Stairwell
Your path to the rooftop will inevitably lead you to the main stairwell in the East Wing. However, a massive pile of rubble and a collapsed section of the ceiling will block your ascent. This is where your problem-solving skills, and potentially some explosives, come into play.
Specific Obstacle: The collapsed stairwell at the 3rd Floor landing of the East Wing Stairwell. This is a critical choke point.
Solution 1: Pushing the Heavy Object (Cooperative Effort)
- Location: On the 3rd Floor landing, directly in front of the collapsed section, you will find a large, heavy metal cabinet or filing cabinet.
- Action: Two characters are required to push this object. Position two characters on opposite sides of the cabinet (or one on the front, one on the side, depending on the exact model's interaction points).
- Execution: Both players must simultaneously hold down the action button to push the cabinet. Pushing it will create a small gap, allowing one character to squeeze through.
- Strategy: The character who squeezes through first should immediately look for a way to clear the remaining debris or find an alternative path for the second player. Often, this involves activating a mechanism or finding a key item on the other side.
- Pitfall: If only one character is available, this route is impossible. Ensure your team stays together or designate roles beforehand.
Solution 2: Using Explosives (Specific Item Required)
- Item Required: Plastic Explosive (often found in the Chemistry Lab or Storage Room in the West Wing earlier in the scenario) and a Detonator (sometimes found separately, or combined with the explosive).
- Location: The optimal placement for the explosive is directly at the base of the most significant pile of rubble blocking the stairwell on the 3rd Floor. There will be a prompt to "Place Explosive."
- Action: Place the Plastic Explosive. If you have a separate Detonator, use it on the placed explosive. If the explosive is already combined with a detonator, simply activate it after placement.
- Consequence: The explosion will clear the debris, but it will also cause significant structural damage, potentially creating new pathways or hazards. Be prepared for a brief screen shake and loud noise.
- Strategy: Designate one character to carry and deploy the explosives. Ensure they have enough inventory space. It's often safer to place the explosive and then retreat a short distance before detonating.
- Pitfall: Using explosives too close to other characters can cause friendly fire damage. Ensure your team is clear. Also, if you haven't found the explosives, this option is unavailable.
Phase 3: The Rooftop Helipad and Final Encounter
Once the stairwell is cleared, continue your ascent to the Rooftop Access Door. Be warned: the rooftop is not a safe haven. The final challenge awaits you here.
- Enemies: The rooftop will be swarming with a final wave of Crows and potentially a few lingering Zombies or even a Licker that has scaled the building. The Crows, while individually weak, can quickly overwhelm you in large numbers, pecking away at your health and causing confusion.
- Objective: Your ultimate goal is to reach the Helipad area, usually marked by a large "H" and flashing lights.
- Strategy against Crows: Shotguns are highly effective against groups of Crows. If you have a character with a high-capacity weapon like the Assault Rifle, they can provide excellent crowd control. Melee attacks are risky due to their speed and numbers.
- Item Spawns: Check around the helipad for emergency supplies. Sometimes, a First Aid Spray or extra Handgun Ammo can be found near the evacuation point.
- The Helicopter: The rescue helicopter will appear after a short delay once you reach the helipad. You must survive until it lands and the pilot gives the signal to board. This period is often the most intense, with enemies continuously spawning.
- Teamwork: Cover your teammates as they board. Ensure everyone makes it onto the helicopter before the timer runs out or the pilot decides to leave. If a character is incapacitated or left behind, they will not escape.
Recommended Loadout for Escape
For the final escape, prioritize mobility, crowd control, and healing.
- Primary Weapon: Shotgun (for Crows and grouped Zombies) or Assault Rifle (for sustained damage and crowd control).
- Secondary Weapon: Handgun (for conserving ammo on weaker enemies or precision shots).
- Healing Items: At least one First Aid Spray per character, and a few Herbs (Green + Green for full heal, Green + Red for increased healing).
- Utility Items: If you're designated as the explosive carrier, ensure you have the Plastic Explosive and Detonator.
- Character Choice: Characters with high defense (e.g., Kevin, Mark) or high mobility (e.g., Cindy, Yoko) can be advantageous. Cindy's ability to carry more healing items is also invaluable.
Common Pitfalls and Missables
- Separation: Getting separated from your team, especially during the stairwell obstacle, can be fatal. Stick together.
- Running out of Ammo: The final push can be ammo-intensive. Conserve where possible, but don't be afraid to use your best weapons when overwhelmed.
- Ignoring Environmental Hazards: Falling debris and fires are not just cosmetic; they deal damage. Avoid running blindly through burning areas.
- Leaving Teammates Behind: The game requires all surviving players to escape. If a teammate is downed or fails to board the helicopter, the escape is unsuccessful for them.
- Not Finding Explosives: If you chose the explosive route for the stairwell and haven't found the necessary items, you'll be forced to backtrack or rely on the two-person push.
Successfully reaching the helipad and boarding the helicopter with your surviving teammates completes the "Hellfire" scenario. Good luck, and try not to get roasted!