
Temple Approach
Welcome, Serious Sam, to the treacherous Temple Approach, a critical sub-section within the sprawling Hatshepsut level. This guide will meticulously navigate you through the gauntlet leading to the main temple entrance, ensuring you conquer every threat and uncover every secret. The Temple Approach is not a standalone level but rather the challenging exterior courtyard and immediate surroundings that precede the inner sanctums of Hatshepsut. Prepare for intense close-quarters combat and strategic enemy waves.
Objective: Clear the Courtyard and Gain Entry to Hatshepsut's Main Temple
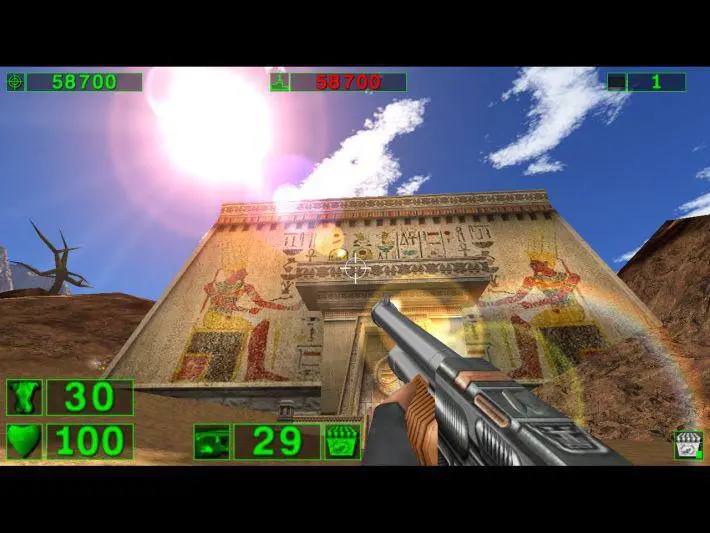
Upon entering the Temple Approach, you'll find yourself in a vast, open courtyard dominated by ancient Egyptian architecture, including numerous sturdy pillars and crumbling stone structures. This area serves as a significant choke point and will test your crowd control and evasion skills. Your primary goal is to eliminate all hostile forces within the courtyard to unlock the massive main temple doors, granting you access to the next phase of the Hatshepsut level.
Enemy Encounter Breakdown
The Temple Approach is notorious for its multi-directional enemy spawns and diverse threat composition. Expect a relentless assault from the following:
- Headless Kamikaze: These screaming, bomb-wielding maniacs are your top priority due to their explosive demise. They often spawn in groups and can quickly overwhelm you if not managed.
- Gnaar: The one-eyed, charging brutes will attempt to close the distance rapidly. Their melee attacks are powerful, so keep them at bay.
- Kleer Skeletons: Fast, agile, and deceptively strong, Kleer Skeletons are a constant menace. They attack with sharp claws and can leap great distances, making them difficult to hit reliably.
- Minor Biomechanoids (potentially): While less frequent than in later areas, be prepared for the occasional appearance of these robotic menaces, especially on higher difficulties. Their plasma projectiles can be devastating.
Recommended Loadout & Strategy
For the Temple Approach, a balanced arsenal and agile movement are key. Here’s what we recommend:
Weapon Priority:
- Double Shotgun: Your bread and butter for close-range crowd control. Absolutely essential for dispatching Gnaar and Kleer Skeletons that get too close, and for clearing groups of Kamikazes.
- Revolver (Dual): Excellent for precise headshots on distant Gnaar or picking off individual Kleer Skeletons without wasting precious shotgun shells. Also useful for initiating combat.
- Minigun: If you've acquired it, the Minigun is fantastic for sustained fire against larger groups of enemies or quickly eliminating multiple Kamikazes before they reach you. Conserve ammo for critical moments.
- Rocket Launcher: While ammo might be scarce, a well-placed rocket can clear entire waves of Kamikazes or severely damage a cluster of Gnaar. Use sparingly.
Tactical Maneuvers:
- Circle-Strafing: This is your most vital defensive technique. Continuously move around the central pillars and other structures to avoid incoming projectiles and melee attacks. This also helps group enemies together for efficient area-of-effect weapon usage (e.g., Double Shotgun blasts).
- Pillar Utilization: The numerous pillars are not just aesthetic; they are your best friends. Use them for cover against projectiles, to break line of sight from charging Gnaar, and to funnel enemies into predictable paths.
- Prioritize Kamikazes: Always, always, always eliminate Headless Kamikazes first. Their explosion radius is significant, and they can quickly deplete your health and armor. Listen for their distinctive scream.
- Environmental Awareness: Keep an eye on all entry points. Enemies will spawn from multiple directions, including behind you. Regularly check your flanks.
- Health & Armor Management: Don't be afraid to retreat briefly to pick up health or armor if you're taking heavy damage. The courtyard is large enough to create some distance.
Walkthrough: Step-by-Step
- Initial Engagement: As you step into the courtyard, expect an immediate wave of Headless Kamikazes and Gnaar to rush you. Backpedal slightly and use your Double Shotgun to clear the initial threats. Aim for the center of groups.
- First Pillar Gauntlet: Move towards the central area, utilizing the large pillars for cover. More Kamikazes will spawn from the far end of the courtyard, often accompanied by Kleer Skeletons. Focus on the Kamikazes first, then switch to the Kleers with your Shotgun or Revolver.
- Flank Attack: Around the midpoint of the fight, expect enemies to spawn from side passages or even behind you. A common spawn point for Kleer Skeletons is from small alcoves near the courtyard's edges. Be ready to quickly turn and engage.
- Sustained Pressure: The enemy waves will be continuous until a certain kill count is met. Maintain constant movement, circle-strafing the pillars, and prioritizing high-threat enemies. Don't stand still for more than a second.
- Final Push: As the enemy count dwindles, the spawns will become less frequent. Mop up any remaining Gnaar or Kleer Skeletons. Listen for any lingering Kamikaze screams.
- Door Activation: Once the last enemy is defeated, a distinct sound cue will play, and the massive main temple doors at the far end of the courtyard will slowly grind open, revealing the path forward into the heart of Hatshepsut.
Secrets and Collectibles
The Temple Approach, despite its combat focus, hides a few valuable resources. Thorough exploration is rewarded:
| Item | Location | Quantity/Effect | Notes |
|---|---|---|---|
| Health Pack | Behind a large pillar on the left side of the courtyard (facing the temple entrance). | +50 Health | Often hidden in a small recess or alcove. Essential for mid-fight recovery. |
| Armor Vest | In a small, partially obscured alcove on the right side of the courtyard, behind some rubble. | +100 Armor | Provides a significant defensive boost. Look for subtle cracks or openings in the wall. |
| Shotgun Shells | Scattered throughout the courtyard, often near enemy spawn points or behind small structures. | +10-20 Shells | Crucial for maintaining your primary close-quarters weapon. |
| Revolver Ammo | Less common, but can be found near the edges of the courtyard or in corners. | +12-24 Bullets | Useful for sustained ranged combat. |
| Rocket Ammo (Rare) | Extremely rare, but sometimes a single rocket can be found in a very well-hidden spot, often requiring a jump or precise movement. | +1 Rocket | A valuable find for clearing tough groups. |
Common Pitfalls & How to Avoid Them:
- Getting Cornered: The most common mistake. Always keep moving and maintain open escape routes. Getting trapped against a wall by Gnaar or Kleer Skeletons is a death sentence.
- Ignoring Kamikazes: Allowing too many Headless Kamikazes to detonate near you will quickly drain your health and armor. Prioritize them above all else.
- Wasting Ammo: While the Double Shotgun is powerful, don't use it on single, distant enemies if your Revolver can do the job more efficiently. Conserve your heavy weapon ammo for large groups.
- Lack of Situational Awareness: Enemies will spawn from all directions. Failing to check your surroundings regularly can lead to being ambushed from behind.
By following these detailed instructions and employing smart tactics, you will successfully navigate the Temple Approach and gain entry to the majestic Hatshepsut temple, ready for the next challenge that awaits you within its ancient walls.