
Tomb Exploration: Navigating the Ancient Labyrinths of the Valley of the Kings
Welcome, Serious Sam, to the treacherous depths of the Valley of the Kings! This guide focuses specifically on the "Tomb Exploration" phase, which encompasses the intricate, often claustrophobic, indoor sections of the level. Unlike the sprawling outdoor arenas, these tombs demand a different approach, emphasizing environmental awareness, puzzle-solving, and close-quarters combat. Prepare for ambushes, hidden mechanisms, and a constant threat from Mental's hordes.
Understanding the Tomb Structure
The Valley of the Kings level is structured as a series of interconnected outdoor zones and indoor tomb complexes. The "Tomb Exploration" sections are the indoor segments you enter after traversing an initial outdoor area or to access a new outdoor zone. These are not standalone levels but rather critical sub-sections designed to challenge your spatial reasoning and combat skills in confined spaces.
Each tomb complex typically features:
- Interconnected Chambers: A network of corridors, antechambers, and larger burial halls.
- Environmental Puzzles: Mechanisms requiring interaction to open doors, reveal paths, or activate objectives.
- Traps: Hidden dangers designed to catch unwary players.
- Enemy Ambushes: Expect enemies to spawn from behind secret walls, ceilings, or previously cleared areas.
- Resource Management: Health, armor, and ammo pickups are strategically placed, often as rewards for solving puzzles or clearing rooms.
Key Tomb Exploration Objectives
Your primary objectives within these tomb sections are:
- Locate Exit/Next Area: Find the path leading deeper into the Valley or out to the next outdoor segment.
- Solve Environmental Puzzles: Activate switches, press plates, or find keys to open sealed doors.
- Clear Enemy Threats: Eliminate all hostile forces to ensure safe passage and prevent back attacks.
- Collect Resources: Scavenge for vital health, armor, and ammunition.
Common Environmental Puzzles and Mechanics
The tombs are riddled with ancient mechanisms designed to impede your progress. Here are the most common types you'll encounter:
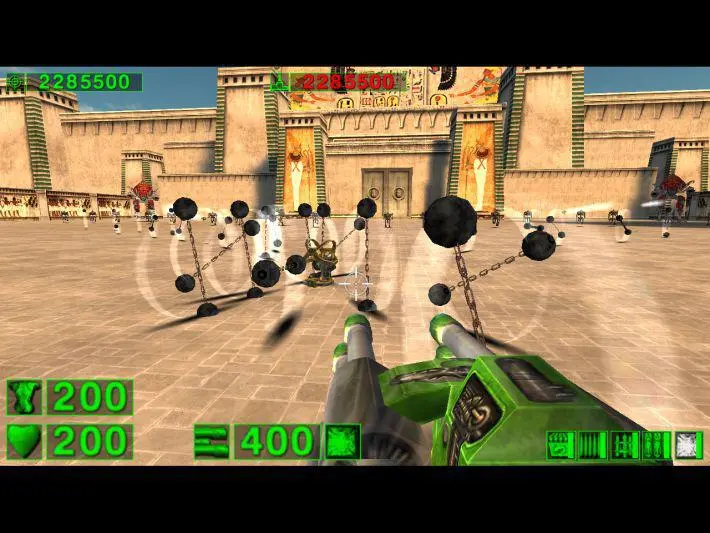
1. Pressure Plates
These are ubiquitous in the tombs. Look for discolored or slightly raised sections of the floor. Stepping on them often triggers an event:
- Door Activation: Most commonly, a nearby door will open. Be aware that this can also trigger enemy spawns.
- Trap Activation: Less frequently, a pressure plate might activate a falling ceiling, spike pit, or dart trap. Always be ready to move!
- Timed Mechanisms: Some plates require you to remain on them for a short duration, or activate a door that closes after a few seconds, requiring quick movement.
Strategy: Approach pressure plates cautiously. If a door opens, be prepared for enemies. If nothing immediately happens, check for subtle environmental changes or listen for distant sounds.
2. Wall Switches and Levers
These are typically found on walls, sometimes subtly blended into the ancient masonry. They often control larger mechanisms:
- Door Locks: Activating a switch might unlock a door elsewhere in the tomb, often indicated by a distinct sound effect.
- Bridge/Platform Extension: Switches can extend bridges over chasms or raise platforms to reach higher areas.
- Secret Area Revelation: Some switches reveal hidden passages containing valuable pickups.
Strategy: Always scan walls, especially in dead ends or large chambers. Look for anything that stands out or has a slightly different texture. If a switch seems to do nothing immediately, it likely affects an area you haven't reached yet or a door you've previously tried to open.
3. Key Items and Pedestals
Certain doors or mechanisms require a specific key item to proceed. These are usually found on pedestals or carried by specific enemies:
- Ankh Keys: While not as prevalent as in later levels, some tomb doors might require an Ankh Key, which is typically found in a nearby chamber after defeating a significant enemy wave.
- Orbs/Crystals: Occasionally, you might need to pick up a glowing orb or crystal and place it on a specific pedestal to activate a larger mechanism.
Strategy: If a door is clearly locked and no switches are apparent, backtrack and thoroughly search previously cleared rooms for a key item. Pay attention to the environment for any visual cues indicating a missing component.
Enemy Encounters in the Tombs
The confined spaces of the tombs make certain enemies particularly dangerous. Prioritize targets and manage your space effectively.
| Enemy Type | Threat Level | Recommended Weapon | Strategy in Tombs |
|---|---|---|---|
| Kleer Skeleton | Medium-High | Shotgun, Double Shotgun | Extremely dangerous in corridors. Their charge attack can be devastating. Backpedal and use the Shotgun's knockback. Aim for headshots to dismember them quickly. |
| Gnaar | Low-Medium | Pistol, Shotgun | Often appear in groups. Their melee attack is strong, but they are slow. Use the Pistol for single Gnaar or the Shotgun for groups. Maintain distance. |
| Headless Kamikaze | High | Minigun, Double Shotgun | Their signature scream means imminent explosion. In tight spaces, they are a nightmare. Use the Minigun to mow them down before they get close. If they get too close, quickly switch to the Double Shotgun for a powerful, desperate blast. |
| Headless Rocketeer | Medium | Assault Rifle, Minigun | Their rockets can bounce off walls, making them unpredictable in corridors. Prioritize them. Use cover and peek-shoot. The Assault Rifle is good for sustained fire. |
| Minor Biomechanoid | Medium-High | Minigun, Rocket Launcher | Their plasma balls are hard to dodge in tight spaces. Use the Minigun to suppress them. If you have space, a well-placed Rocket can take them out quickly, but be careful of splash damage. |
Weapon Loadout and Strategy for Tombs
Your weapon choices are crucial for survival in these close-quarters environments.
- Shotgun / Double Shotgun: Your bread and butter for most tomb encounters. Excellent for dealing with Kleer Skeletons and Gnaar due to high damage and knockback. The Double Shotgun is devastating at point-blank range.
- Minigun: Invaluable for clearing groups of Headless Kamikazes or suppressing multiple enemies in a larger chamber. Its high rate of fire is perfect for shredding enemies before they can close the distance.
- Assault Rifle: Good for mid-range engagements against Headless Rocketeers or for conserving Shotgun ammo against weaker enemies.
- Pistol: Useful for picking off lone Gnaar or conserving ammo when facing minimal threats. Don't underestimate its accuracy.
- Rocket Launcher: Use with extreme caution! Rockets can be incredibly powerful but the splash damage in enclosed spaces can be fatal to Sam. Reserve it for larger, more open tomb chambers or against high-health targets when you have a clear shot.
Common Pitfalls and Missables
- Ignoring Secret Areas: Many tombs contain hidden passages, often revealed by subtle wall switches or pressure plates, leading to significant health, armor, or ammo caches. Always look for suspicious textures or sounds.
- Rushing into Rooms: Never rush into an un-cleared room. Always peek around corners, listen for enemy sounds, and be prepared for ambushes.
- Forgetting About Back-Spawns: Enemies often spawn behind you after you've activated a switch or picked up an item. Periodically check your six.
- Wasting Rocket Ammo: Using the Rocket Launcher in tight corridors is a common mistake that leads to self-inflicted damage. Save it for more open areas or specific, high-threat targets.
- Missing Health/Armor Pickups: In the heat of battle, it's easy to overlook crucial health vials or armor shards. After clearing an area, do a quick sweep before moving on.
Step-by-Step Example: Navigating the "First Tomb Complex"
Upon entering the first major tomb complex from the initial outdoor area of the Valley of the Kings, you'll find yourself in a dimly lit antechamber.
- Initial Entry: As you step inside, two Gnaar will immediately spawn from the left and right alcoves.
- Strategy: Quickly dispatch them with your Pistol or a single Shotgun blast each to conserve ammo.
- Corridor Ambush: Proceed down the main corridor. As you round the first bend, a group of three Kleer Skeletons will charge from the far end.
- Strategy: Backpedal while firing your Shotgun. Aim for their heads to dismember them. Use the corridor's length to your advantage, preventing them from surrounding you.
- Pressure Plate Chamber: You'll enter a larger square chamber with a noticeable discolored pressure plate in the center.
- Action: Step onto the pressure plate.
- Result: A hidden door on the far wall will slide open, revealing two Headless Kamikazes and a Headless Rocketeer. Simultaneously, two more Gnaar will spawn in the alcoves you just passed.
- Strategy: Immediately switch to your Minigun. Focus fire on the Kamikazes first to prevent their explosions. Then, target the Rocketeer, using the central pillar (if present) for cover from its rockets. Once the immediate threats are down, turn around and eliminate the two Gnaar that spawned behind you with your Shotgun.
- Switch Activation: Inside the newly opened passage, you'll find a glowing wall switch.
- Action: Activate the switch.
- Result: A distant grinding sound indicates that a large door elsewhere in the tomb has been unlocked.
- Strategy: After activating, check the small alcoves in this passage for Small Health and Shotgun Shells.
- Exit to Next Area: Backtrack to the main corridor. The previously locked door at the very end of the corridor (opposite your entry point) will now be open, leading to the next outdoor segment of the Valley of the Kings.
- Strategy: Before exiting, ensure you've collected all available resources in the tomb. Sometimes, a final wave of enemies (e.g., a few Kleer Skeletons) might spawn as you approach the exit, so be ready.
By following these guidelines and adapting to the specific challenges of each tomb, you'll successfully navigate the ancient dangers of the Valley of the Kings and continue your relentless pursuit of Mental!