
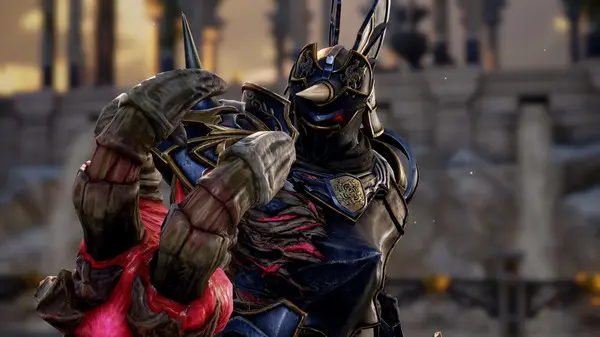
Mitsurugi's Path
Embarking on Mitsurugi's Path in Soulcalibur VI introduces players to a master swordsman renowned for his balanced and aggressive fighting style. He excels at controlling the mid-range with powerful horizontal and vertical attacks, while also possessing potent counter-attacks and mix-up potential. Mastering Mitsurugi involves understanding his stances, capitalizing on his high damage output, and effectively punishing opponents.
Understanding Mitsurugi's Core Strengths
Mitsurugi's strength lies in his versatility. He doesn't rely on gimmicks but rather on solid fundamentals and powerful, well-rounded attacks. His key attributes include:
- Balanced Offense: Excellent horizontal attacks for crowd control and ring-outs, and strong vertical attacks for high damage and breaking guards.
- Good Range: His katana provides a comfortable mid-range advantage, allowing him to poke and pressure opponents effectively.
- Effective Counter-Attacks: Mitsurugi has several tools to punish over-aggressive opponents or those who commit to slow attacks.
- Stance Mix-ups: His "Relic" stance offers diverse follow-ups, keeping opponents guessing.
- High Damage Potential: Many of his combos and individual attacks deal significant damage, making him a threat in any exchange.
Key Moves and Combo Starters
To truly grasp Mitsurugi's potential, focus on integrating these essential moves into your gameplay:
- Relic Stance (214A or 214B): This is Mitsurugi's primary stance. Entering it with 214A (Relic A) offers a faster, more defensive entry, often leading to quick pokes or guard breaks. 214B (Relic B) is a slightly slower, more offensive entry, often used to transition into powerful attacks. From Relic, you have numerous options:
- Relic A, A: A quick horizontal slash, good for interrupting.
- Relic A, B: A powerful vertical attack that can launch opponents.
- Relic B, K: A fast kick, useful for low mix-ups.
Practice transitioning into and out of Relic to keep your opponent on their toes. It's excellent for both offense and defense, allowing for quick follow-ups and mix-ups.
- Silent Step (66B): A fantastic lunging vertical attack that covers good distance and deals significant damage. It's a great approach tool and can punish whiffed attacks from afar. It also has good guard break properties.
- Heavenly Dance (A+B): Mitsurugi's unblockable attack. While slow, it's incredibly powerful and can be used to punish opponents who are turtling or to force a reaction. Consider canceling it with a guard or movement to bait a response.
- Mist (4B): A quick, mid-range vertical attack that is a reliable poke and combo starter. It's relatively safe on block and can lead into various follow-ups. A common string is 4B, B for an additional vertical hit.
- Wind Stitch (6A+B): This is a crucial counter-attack and a fantastic combo starter. It's a parry-like move that, when timed correctly against an incoming attack, will stun the opponent, leaving them open for a devastating follow-up combo. This move is particularly effective against slower, more committal attacks.
Elaborating on Effective Counter-Attacks
Mitsurugi's counter-attacks are not just about parrying; they're about punishing. What makes them effective is their ability to:
- Create Large Openings: Unlike simple blocks, a successful counter-attack often leaves the opponent in a stunned or launched state, allowing Mitsurugi to land high-damage combos that would otherwise be impossible.
- Shift Momentum: Landing a well-timed counter can completely turn the tide of a match, discouraging aggressive play from your opponent.
- Punish Predictable Offense: Opponents who rely on repetitive or easily telegraphed attacks become prime targets for Mitsurugi's counter-game.
For example, Wind Stitch (6A+B) is a prime example. When an opponent throws out a slow, powerful vertical attack, timing 6A+B will parry their attack and leave them reeling, open for a full combo like 6A+B (counter), 6B, B, 236B+K for significant damage and potential ring-out. Another subtle counter is using Relic (214A or B) defensively. If you anticipate a slow attack, entering Relic can sometimes evade the attack's hitbox, allowing you to quickly retaliate with a Relic follow-up.
Early Game Strategy and Practice
In the early fights of Mitsurugi's Path, focus on:
- Optimal Range: Experiment with his normal attacks (A, B, K) to understand their reach. Mitsurugi thrives at a step or two away from his opponent, allowing him to poke and then close in for combos.
- Basic Combos: Practice simple strings like A, A, A (quick horizontal slashes), B, B (vertical strikes), and K, K (kicks). These will build muscle memory.
- Relic Transitions: Get comfortable entering and exiting Relic stance. Try to chain a few attacks from Relic, then cancel out with a guard or movement to reset.
- Aggression with Purpose: Mitsurugi is best played aggressively, but not recklessly. Use his speed and power to pressure opponents, but always be ready to block or counter. Don't be afraid to be aggressive, but ensure your aggression is backed by solid execution and awareness.
Recommended Loadouts and Soul Charges
For Mitsurugi, consider Soul Charge enhancements that boost his offensive capabilities or provide additional defensive layers:
- Attack Buffs: Any Soul Charge bonus that increases attack power will significantly benefit Mitsurugi's already high damage output.
- Guard Break/Lethal Hit Enhancements: These can make his powerful attacks even more threatening, leading to quicker victories.
When activating Soul Charge, prioritize using his more damaging attacks and stance transitions. For instance, a Soul Charged Silent Step (66B) or a combo initiated from a successful Wind Stitch (6A+B) will deal devastating damage.
Common Pitfalls and How to Avoid Them
- Over-reliance on Slow Attacks: While Mitsurugi has powerful slow attacks, using them predictably will lead to easy punishes. Mix them with faster pokes and stance transitions.
- Predictable Relic Use: If you always follow up Relic with the same attack, opponents will quickly learn to block or interrupt. Vary your Relic follow-ups.
- Ignoring Counter-Attacks: Mitsurugi's counter-attacks are a powerful tool. practice their timing and integrate them into your defensive game.
- Poor Spacing: Mitsurugi can be vulnerable up close if he can't create space, and his attacks can whiff if he's too far. Constantly adjust your distance.
By focusing on these core principles, practicing his key moves, and understanding the nuances of his counter-attacks, you will quickly become a formidable Mitsurugi player, dominating the battlefield with his balanced and aggressive katana style.