
Objective 3: Secure Tempest Field
This objective marks a pivotal moment in the Tempest Dynasty's early campaign, focusing on the expansion of your resource network and the consolidation of your territorial gains. Your primary goal is to secure a vital Tempest Field from entrenched GDF resistance, ensuring a steady flow of Tempest for your burgeoning war machine.
Initial Engagement and Advance
Upon receiving this objective, your immediate task is to mobilize your available forces and push towards the designated Tempest Field. Expect the GDF to have established a defensive perimeter around this critical resource. Your starting forces will typically consist of several squads of Thralls, the backbone of the Tempest Dynasty's infantry.
- Deployment Zone: Your forces will likely begin near your primary Tempest Nexus, allowing for immediate reinforcement and healing if necessary.
- Path to Objective: Follow the primary objective marker on your minimap. The terrain will likely feature a mix of open ground and light cover, such as ruined structures or rock formations.
- First Contact: Expect to encounter GDF patrols consisting primarily of GDF Riflemen. These units are individually weaker than your Thralls but can pose a threat in numbers or from elevated positions.
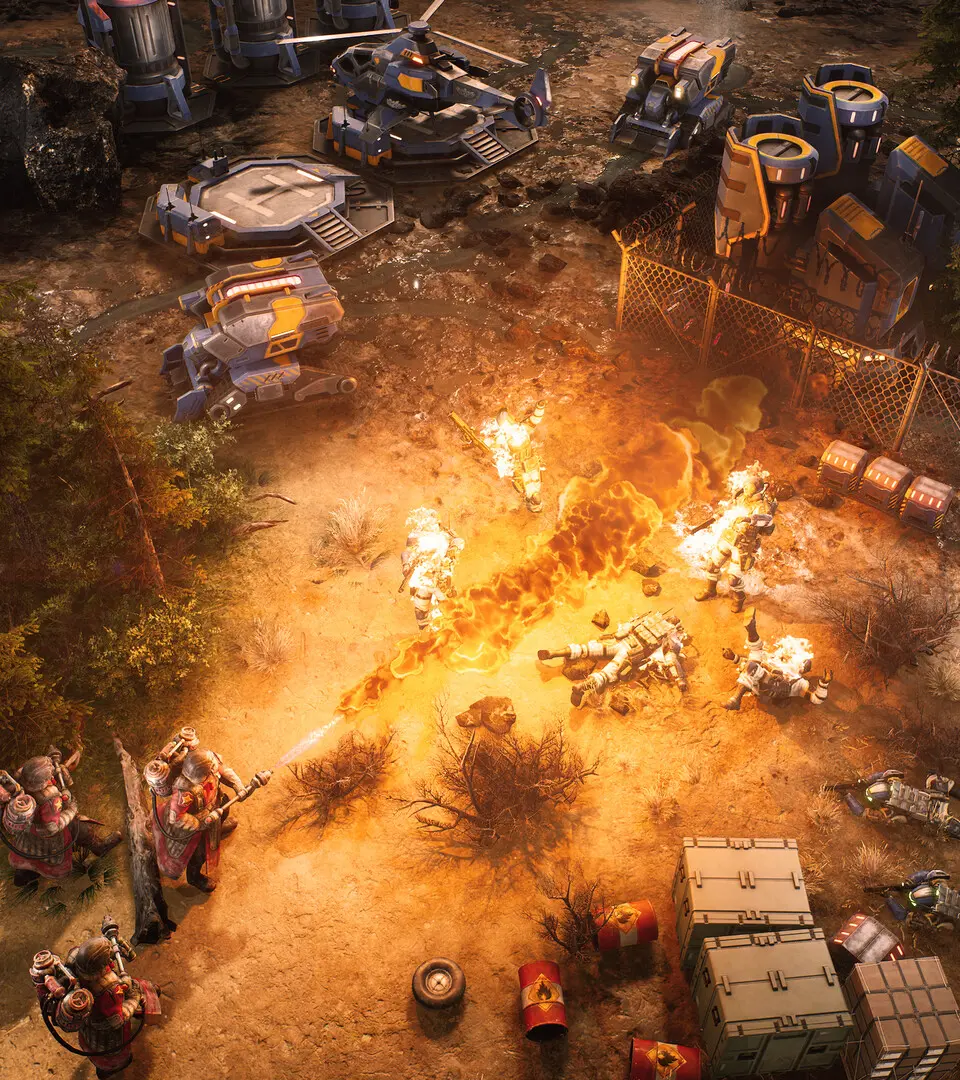
Engaging GDF Resistance
The GDF will not surrender the Tempest Field without a fight. Prepare for a multi-layered defense, potentially including light vehicles and defensive structures.
Dealing with Infantry
Your Thralls, despite their seemingly primitive nature, are highly effective against GDF infantry due to their sheer numbers and rapid attack rate. Utilize the following tactics:
- Numerical Superiority: Engage GDF Riflemen head-on. Your Thralls' ability to swarm and overwhelm individual targets is a key advantage.
- Flanking Maneuvers: If the terrain allows, attempt to flank GDF positions to minimize incoming fire and maximize your damage output.
- Focus Fire: Designate specific GDF squads as targets for all your Thralls to quickly eliminate threats. Avoid spreading your damage too thin.
Neutralizing Light Vehicles
A significant threat you will likely encounter is the GDF Scorpion Buggy. These fast-moving, lightly armored vehicles can inflict considerable damage on your Thrall squads if left unchecked.
- Prioritize the Threat: As soon as a Scorpion Buggy is sighted, immediately designate it as the primary target for all your Thrall squads.
- Swarm Tactics: Thralls, while not anti-vehicle specialists, can collectively bring down a Scorpion Buggy through sustained fire. Their sheer numbers compensate for individual unit weakness.
- Avoid Open Ground: If possible, try to engage Scorpion Buggies in areas with some cover or choke points to limit their mobility and allow your Thralls to close the distance.
Sustaining Your Forces: The Tempest Nexus
The Tempest Dynasty's unique healing mechanic is crucial for prolonged engagements. Unlike other factions, Dynasty units, particularly Thralls, regenerate health slowly when out of combat. However, the Tempest Nexus provides a vital rapid healing capability.
- Strategic Retreat: If your Thrall squads take heavy damage during an engagement, do not hesitate to retreat them to the vicinity of your Tempest Nexus.
- Rapid Regeneration: While near a Tempest Nexus, your damaged units will regenerate health at a significantly faster rate, allowing them to quickly re-enter the fray.
- Nexus Placement: Ensure your initial Tempest Nexus is well-defended and strategically placed to cover your forward operating areas, facilitating quick retreats and reinforcements.
Securing the Tempest Field
Once all GDF resistance in the immediate vicinity of the Tempest Field has been eliminated, the objective will update, prompting you to consolidate your control.
- Eliminate All Threats: Double-check the area for any lingering GDF infantry or vehicles. The objective will not complete until the field is entirely clear.
- Deploy Tempest Harvester: The final step is to deploy a new Tempest Harvester directly onto the newly secured Tempest Field. This unit will automatically begin extracting Tempest, significantly boosting your resource income.
- Resource Management: Ensure you have sufficient Tempest resources available to construct the new Harvester. If not, wait for your existing Harvesters to generate enough income or consider constructing additional Thralls to gather loose Tempest crystals if available.
Common Pitfalls and Strategy Tips
- Underestimating GDF: Do not assume GDF Riflemen are harmless. In large groups or with proper cover, they can inflict significant casualties on your Thralls.
- Ignoring Vehicles: Scorpion Buggies are a priority threat. Failing to focus fire on them will result in heavy losses.
- Neglecting Healing: While Thralls are cheap, constantly replacing them is inefficient. Utilize your Tempest Nexus for healing to preserve your forces and resources.
- Overextending: Avoid pushing too far ahead of your main force or your Tempest Nexus. This can leave your units isolated and vulnerable.
- Scouting: Use a single Thrall to scout ahead cautiously, revealing enemy positions before committing your main force.
By successfully securing this Tempest Field, you will have not only expanded your economic base but also demonstrated your ability to overcome GDF opposition, paving the way for further Tempest Dynasty dominance.