Explorer's Crypt
Welcome, hero, to the Explorer's Crypt, the eighth and penultimate dungeon in The Legend of Zelda: Oracle of Seasons. Located deep within the treacherous Sword & Shield Maze, this dungeon is a true test of your accumulated skills, requiring mastery of season manipulation, precise item usage, and strategic combat. While it is the eighth dungeon, it is crucial to remember that it is not the final dungeon before the ultimate confrontation with Onox; that honor belongs to Onox's Castle itself. Your primary objective within the Explorer's Crypt is to obtain the mighty Power Glove, an essential tool for moving heavy blocks and progressing through the dungeon's many obstacles.
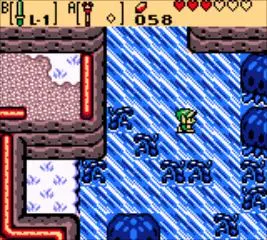
This crypt is a labyrinth of interconnected rooms, often requiring you to revisit areas after acquiring new items or changing seasons. Be prepared for a gauntlet of challenging puzzles, formidable foes, and the ever-present threat of traps as you seek the Burning Flame.
Key Items & Rewards
- Dungeon Map: Reveals the intricate layout of the Explorer's Crypt.
- Compass: Shows the location of the boss and any hidden Small Keys.
- Small Keys: Used to unlock various locked doors within the dungeon.
- Boss Key: Unlocks the formidable door to the final boss chamber.
- Power Glove: The main dungeon item, allowing Link to lift heavy blocks.
- Heart Container: Increases your maximum health by one heart.
- Burning Flame: The eighth Essence of Nature, crucial for progressing the story.
Walkthrough: Navigating the Explorer's Crypt
Upon entering the Explorer's Crypt, you'll find yourself in a large, central chamber. Your first priority should be to explore the surrounding rooms to gather the Dungeon Map and Compass, which will greatly assist your navigation.
- Entrance and Initial Exploration (B1F):
- From the entrance, head north into a room with a large block puzzle. You won't be able to solve this yet.
- Go east from the block puzzle room. Defeat the Hardhat Beetles by pushing them into the pits with your shield. Continue east to find a staircase leading down.
- Lower Levels and Map Acquisition (B2F):
- On B2F, head west. You'll encounter Ropes and Gels. Defeat them and continue west.
- In the next room, clear out the enemies and push the block to access the chest containing the Dungeon Map.
- Return east, then head south. You'll find a room with a Spark and a Blade Trap. Navigate carefully and take the staircase down to B3F.
- Compass and Small Key (B3F):
- On B3F, head north. You'll find a room with a Stalfos and a Keese. Defeat them and proceed north.
- In the next room, you'll see a chest on a raised platform. Use your Roc's Feather to jump across the gap and open the chest to obtain the Compass.
- From the Compass room, head east. You'll find a room with a few Ghini. Defeat them to make a Small Key appear. Collect it.
- Return west, then south twice to get back to the staircase leading up to B2F.
- Unlocking Paths and Mini-Boss (B2F):
- Back on B2F, use the Small Key to unlock the door to the north.
- This path leads to the mini-boss chamber.
Mini-Boss: Blue Stalfos
The mini-boss of the Explorer's Crypt is the formidable Blue Stalfos. This skeletal warrior is more agile and resilient than its regular counterparts, wielding a sword and shield that make direct frontal attacks difficult.
- Strategy: The Blue Stalfos will often jump around the room, making it hard to pin down. Wait for it to land, then quickly dash around its back using your Roc's Feather or Pegasus Seeds. Once behind it, unleash a flurry of sword attacks. Be careful of its wide sword swings; they have a decent reach and can knock you back. If you have Scent Seeds, you can try to stun it with your Slingshot before moving in for an attack, but melee is generally more effective. Repeat this process until it is defeated.
- Reward: Defeating the Blue Stalfos will typically open a portal back to the dungeon entrance and grant you access to the next section of the dungeon, often revealing a chest with a Small Key or opening a previously locked door.
Acquiring the Power Glove (B2F & B1F)
- Post-Mini-Boss Progression (B2F):
- After defeating the Blue Stalfos, head north. You'll find a room with a large block. You can't move this yet.
- Go east from here. You'll find a room with a Pols Voice. Defeat it (use the Recorder or bombs) and continue east.
- In this room, you'll see a series of blocks. Push the central block north to reveal a staircase leading down to B3F.
- The Power Glove Chamber (B3F):
- On B3F, you'll be in a room with several heavy blocks. This is where the Power Glove awaits!
- Navigate the blocks to reach the chest in the center. You'll need to push and pull some of them. Once you reach it, open the chest to claim the Power Glove. This item allows Link to lift and throw heavy blocks that were previously immovable.
- Now that you have the Power Glove, you can return to previous areas to move blocks that were blocking your path.
- Returning to B1F with Power Glove:
- Go back up the stairs to B2F. Head west twice, then south, and finally west again to reach the staircase leading up to B1F.
- On B1F, you're back in the room with the large block puzzle near the entrance. Use your new Power Glove to lift and move the heavy blocks, clearing a path to the north.
Season Puzzles and Boss Key (B1F & B2F)
- Navigating Season Puzzles (B1F):
- After moving the blocks, head north. You'll enter a room with a Season Tile. Change the season to Winter.
- With Winter active, head east. The water in this room will now be frozen, allowing you to walk across it.
- Continue east. You'll find a room with a Darknut. Defeat it and push the block to reveal a staircase leading down.
- Boss Key Acquisition (B2F):
- On B2F, you'll be in a room with a series of moving platforms and Goriyas. Navigate carefully.
- Head north. You'll find a room with a large pit and a single block. Use your Power Glove to lift and throw the block across the pit, creating a stepping stone.
- Jump across and proceed north. You'll find the chest containing the Boss Key. Collect it!
- Now that you have the Boss Key, you need to make your way to the boss chamber.
- Reaching the Boss Chamber (B2F & B1F):
- From the Boss Key room, head south twice.
- Go west, then south again. You'll be in a room with a Season Tile. Change the season to Summer.
- Head west. The water will now be dried up. Continue west to find a staircase leading up to B1F.
- On B1F, you'll be in a room with a large block. Use your Power Glove to lift it, revealing a hidden passage or staircase.
- Follow this path, which will lead you directly to the large boss door. Use your Boss Key to unlock it.
Final Boss: Manhandla
The final boss of the Explorer's Crypt is the monstrous, multi-mouthed plant, Manhandla. This formidable foe is a recurring boss in the Zelda series, and its appearance here is no less challenging. Manhandla is a large, central mouth surrounded by four smaller mouths, each with an eye.
- Preparation: Ensure your health is full, and you have a good supply of bombs. The Power Glove is not directly used in this fight, but the Bombs are your primary weapon. Equip your Sword and Bombs.
- Strategy: Manhandla will move around the arena, attempting to corner Link. Its main weak points are the eyes in its mouths.
- Phase 1: Attacking the Small Mouths: Manhandla will open its four smaller mouths, revealing eyes. Your goal is to destroy these eyes. The most effective way is to use Bombs. Place a bomb in the path of one of the open mouths. When the bomb explodes, it will damage the eye. You can also try to hit them with your sword if they get close enough, but bombs are safer and more efficient.
- Phase 2: The Central Mouth: After all four smaller mouths are destroyed, Manhandla's large central mouth will open, revealing its main eye. This is your window of opportunity for significant damage.
- Final Blow: Continuously throw Bombs into the central mouth when it's open. Be quick, as it won't stay open for long. If you run out of bombs, you can try to hit it with your sword, but it's much riskier. Repeat this process until Manhandla is defeated.
- Common Pitfalls: Manhandla moves quickly, so anticipate its movements when placing bombs. Avoid direct contact with its mouths, as they deal damage. Keep moving to avoid being trapped.
- Reward: Upon defeating Manhandla, you will be rewarded with a precious Heart Container, permanently increasing your maximum health. Step into the warp portal that appears to claim the Burning Flame, the eighth Essence of Nature.
With the Burning Flame in hand, you have collected all eight Essences of Nature. This marks a significant milestone in your quest to save Holodrum. Your adventure is now poised for its climax. You are ready to face Onox in his formidable castle and bring peace back to the land!