
Navigating The Moon & Key Items: Dungeon 2 - The Moon
Welcome, brave adventurer, to Dungeon 2, often referred to as "The Moon"! This dungeon introduces new challenges and rewards you with essential tools for your journey across Hyrule. Prepare to face cunning enemies like Darknuts and the elusive Wallmasters, and master the art of strategic movement. Our comprehensive guide will lead you through every twist and turn, ensuring you acquire all key items and emerge victorious against the dungeon's formidable guardian.
Dungeon 2 Walkthrough: Acquiring the Boomerang and Beyond
Your quest in Dungeon 2 begins the moment you step inside. Follow these precise instructions to navigate its treacherous corridors and secure vital equipment:
- Initial Entry & First Key:
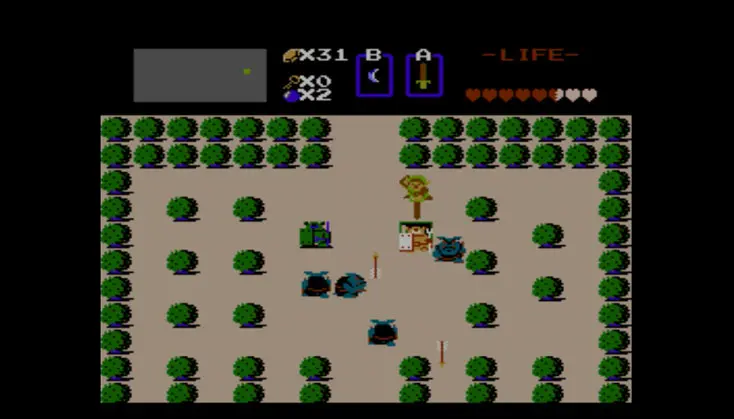
- Upon entering Dungeon 2, immediately head right.
- In this room, you will encounter several Stalfos. Defeat them to clear the path.
- A Key will drop from one of the defeated enemies or be found in the room. Collect it.
- Encountering Darknuts & Reaching the Boomerang:
- Continue heading right from the previous room.
- This chamber is guarded by Darknuts. These armored foes are impervious to frontal attacks. Remember: you can only damage them from behind. Use careful positioning and movement to maneuver around them and strike their vulnerable backs.
- After successfully defeating all Darknuts, proceed north through the doorway.
- Key Item Acquired: The Boomerang! In this room, you will discover the invaluable Boomerang. This versatile utility item is crucial for stunning most enemies, allowing you to bypass them or land easy hits. It's also perfect for retrieving items (like Keys or Rupees) from a distance, over pits, or across water. Master its use, as it will be indispensable throughout your adventure.
- Mapping Your Path & Finding the Compass:
- From the Boomerang room, head south.
- Then, turn left.
- Proceed north through the locked door (using the Key you acquired earlier).
- In this room, you'll face more Darknuts. Defeat them to secure another Key.
- Head left from this room.
- Key Item Acquired: The Map! Here, you will find the Map for Dungeon 2, revealing the layout of its chambers.
- From the Map room, head right.
- Then, proceed north.
- This room presents a dual threat: Darknuts and Wallmasters. Be extremely cautious of Wallmasters; these disembodied hands will drop from the ceiling. If a Wallmaster grabs Link, you will be instantly transported back to the dungeon entrance, losing any progress made since your last entry. Prioritize defeating them quickly or avoiding their grasp.
- After clearing the room of threats, head right.
- Key Item Acquired: The Compass! In this room, you will locate the Compass, which indicates the location of the Triforce Shard (or dungeon boss) on your map.
Confronting the Guardian: Dodongo
With the Map, Compass, and Boomerang in hand, you are now fully equipped to challenge Dungeon 2's boss. The path to the boss is clear:
- Path to the Boss Chamber:
- From the Compass room, head left.
- Then, go south.
- Turn left again.
- Finally, proceed north through the last locked door (using your remaining Key).
- You have arrived at the lair of Dodongo!
- Boss Strategy: Dodongo
- Dodongo is a large, dinosaur-like creature that patrols its chamber. Its primary weakness lies within its stomach.
- Recommended Loadout: Ensure you have a good supply of Bombs.
- Strategy:
- Wait for Dodongo to open its mouth. This is your window of opportunity!
- Quickly place a Bomb directly in front of its open mouth.
- If timed correctly, Dodongo will ingest the Bomb.
- The Bomb will explode inside, causing significant damage and temporarily stunning Dodongo.
- While stunned, Dodongo will be vulnerable to sword attacks. Rush in and strike it repeatedly with your sword.
- Repeat this process 2-3 times (depending on your sword upgrade) until Dodongo is defeated.
- Common Pitfalls: Avoid getting too close to Dodongo when its mouth is closed, as it can charge and inflict damage. Be patient and wait for the precise moment to deploy your Bombs.
Key Items Acquired in Dungeon 2: The Moon
Congratulations on conquering Dungeon 2! Here's a summary of the vital items you've added to your inventory:
- Boomerang: Essential for stunning enemies, retrieving items, and solving certain puzzles.
- Dungeon Map: Reveals the complete layout of Dungeon 2.
- Dungeon Compass: Pinpoints the location of the Triforce Shard (or boss) within the dungeon.
- Triforce Shard: The ultimate reward for defeating Dodongo, bringing you closer to restoring peace to Hyrule.
With these new tools and a Triforce Shard in hand, you are well-prepared for the challenges that lie ahead in your quest to defeat Ganon!