
Collect First Missiles
Congratulations, Space Hunter! With the Morph Ball in your arsenal, a new world of exploration opens up. Your immediate priority should be to acquire Missile Tanks. Missiles are not just for combat; they are crucial for progression, allowing you to open red doors that block your path and providing the necessary firepower to overcome stronger enemies and bosses.
While the fundamental purpose of Missile Tanks remains consistent across both the NES and Game Boy Advance versions of Metroid, there are critical differences in how they augment your capacity. Understanding these distinctions is vital for effective resource management.
Missile Capacity Breakdown
The number of missiles gained per tank varies significantly between the NES and GBA versions:
- NES Metroid: Each Missile Tank collected adds 4 missiles to your total capacity.
- Metroid: Zero Mission (GBA): Each Missile Tank collected adds 5 missiles to your total capacity.
This guide will focus on the initial acquisition of Missile Tanks, providing specific, actionable steps for both platforms where applicable, with a clear emphasis on the NES version's unique mechanics.
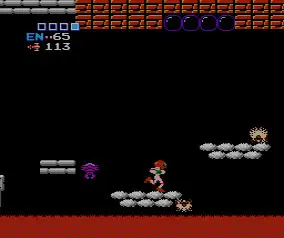
NES Metroid: First Missile Tank Acquisition (Brinstar)
Your journey to expand your arsenal begins in Brinstar. After obtaining the Morph Ball, you'll want to retrace your steps slightly and then venture into new areas made accessible by your new ability. This first Missile Tank is relatively straightforward to acquire and will significantly boost your early-game combat potential.
- From the Morph Ball Statue: Assuming you've just collected the Morph Ball, head directly right from the statue's location.
- Navigate the Vertical Shaft: You will enter a room with a vertical shaft. Ascend this shaft. Be wary of the Zoomers and Rippers that patrol these areas. A well-timed shot or a quick Morph Ball dodge can save you valuable energy.
- Proceed Left: At the top of the vertical shaft, head left through the doorway.
- Traverse the Horizontal Rooms: You'll move through a series of horizontal rooms. Continue pressing left. You may encounter more enemies like Skrees dropping from the ceiling. Keep your Power Beam charged for a quick dispatch.
- Locate the Alcove: Eventually, you will reach a room with a small, elevated alcove. Use your jump or Morph Ball to access this alcove.
- Collect the Missile Tank: Inside this alcove, you will find your very first Missile Tank. Approach it to collect it.
Upon collection, your missile capacity will increase by 4. This is a crucial upgrade, allowing you to open your first red doors and deal significant damage to tougher enemies.
Metroid: Zero Mission (GBA) - Early Missile Tank (Brinstar)
For players on the Game Boy Advance, the initial acquisition of missiles is similarly important, though the exact locations and capacity increase differ. Here's a common early Missile Tank location in Metroid: Zero Mission:
- From the Crateria Landing Site: After landing and proceeding into Brinstar, you'll generally head right.
- Through the First Major Room: Navigate through the initial large Brinstar chamber, often involving some platforming and dealing with Zebesians.
- Locate the Hidden Passage: In one of the early horizontal rooms, look for a section of the floor or ceiling that appears destructible. Often, a single shot will reveal a hidden path.
- Morph Ball Access: Use your Morph Ball to roll through this newly opened passage.
- Collect the Missile Tank: The passage will lead you directly to a Missile Tank.
Collecting this tank in Zero Mission will add 5 missiles to your capacity, providing a strong early boost to your firepower.
Why Missiles are Essential
- Red Doors: These iconic barriers require 5 missiles to open. They are often found blocking critical paths to new areas, upgrades, or boss chambers. Conserve your missiles for these doors if you're low!
- Boss Fights: Most bosses in both NES Metroid and Zero Mission are highly resistant to your standard Power Beam. Missiles are your primary source of damage against these formidable foes. Learning their patterns and knowing when to unleash a volley of missiles is key to victory.
- Tougher Enemies: Certain mini-bosses or elite enemies, such as the Ridley or Kraid clones found in various areas, can be dispatched much faster with missiles, saving you energy and time.
- Environmental Destruction: In some rare cases, missiles can be used to destroy specific environmental blocks that are impervious to the Power Beam, revealing hidden paths or items.
Common Pitfalls & Tips
- NES Missile Conservation: In NES Metroid, with only 4 missiles per tank, careful management is paramount. Don't waste them on common enemies unless absolutely necessary. Prioritize opening red doors and saving them for bosses.
- Zero Mission Abundance: While Zero Mission gives you 5 missiles per tank, the game also features more frequent and powerful enemies. It's still wise to conserve, but you might find yourself with a slightly larger buffer.
- Missable Tanks: Some Missile Tanks are hidden behind destructible blocks or in obscure passages. Always be on the lookout for suspicious walls or floors. Firing a shot at every block can sometimes reveal secrets.
- Farming Missiles: If you find yourself low on missiles before a critical encounter, you can often "farm" them by defeating certain enemies that drop missile refills. Look for areas with respawning enemies that are easy to defeat.
Collecting your first Missile Tank is a significant milestone. It empowers Samus with the tools necessary to overcome the challenges of Zebes and delve deeper into its mysteries. Continue to explore diligently, and you'll uncover many more of these vital upgrades!