Understand the SUPERVIVE User Interface (UI). Master the main HUD and its elements for efficient gameplay, resource management, and strategic decisions.
Mastering the User Interface in SUPERVIVE is crucial for efficient gameplay, resource management, and strategic decision-making. This detailed guide will walk you through every essential element of the UI, ensuring you can navigate the game with confidence and precision.
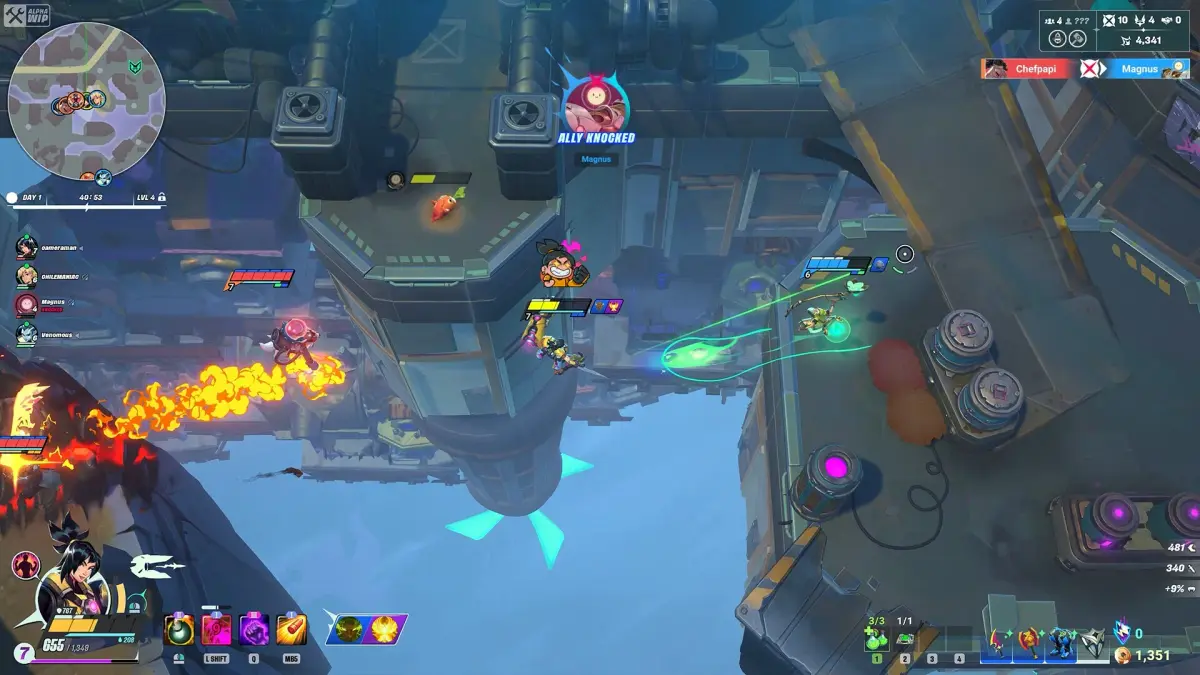
The Main HUD (Heads-Up Display)
Your primary source of real-time information during combat and exploration. Understanding each component is vital for survival.
- Health Bar (Top-Left Corner): Displays your current health points (HP). A red bar indicates damage taken. Keep an eye on this! If it reaches zero, you're down.
- Stamina Bar (Below Health Bar): A yellow bar representing your stamina. Depletes with actions like sprinting, dodging, and heavy attacks. Regenerates over time. Manage it wisely to avoid being caught defenseless.
- Ability Cooldowns (Bottom-Center): Icons representing your equipped abilities. A glowing icon means the ability is ready. A greyed-out icon with a timer indicates it's on cooldown. Prioritize learning the cooldowns of your most impactful skills.
- Weapon Equipped (Bottom-Right Corner): Shows the icon and name of your currently active weapon. Press
[Weapon Swap Key - Default: Q]to cycle through your equipped weapons. - Mini-Map (Top-Right Corner): A small, circular map displaying your immediate surroundings, objectives, and enemy locations (if detected).
- Player Icon: A white arrow indicating your current position and facing direction.
- Objective Markers: Yellow diamonds for main objectives, blue circles for side quests.
- Enemy Indicators: Red dots for detected hostiles. Be aware that not all enemies appear on the mini-map until engaged or within close proximity.
- Resource Counter (Below Mini-Map): Displays your current count of essential resources like
Scrap Metal,Energy Cells, andData Fragments. These are crucial for crafting and upgrades.
The Inventory Screen
Accessed by pressing [Inventory Key - Default: I]. This is where you manage all your collected items, gear, and resources.
- Equipment Slots (Left Panel):
- Head: Helmet, Visor
- Chest: Armor Plating, Exoskeleton
- Arms: Gauntlets, Arm Guards
- Legs: Leggings, Greaves
- Weapon 1: Primary Weapon Slot (e.g.,
Plasma Rifle,Kinetic Blade) - Weapon 2: Secondary Weapon Slot (e.g.,
Energy Pistol,Combat Axe) - Utility Slot: Gadgets like
EMP Grenade,Healing Injector
To equip an item, select it from your inventory (right panel) and drag it to the corresponding slot, or simply double-click it. Compare stats carefully before equipping new gear.
- Inventory Grid (Right Panel): A grid displaying all your unequipped items. Items are categorized for easier navigation:
- Weapons: All firearms, melee weapons, and explosives.
- Armor: All protective gear.
- Consumables: Items like
Health Packs,Stamina Boosters,Antidotes. Use these directly from the inventory or assign them to quick-slots. - Crafting Materials: Raw resources such as
Circuit Boards,Synthetic Fibers,Rare Earth Elements. - Quest Items: Unique items required for specific missions.
- Item Details Panel (Bottom-Center): When an item is selected, this panel displays its name, description, stats (damage, defense, weight, etc.), and any special properties. Pay close attention to the
Durabilitystat for weapons and armor.
The Crafting & Upgrade Station
Found at various safe zones and your main base. Interact with the station by pressing [Interact Key - Default: E].
- Crafting Tab:
- Weapon Crafting: Select a blueprint (e.g.,
Assault Rifle Mk. II Blueprint) and view the required materials. If you have them, click "Craft" to create the item. - Armor Crafting: Similar to weapon crafting, but for protective gear.
- Consumable Crafting: Create essential supplies like
Advanced Health PacksorEMP Charges.
- Weapon Crafting: Select a blueprint (e.g.,
- Upgrade Tab:
- Weapon Upgrades: Select an equipped weapon. You can enhance its damage, accuracy, or fire rate using specific upgrade modules (e.g.,
Precision Scope,High-Capacity Magazine) and resources. - Armor Upgrades: Improve defense, elemental resistance, or add utility slots to your armor pieces.
- Module Installation: Some items have module slots. Drag and drop compatible modules (e.g.,
Kinetic Dampener,Energy Shield Generator) into these slots to customize their functionality.
- Weapon Upgrades: Select an equipped weapon. You can enhance its damage, accuracy, or fire rate using specific upgrade modules (e.g.,
The Mission Log
Accessed via the main menu or by pressing [Mission Log Key - Default: J]. Keeps track of your progress and objectives.
- Active Missions: Lists all currently accepted main and side quests. Select a mission to view its detailed description, objectives, and rewards.
- Completed Missions: A record of all missions you've successfully finished. Useful for reviewing lore or checking past rewards.
- Lore & Databanks: Unlocks as you progress through the story or discover hidden items. Contains information about the world, characters, and factions of SUPERVIVE. Essential for those who want to dive deep into the game's narrative.
The Options Menu
Accessible from the main menu or by pressing [Escape Key] during gameplay. Allows you to customize your experience.
- Video Settings: Adjust resolution, graphics quality, V-Sync, and other visual parameters to optimize performance or fidelity.
- Audio Settings: Control master volume, music, sound effects, and voice acting levels.
- Controls: Rebind key assignments for movement, combat, and UI navigation. You can also adjust mouse sensitivity here.
- Gameplay: Toggle various gameplay assists, HUD elements, or difficulty settings.
- Save/Load: Manually save your game progress or load a previous save file.
Familiarizing yourself with these UI elements will significantly enhance your SUPERVIVE experience, allowing for quicker reactions in combat and more efficient management of your resources and objectives.
100% Human-Written. AI Fact-Checked. Community Verified. Learn how AntMag verifies content