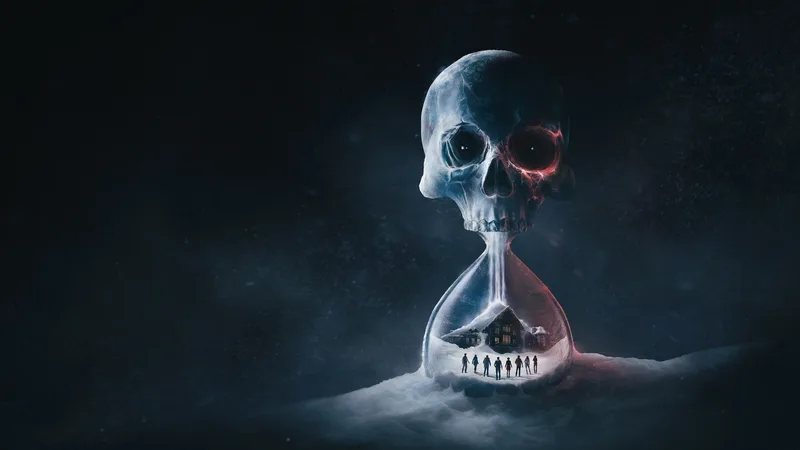
Face your deepest fears in Alone in the Dark, a chilling action-adventure experience. This extensive guide boasts 171 sections, covering everything from getting started with 12 initial sections to navigating the main walkthrough with 11 parts. Find strategies for all 8 boss fights, locate collectibles across the world, and optimize your character builds with 4 detailed sections.
Part 10
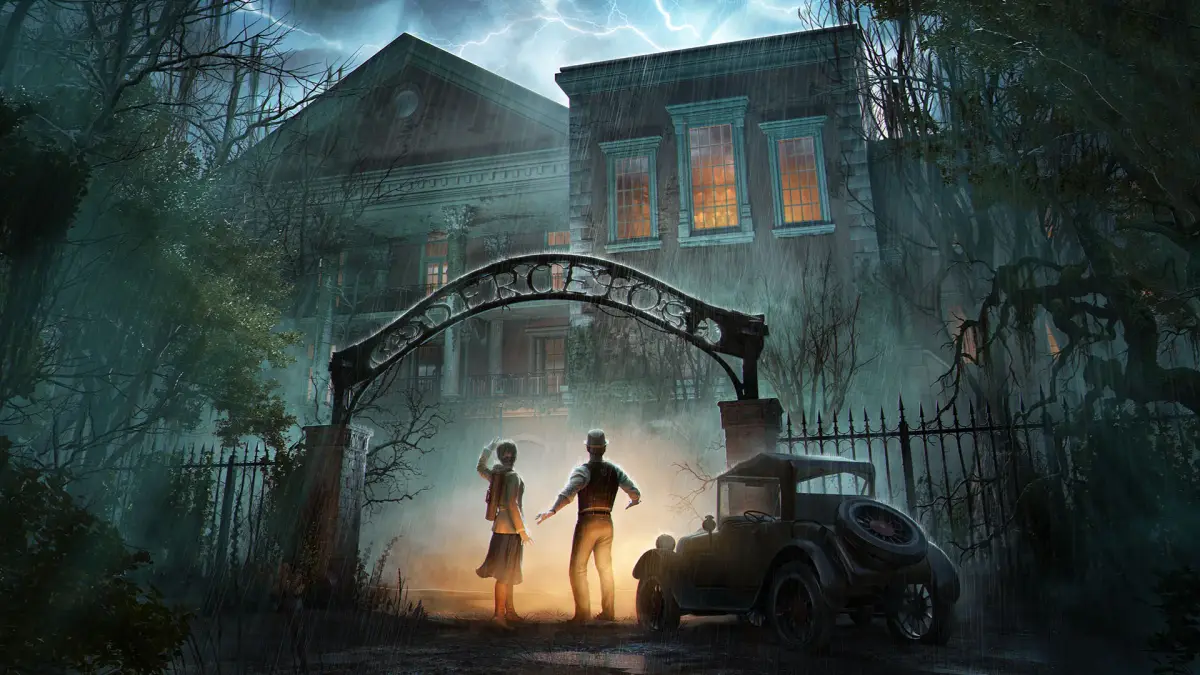
Explore Part 10 of Alone in the Dark, uncovering Jeremy Hartwood's secrets and Edward Carnby's investigation. Learn about Derceto's mysteries.
- 1As Emily, you feel compelled to go to Derceto despite your uncle Jeremy's fragile nerves and the mansion's unsettling tales. You believe he left a note, possibly in a secret drawer of the piano in the loft, explaining his decision. You oppose selling the house and are convinced your uncle was not insane, despite the police report mentioning the loft window being blocked with a wardrobe.
- 2As Edward Carnby, a private detective, you are contacted by antique dealer Gloria Allen. She hires you to visit Derceto and find a piano in the loft. She pays you $150 and gives you a key.
- 3You review a police report stating the former owner, J. Hartwood, hanged himself in the loft, ruled a suicide. You agree to provide a report in a couple of days. You have read about Derceto's history of murders, curses, and lunacy, finding devil-worship amusing.
- 4In the loft, you find Jeremy Hartwood's suicide letter stating that hellish forces have been freed and Derceto is prey to evil. He mentions his body will be found but his soul will not be taken.
- 5You find an extract from the Golden Fleece, translated by Edouard de Vielban, discussing the Medusa and the importance of using polished bronze shields to avoid being turned to stone, comparing them to mirrors.
- 6In the First Floor Bedroom, you find Jeremy Hartwood's notebook. Entries detail his dreams, visions, and research into the occult. He mentions a stone circle, a pentacle, and finding a sacrificial dagger belonging to an unholy cult. He notes his father's research and his own deteriorating sanity due to his visions.
- Pay close attention to Jeremy Hartwood's notebook entries for clues about the occult and his state of mind.
- The piano in the loft is a key element, as hinted by your uncle.
- Consider the historical and mythological references, like the Golden Fleece extract, for deeper understanding.
Part 11
Dive into Alone in the Dark's Part 11. Unravel Jeremy Hartwood's diary entries and explore mysterious texts that reveal the house's dark secrets and the true nature of the 'dark man'.
Alright, let's get into Part 11. This section is less about direct action and more about piecing together the story through Jeremy Hartwood's diary and some other fascinating texts. It's crucial for understanding what's really going on with the 'dark man' and the curse on Derceto.
Jeremy Hartwood's Diary Entries:
Jeremy's diary entries paint a grim picture. He's clearly terrified of this 'dark man' who has revealed his true, horrifying face. It's not just a haunting; it's a palpable, icy presence that freezes him in place. He's trying to fight back, drawing symbols on the floor to create barriers, but he's exhausted and his knowledge of ancient languages is holding him back.
He mentions moving to another bedroom to get better sleep, but the dark man is still a constant threat, waiting patiently. The financial strain of translating texts is also getting to him, affecting his sanity and his art, as seen by collector Thornhill's reaction.
The entries become more desperate. The dark man finds his way into his dreams, and Jeremy feels too weak to resist. Then, a major discovery: the cave his father was searching for is beneath the house, accessed through a crack in the cellar wall. This is where his father met his end, a horrific death involving a heart attack, choking on his own blood after biting off his tongue. Jeremy's exploration of these caverns, even in a dream, reveals the dark man's true motive: he seeks a body, and his servants are now free. Jeremy realizes he's the cause of this curse on Derceto and feels the end is near, leading him to make a final, desperate decision.
'A Brightness From Afar' by Lord Boleskine:
This text offers a different perspective, detailing a journey to New England in 1824. Lord Boleskine describes his arrival in a harbor and his observations of the locals, noting signs of degeneracy and peculiar hands on some children. Intrigued by a child's promise of a 'prodigious phenomenon,' he ventures into the forest.
What he witnesses is astounding: the Milky Way blazing like the fires of the Apocalypse, stars of unusual intensity, and a celestial clarity unaffected by clouds. He notes the presence of a cross casting a shadow and the sea being calm. He plans to return to sketch the stars and witness Halley's comet. Despite his sense of direction, he needs a child with torches to navigate the dark forest. He believes these drawings will enlighten men, describing the forest clearing as a place outside normal time and space, possibly linked to his research and a voyage to this village.
'Memories' by Alistair Boleskine:
This piece, printed in London in 1833, recounts Alistair Boleskine's interest in a New England fishing village known for unusual celestial phenomena. Driven by his research on space and comets, he travels there, eager to include original sketches of these phenomena in his work.
It seems these texts are meant to provide context for the supernatural events and the nature of the 'dark man,' hinting at cosmic influences and ancient evils tied to the house and its surroundings. Keep these details in mind as you progress!
Part 12
Delve into the lore of Alone in the Dark Part 12. Explore Jeremy's Bedroom and the Library's Secret Room, uncovering forbidden texts and ancient rituals.
This section of the walkthrough focuses on lore and narrative elements found within the game, primarily in Jeremy's Bedroom and the Library's Secret Room. It details various forbidden texts and their implications.
Jeremy's Bedroom: The Creatures of the Night
This text, attributed to Hubertus the Bald and translated by Fratre Johan Markus, discusses the existence of night creatures and the dangers of forbidden knowledge, referencing the accursed book of Abdul Al Azred. It warns of monsters born from night, the Deep Ones lurking in stagnant waters, and the 'vagabond' that comes from other spheres, generated by disturbing ancient texts. The passage emphasizes that evil is conjured by science and secrecy, and that those who seek to fight these creatures often perish.
Library's Secret Room: Signs and Rituals
This section, compiled by Monsignor Vachey, references 'The Book of Yael' and 'Eucharistic Rituals of Forbidden Cults.' It speaks of monstrous beings known as the Old Ones, possessing god-like powers, and how cultists attempt to summon them using forbidden literature. The text mentions Cthulhu and Shub Niggurath, and the use of 'signs of stone,' particularly 'MNAR stone,' as protection against these entities. It warns of the dangers of perversion and the need for constant vigilance against evil.
Library's Secret Room: The Sacrificial Dagger
Authored by Otto Stern, this text explores the significance of ritual sacrifice in religious practices, drawing parallels from the Old Testament and primitive polytheistic beliefs. It discusses the act of human sacrifice as a means of purification, atonement, and appeasement of gods. The text details a 'rite of steel' encountered through a sorcerer in Arkham, linked to a ceremony called 'Adoring the Black Goat of the Woods with a thousand youngs.' The 'Vagabond' is described as a frightening figure acting as a go-between for a goat-god, capable of moving between dimensions. The passage differentiates between two types of daggers: one with a sinusoidal blade, unsuitable for the ritual as it would send the Vagabond to his own dimension, and a dagger with a curved blade, appropriate for sacrificing a lamb, which transfigures the sorcerer-priest.
Part 13
Dive into Part 13 of our Alone in the Dark walkthrough. Explore the Library's secret room, uncover forbidden texts like the Necronomicon, and learn about the Derceto plantation's dark history.
Alright, we're heading into Part 13 of our Alone in the Dark journey. This section is all about delving into the mysteries hidden within the Library. We'll be looking at some seriously creepy forbidden texts and uncovering the dark history of a Louisiana plantation. Let's get started!
Walkthrough:
First up, we're investigating the LIBRARY’S SECRET ROOM. This is where we'll find some truly disturbing texts that hint at the game's deeper lore. One of the key finds here is related to Reflexions on the power of the verb. The text warns about the dangers of forbidden books, stating that their malevolent energy remains potent regardless of translation. It emphasizes that speaking spells aloud from these texts can awaken powerful, malignant forces. The author even refuses to quote directly from a specific text for fear of the consequences, mentioning that even reading certain passages can lead to hysteria or possession-like symptoms. They reference studies on exorcisms and the infamous Necronomicon by Al Azif, noting that copies exist despite efforts to destroy them, specifically mentioning archives at Miskatonic University. Other dangerous books mentioned are Von Junzt’s Von unaussprechlichen Kulten and Ludwig Prinn’s De Vermis Mysteriis.
Speaking of De Vermis Mysteriis, we get a direct quote from it. It's a chilling warning: “In nomine invocatoris, si non sanctificatus es, cave. De vermis mysteriis non absolvo follem legendum fatum et eum versus: « tibi, magnum innominandum signa stellarum nigrarum et… »”. The crucial part here is the note: (NB: You die after reading this book). So, definitely steer clear of reading that one in-game if you get the chance!
Next, we're shifting focus to the LIBRARY: Story of a Louis(i)ana plantation. This section tells the story of the Marquis of Champfrey and his family's experiences in Louisiana. After Florida was sold, his father stayed in the area. In 1818, a man named Pickford bought nearby land and began a massive undertaking: digging into a mountain to fill in a swamp and connect existing caves with a larger one. Pickford was a ruthless and secretive individual, constantly hiring and firing workers, and trying to hide his plans. The Marquis’s father suspected Pickford would get lost in his own creation. Pickford, a former sailor with a shady past, invited them to the opening of his mansion, which he named “Derceto,” linking it to Astarte and Shub-Niggurath. The Marquis’s father found the name steeped in evil and they left immediately.
The story continues: In 1862, Derceto burned down under mysterious circumstances. Servants tried to save their master, but he was bullet-riddled. The mansion fell into ruin. In 1875, the property was bought by Howard Hartwood, a learned man interested in piracy. Hartwood discovered Pickford had been a pirate and believed he had hidden treasure. Hartwood meticulously searched the ruins and rebuilt the house, renaming it Derceto. He refurbished the library, which had miraculously survived the fire, and studied its contents. Hartwood was devoted to his son, Jeremy. Despite his efforts, Hartwood found no treasure. He died before the Marquis heard the news while in Paris.
Finally, we have an entry for LIBRARY: Terra Incognita. This is noted as an unfinished chapter by Jacob Van Ostadte. That's all the information we have on this particular fragment.
- Pay close attention to the warnings about forbidden texts. Some can have dire consequences if read directly in the game.
- The history of Derceto and Pickford is rich with occult references. Keep these in mind as they might tie into puzzles or future events.
- Remember the names mentioned: Pickford, Derceto, Hartwood, Shub-Niggurath, Necronomicon, De Vermis Mysteriis. These are important lore elements.
Similar guides you might like

100% Human-Written. AI Fact-Checked. Community Verified. Learn how AntMag verifies content