Welcome to Etrian Odyssey IV: Legends of the Titan, a Nintendo 3DS RPG where you'll chart the unknown depths of the Labyrinth and battle formidable foes. As a member of the Explorer's Guild, you'll create your own party, map out treacherous floors, and uncover the secrets of the world tree.
This guide will help you conquer the challenges ahead, from navigating the dense forests of the first stratum to defeating the formidable bosses that guard the path to the Titan. We'll cover everything you need to know to achieve Gold Medals on every FOE and boss, find all the hidden treasures, and unlock the game's multiple endings.
Part 1
Guide and Walkthrough for Etrian Odyssey IV: Legends of the Titan, covering Part 1 including controls, the Windy Plains, and the Old Forest Mine.
- 1Register at the guild and create at least one explorer (a full party of 5 is recommended).
- 2Go to the court and talk to the Count.
- 3Accept the first mission from the Count.
- 4Enter the first minor dungeon, Old Forest Mine.
- 5Old Forest Mine:
- Monsters: Grasseater, Roller.
- 6FOE: Nomad Baboon.
- 7Materials: Slate, Iridescent Ore.
- 8Treasure: Medica A-3.
- 9Avoid or run from the Nomad Baboons (FOE's) in the mine; they patrol a set route and can be avoided by observing their patterns.
- 10Be aware that FOE's can attack during random encounters or if you attempt to gather when they are nearby.
- 11Optional Quest: A man named Whirlwind offers to check your map. To complete this, fill in all floor tiles and pencil in all walls on your map. Show Whirlwind your completed map before reporting back to the Count.
- 12Main Objective: Obtain ore from the mining point (glowing spot) at A-2. This ore is rare and may require multiple attempts. Rest at the inn for 1 day to resupply the mining spot.
- 13Once you have at least one piece of ore, return to the Count and report your success.
- 14With your new Skyship, you can now explore the surrounding outdoors.
- 15Optional Dungeons: Fly west of the Lush Woodlands to find the Small Orchard. Drop plant-type food to distract FOE's guarding the northwest minor dungeon, Valley Spring.
- 16Story Progression: To proceed, begin exploring the Lush Woodlands major dungeon.
- A good starting party composition is Fortress, Landsknect, Dancer, Medic, Runemaster (F,L,D,M,R). This party is suitable for the main story but not optimal for post-game content.
- To level up quickly, complete the Scarlet Pillars request "Small flowers needed!" to obtain the Holy Gift burst skill, which boosts experience gain. Use Holy Gift when fighting rare-breed FOE's.
- Rare-breed enemies can appear by chance, similar to random encounter enemies. Cooking certain foods can increase the likelihood of rare-breed enemies appearing. You can also feed specific food to an outdoor FOE to make it a rare-breed (e.g., feeding Gold Stinkhorns to sheep in Scarlet Pillars). Different FOE's require different foods.
- Gathering spots (Take/Chop/Mine) replenish after 1 day of rest at the inn.
- FOE's typically revive after 7 days, with some reviving after only 1 day.
- Shortcuts are hidden passages in walls, often indicated by colored flowers.
- Minor Dungeons are small, single-floor dungeons, some required for the story, others optional.
- Major Dungeons are large, 3-floor dungeons essential for story progression.
- Successful completion of the first mission and delivery of ore leads to obtaining a Skyship, enabling further exploration.
- Completing the "Small flowers needed!" request grants the Holy Gift burst skill.
Part 2
Navigate Part 2 of Etrian Odyssey IV: Legends of the Titan, covering Lush Woodlands, Scarlet Pillars, and Miasma Forest, including boss strategies.
Valley Spring
Monsters: Deathstalker, Mandrake, Big Roller, Angry Baboon. FOE (Field Other Enemy): FuryHorn. Materials: Supple Branch, Guaiacum Wood. Treasure: Solid Moccasins C-1, Pelta B-2, Old Breastplate B-2.
The shortcut at C-2 will enable you to get past the river blocking your path. The Furyhorn only patrols a small corridor and is easily avoided. The Old Breastplate inside the locked chest is obtained as part of a pub request, Treasure on my mind.
Lush Woodlands
F1
Monsters: same as the minor dungeons. FOE: Cutter. Materials: Forest Aloe, Small Flower. Treasure: Main Gauche.
Many of the passages in this dungeon are blocked by tree branches. To remove the branches you must lure the Cutter bear FOE's in front of the branches and they will destroy them permanently, the first Cutter is at B-3. The Cutters will chase you, but you can lose them by going through a door or shortcut.
You can get useful items from the box at C-5. Leave a thread in the box and then check the box after 1 day. Sometimes you get a Nectar or Therica, sometimes you get nothing. However, the best result is getting the TP (Technique Points) restoring Amrita. You can slowly farm Amritas by using the box.
A secret passage at B-4 leads to a treasure box, Main Gauche, and a take point which you need to complete the pub request Culantro, please. The stairs to F2 are at D-6.
F2
Monsters: Ghost Owl, at night. FOE: Cutter. Materials: Sturdy Timber, Teak Wood. Treasure: Aim Hammer B-2, Macana B-4, Arm Hammer E-2.
Once you reach the second floor you will need to return to town to get a new mission from the Count. After accepting the mission you can finish exploring F2.
F2 is filled with even more of the same Cutter FOE's from F1. Many of them are waiting in alcoves, which you can avoid by walking behind.
The stairs to F3 are blocked by the Bloodbear at C-2.
Bloodbear (Mini-Boss)
The Game's first mini-boss, uses a bunch of physical attacks and a powerful charging-up move. Useful skills in this fight are L, power-break, N, Sand-throw, S, Arm-bind, D, Attack and Guard Tango. Save your burst skills until it starts charging-up and then use double slash along with lots of other attacks to make the bear flinch, canceling his attack. The bear flees down the stairs after getting low on health. Go back to town to rest and then proceed to F3.
F3
Monsters: Fanged Vine, Jig Lizard. FOE: Bloodbear. Materials: Granite, Cyanite. Treasure: Critical Hammer E-2, Hamao II E-2, Amrita D-3.
Upon entering F3 you must fight the Bloodbear again and defeat it; it will use all the same attacks but will only have half its health. F3 is filled with other Bloodbears who act like normal FOE's. Like the Cutters, the Bloodbears will chase you and destroy any branches you lead them to. You can lose the Bloodbears by going through a door or shortcut. A secret passage at F2 has two treasure boxes inside. You can get the Critical Hammer now, but you won't get the key to the locked chest until near the end of the game.
Your goal on F3 is to reach the center of the map, D-4, where the boss waits. After reaching the boss chamber explore the east side of the room to find shortcuts. The shortcuts will enable you to sneak behind the boss and avoid the other FOE's.
Berserker King (Boss)
Level recommendation 15-20. The first major boss of the game, similar to the Blood Bear but has a lot more health. Like the Blood Bear this boss also has a powerful charging-up attack that you can block with double slash and a lot of hits. The boss has no particular weaknesses so be prepared for a long fight. After beating the boss check the altar and then report back to the Count. Fly your skyship north of the Lush Woodlands to reach the second land, the Scarlet Pillars.
=== Scarlet Pillars ===
Activate the geomatic pole and then fly north, to A-3, to find a minor dungeon, Miasma Forest, you must explore.
Miasma Forest
Monsters: Great Lynx, Forest Hare, Trip Mushroom. FOE: Greedy Lizard. Materials: Osmunda Frond, Monks Cress, Lazurite, Night Shard. Treasure: Zoologics A-1.
Due to them patrolling in a tight square the Greedy Lizard FOE's here are hard to avoid, but it is possible due to them pausing after every move. It is best to just try to beat them if you can. Their poison attacks can be countered with a D's Refresh Dance or M's Refresh LV3. The lizards are weak to ice.
Your objective in the Miasma Forest is to reach the mining point on the north side, A-2, and gather a Night Shard. The center chamber of the dungeon is filled with foul gas that forces you to go back to the last room you exited if you take 10 or more steps. First head to the south room to catch your breath. Then go back into the center chamber and move to the southeast door. From the southeast unlock the shortcut in the northeast of the center room, at A-2. Go back to the west side and use the shortcut to reach the northeast room. Get a Night Shard from the mine point at A-2 and then go back to town.
The Night Shard enables your skyship to ascend to a higher plane, making new areas available for exploring. You can access a new minor dungeon, back in the Windy Plains, the Dense Bushland at C-1. You can also now reach all dungeons in the Scarlet Pillars. The Moth's Garden at C-1 is guarded by a Dingator. To get past the Dingator, drop a mushroom type food to lure the nearby sheep 1 extra step south of its patrol zone. The Dinogator will proceed to eat the sheep, giving you time to reach the dungeon it guards. To get past the Omnihunter, guarding the northwe
Part 3
Navigate the Dense Bushland, Moth's Garden, Noisy Marsh, and Misty Ravine in Etrian Odyssey IV: Legends of the Titan. Discover materials, treasures, and defeat challenging FOEs and bosses.
This section covers the next set of dungeons and challenges in Etrian Odyssey IV: Legends of the Titan, including the Dense Bushland, Moth's Garden, Noisy Marsh, and the multi-level Misty Ravine.
Dense Bushland: Monsters include War Bison, and the FOE is Bloodbear. Materials: Small Flower. Treasures: Strength Bracers (C-1), Binoculars (C-3). This area is key for the pub request "Small flowers needed!" which requires reaching F2 of Misty Ravine and completing the "Storied book" request. Completing "Small flowers needed!" grants the Holy Gift burst skill, offering 50% extra EXP. To progress, lure the Bloodbear to break all branches; it respawns after 1 day of rest. War Bison are dangerous normal enemies; defeat them in one turn or flee.
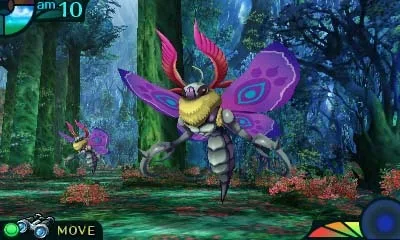
Moth's Garden: Monsters: Glutton Vine, Fire Bulb, Petaloid. FOE: Big Moth. Materials: Strong Vine, Paulownia Bark. Treasure: Flamberge (C-3). Big Moth FOEs join battles lasting over 1 turn. If the encounter detector is red, move away from moths. Attacking from behind grants a preemptive turn. Fire Bulb monsters explode, so kill them quickly or bind their heads. A locked door here is for a later pub request, "The ominous gale." To pass moths blocking the southeast corner, initiate a random battle nearby and end it on turn 2.
Noisy Marsh: Monsters: Raging Boar, Largebill. FOE: Spotted Frog. Material: Akaganeite. Treasure: Spear Tactics (B-2). Spotted Frogs move diagonally and can traverse water. They attack if you gather materials near them. Beware of crawfish in the water at B-2.
Misty Ravine:
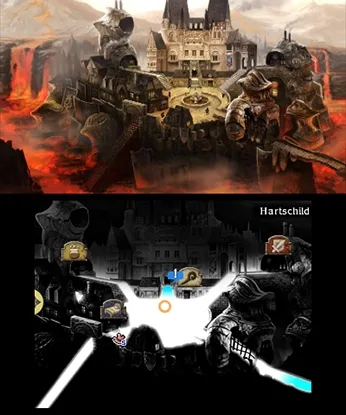
F1: Monsters: Black Claw (at night). FOE: Big Moth. Materials: Mahogany, Jet-Black Pith. Treasure: Volt Hammer (E-4). This dungeon features maze-like passages that warp you. Activate the geo pole at B-2 and go to D-5 for a story event. Big Moths only move in extended battles. At D-5, you'll fight two mini-bosses called Hollows, known for high evasion. Use S's Leg Bind, burst skills like Double Slash, or paralyzing skills like N's Nerve Throw to counter their evasion. After the battle, meet a girl in Vessel town (B-4) on the north side of F1, guided by fireflies. Unlock the shortcut at C-3. Get a mission from the Count, return with his letter, and descend to F2.
F2: Monsters: Hollow Believer. FOE: Giant Moa, Big Moth. Materials: Mint, Crane Ginseng. Treasures: Power Hammer (E-6), Leg Hammer (C-4). This floor also has looping passages. A Big Moth guards the Power Hammer at E-6; bypass it by walking west and looping around. At C-6, go east to the center, then through D-3 to the west side. Lure the Giant Moa at E-2 westwards to be warped past it. Use stairs at D-1 to reach F3.
F3: Monsters: Hollow Roamer. FOE: Giant Moa, Big Moth. Materials: Corundum, Dolomite. Treasure: Stone Hammer (D-4). Wufan can join your party here before the northeast boss. Avoid Moas by luring them to tunnel ends. Take a southern path at E-3. The boss is at A-2. Equip the Black Mist burst skill before the fight.
Boss: Hollow Queen (Recommended Level 25-35). She summons guards; kill them to bring the Queen forward. Binding legs (Sniper, Wufan's snare circle) reduces evasion to 0. Binding heads blocks attacks. N's Shadow Bite deals high damage after an ailment. Inflict ailments using N's throw skills or Wufan's poison circle. Black Mist burst skill extends the duration of ailments and binds.
After defeating the Hollow Queen, you obtain the second slate. Report to the Count in town. Fly your skyship north of Misty Ravine to reach the third land.
Sacred Mountains: Navigate by dropping into pits and flying up sides to avoid tornadoes. Cramped Nest (C-1) is accessible. Underground Lake (A-5) is guarded by an Icy Pincer (distract with Mountain Hare food). The Storm God Icon is needed for Toxic Cave (A-1), obtained in the Golden Lair. The Golden Lair has two entrances; use the east one first.
Cramped Nest: Monsters: Demon Hopper, Cave Bat, Claw Beetle. FOE: Patrol Bat. Materials: Tiger's Eye, Chalcedony. Treasure: Protection II (A-2). Patrol Bats indicate correct passages; wrong ones cause damage.
Part 4
Etrian Odyssey IV: Legends of the Titan Part 4 walkthrough covering the Underground Lake, Golden Lair, and Cloudy Stronghold dungeons.
Underground Lake
Monsters: Jumping Frog, Venomshroom. FOE: frozen Patrol Bat, Plated Chaser. Materials: Fennel, Glove Grass, Flame Fruit. Treasure: Spread Hammer B-2, Skull Crusher C-1.
You cannot finish collecting items in this dungeon until you obtain the Black Flame in the fourth land. Collect Fennel and Glove Grass from the gathering point at C-3. The Flame Fruit material and C-1 treasure become accessible after using the Black Flame to unfreeze the area.
Golden Lair
F1
Monsters: Magma Spawn, Glacier Spawn. FOE: Plated Chaser. Materials: Ice Stake, Luminous Moss, Scarlet Sage. Treasure: Red Doublet C-5, Ice Mist B-1, Amrita II D-2, 3000 D-2.
In this dungeon, small scales (respawn (be brought back to life at a checkpoint after death) after 1 day), big scales (respawn in 7 days), and ice stakes (harvested again after 1 day) are present. Use ice stakes from chop points to destroy small scales blocking your path. Materials from gather points, excluding ice stakes, vary based on whether the level is hot or cold. Look for blue hazes on the walls, which are shortcuts, to unlock at B-7, C-7, and D-4. These shortcuts ease return trips to the big scale that keeps F1 hot.
Plated Chasers are powerful FOEs but are easy to avoid due to their slow speed. Lure them to one side of a room and run around the other to evade them. Beware of their ability to slide across frozen water. If you choose to fight them, use physical attack counters, L's Power-Break, F's Strike Guard, or A's Charm Eye. They resist all three weapon types, so use fire or volt skills for effective damage.
Use an ice stake on the big scale at D-4 to freeze the water on F1. Then, take at least one ice stake from F1 and leave the dungeon via your skyship. Travel to the west/left entrance to reach F2 of the Golden Lair. Use the stairs at E-1 to access the left side of F1. With the water frozen and one ice stake, you can reach the Sentinel village at C-2. After some story events, you must fight Kibagami to proceed.
Kibagami
This mini-boss uses mostly weak physical attacks. L's Power-Break, A's Charm Eye, S's Arm-bind, and blinding him make his attacks less effective.
After defeating Kibagami, return to town to deliver the scroll to the guild and receive a mission from the Count. Once finished in town, return to the Sentinel village and use the stairs at E-4 to reach F2.
F2
Monsters: Baboon. FOE: Plated Chaser. Materials: Moss Strawberry, Trileaf Stalk, Poinciana Pod, Dried Vine. Treasure: 5000 E-2, Madora C-3.
You need 3 ice stakes to destroy F2's big scale at D-4. Reach D-4 via the path guarded by Plated Chasers or the longer path with many scales. At D-4, destroy the two small scales on the west side, then approach the big scale from the west. After destroying F2's scale, return to F1 and use the stairs at B-1 to reach the north side of F2. Leave the scale intact to access the treasure at C-3. On the north side of F2, use the stairs at B-6 to unlock a shortcut back to F1. Use the stairs at B-7 to reach F3.
F3
Monsters: Zapper Frog. FOE: Plated Chaser. Materials: Eclogite, Steel Earth, Emerald. Treasure: Bracers B-6, Ice Jar D-7, Fire Mist C-5, Formaldehyde C-5.
You will likely need to defeat some Plated Chaser FOEs to pass through F3; if you cannot beat them, you are not ready for the boss. Harvest extra ice stakes in the secret passages at B-5, D-7, and D-5. To obtain Steel Earth and Emerald materials, destroy the big scale on F3, then go up to F2 and use the stairs at D-5 to reach hidden mining points.
In the boss room, the lizard will start chasing you upon entry. If it gets close, exit through the south door and reenter; it will stop chasing. If the boss catches you, you can escape the battle by running. Focus on destroying the small scales on the west side to clear a path to the big scale. Destroying the big scale in the boss chamber freezes the boss and halves its health.
Boiling Lizard
Level recommendation: 35-40. This boss uses physical and fire attacks. Reduce fire damage by equipping fire rings, eating Sacred Mountain fish (boosts fire resistance), using R's Fire Rune, or L's Mental-Break. Use an ice stake to kill spawned scales. Use Kibagami's Roar skill if the boss auto-heals. The boss is weak to ice; L's Freeze Link and R's ice spells are effective. An N can also deal decent damage with ice element blades and Shadow Bite.
After defeating the boss, grab the heart and return to the Sentinel village on F1. Talk to the Medium on the left side of the village. After events, fly north to the fourth land.
Cloudy Stronghold
After a brief conversation, you must return to town to report to the Count. Receive your next mission, then go back to the Cloudy Stronghold. Proceed to the South Sanctuary dungeon, where you will eventually battle Logre.
Logre
Logre begins by attacking a front-line character with a powerful elemental attack. Have all front-line characters defend on the first turn, or revive whoever is killed. After his drive attack, Logre uses only weak physical attacks for several turns. He flees after losing half his health.
Return to town and speak with the Count. Your next task is to go to the Windy Ar.
Similar guides you might like


100% Human-Written. AI Fact-Checked. Community Verified. Learn how AntMag verifies content