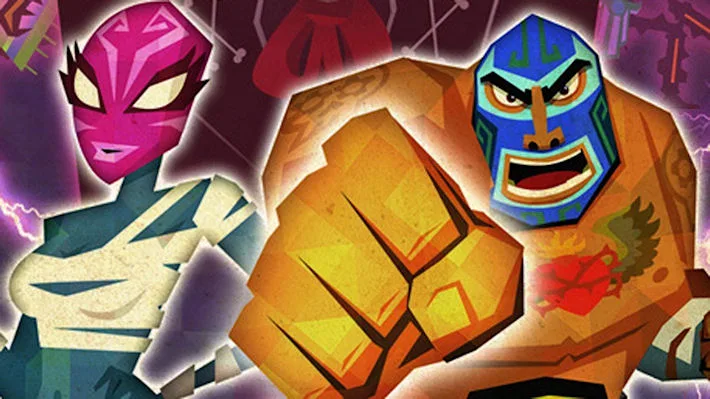
Welcome to Guacamelee! Super Turbo Championship Edition, a vibrant action-platformer where you play as Juan Aguacate. Dive headfirst into a lucha libre-fueled world, mastering a unique combat system that blends brawling with special wrestling moves. You'll need to switch between the vibrant Mexican Day of the Dead world and its dark, skeletal counterpart to progress, using your developing abilities to overcome platforming challenges and powerful foes. It's a fast-paced, often hilarious adventure perfect for players who love tight controls and a good challenge.
This guide is here to help you conquer every aspect of Guacamelee! STCE. We’ll walk you through finding every hidden collectible, mastering the toughest boss fights, and achieving all the game's endings. Whether you're aiming for 100% completion or just need a hand with a particularly tricky platforming section, we've got you covered.
Part 1
This guide covers the initial part of Guacamelee! Super Turbo Championship Edition, detailing the first steps and objectives in the game's walkthrough.
- 1In The Start: This section covers the beginning of the game. (Code: [wtpart1])
- Use Ctrl+F or Option+F to search for section codes (e.g., [wtpart1]) to navigate quickly.
Part 2
Guacamelee! Super Turbo Championship Edition Part 2 walkthrough: Start in a dark room, meet Fray Ayayay, and head to Pueblucho.
- 1The game begins in a dark room; go upstairs and out the door to meet Fray Ayayay, who asks you to come to the church.
- 2Run left, leaving the Agave Field for Pueblucho.
- 3Head to the church on the hill.
- 4Punch the barrels shown by the Fray.
- 5After El Presidente's Daughter arrives, head left to La Mansión del Presidente to help move chairs.
- 6Continue left into the mansion, where Carlos Calaca kidnaps El Presidente's Daughter with his minions, Flame Face and X'tabay. Carlos kills you.
- 7Wander right back to the center of Pueblucho.
- 8Put on the glowing mask from the statue to become a luchador. A second player can join as Tostada.
- 9Talk to the barrel and head to the church, which is under attack.
- 10Defeat the Esqueletos Tropas. Be warned, you can only take four of its hits.
- 11Defeat two more Tropas.
- 12Defeat the Tropas in the dead world by dodging its predictable attack twice.
- 13Defeat the Esqueleto Rápido, which is faster and dodges attacks.
- 14Open the water closet with the grab button.
- 15Fray suggests going to Santa Luchita for clues.
- 16Talk to the man in the yellow hat with a ! above his head to accept a sidequest.
- 17Enter the yellow house labeled "Casa del Pollo" at the foot of the hill.
- 18Beat each chicken until you can throw it, then chuck it into the cage on the right side of the house.
- 19Leave the house and talk to the man to receive a Heart Chunk.
- 20Enter the house just to the left and drop down for an easy treasure chest.
- 21Head to the upper right part of town and leave to the right, passing through a graveyard to find the first shop, which also acts as a save point, health-refilling station, and costume-changing room.
- 22Continue right into the Forest del Chivo.
- 23Move right through the room, encountering 3 Esqueleto Tropas, 1 Esqueleto Lanzador, 2 Tropas, and 2 Lanzadors.
- 24A large cat, Jaguar Javier, blocks a bridge. He breaks the bridge, causing you to fall.
- 25A shop is located down in the gap.
- 26If you wish, turn left. The floor is covered in reset water (touching it sends you back to the last solid surface).
- 27Cross the reset water using moving platforms to reach the left side and get a Stamina Chunk.
- 28Head back to the shop and keep going right.
- 29Defeat the two Esqueleto Tropas in the next room.
- 30A treasure chest is visible but inaccessible at this time.
- The second player can join as Tostada, who has different animations but identical physics to Juan.
- The shop also serves as a save point, health-refilling station, and costume-changing room.
Part 3
Complete Guacamelee! Super Turbo Championship Edition Part 3 walkthrough, including how to get the Rooster Uppercut and defeat enemies.
- 1Proceed down the slope to the right, carefully avoiding spikes. Use a large jump for tall spikes and a short hop for ceiling spikes. A shop is available for healing.
- 2In the next room, a giant sombrero chicken will inform you that you can roll through spikes. Use this ability to continue.
- 3In the following room, airdodge through spikes as you climb upwards, then exit to the left, passing through an empty room.
- 4You will enter an arena that requires you to defeat all enemies to proceed. The enemies appear in waves: 2 Esqueleto Tropas and 2 Esqueleto Lanzadors, followed by another wave of 2 Esqueleto Tropas and 2 Esqueleto Lanzadors.
- 5After clearing the arena, a piñata will appear. Break it to receive $125.
- 6Move on by going left and jumping up the platforms. At the top of the shaft, there is a shop.
- 7After the shop, go right, roll through spikes, and continue further right.
- 8You will find a house with a goat. Enter the house for a treasure chest. Punch the suspicious statue outside to the right to recover 1 HP.
- 9The goat reveals himself as Uay Chivo and teaches you the Rooster Uppercut. Use this new move to jump onto the house's roof and then jump up to the right. Break the red block and enter the alcove to obtain a Heart Chunk.
- 10Head back left and break all the red blocks in your path using the Rooster Uppercut.
- 11Return to the shop and go up through the red block on the left.
- 12Walk left to encounter a Tropas, a Lanzador, a treasure chest, and a dead end. Go up the stairs on the right to progress.
- 13The next room is a platforming puzzle. Use the Rooster Uppercut to jump to the lower and then the higher platform. Roll off the edge through spikes and use the Uppercut to break a block and reach the next platform. You can interrupt your roll with the Uppercut.
- 14Reach the next block-covered platform using the Uppercut; rolling is optional. Defeat the 2 Tropas.
- 15Enter the next arena, which contains: 1 Flor de Lengua, followed by 2 Flor de Lengua, and then 2 Esqueleto Lanzadors with 1 Flor de Lengua. Use the Rooster Uppercut or a throw to reach the Lanzadors on the upper platforms.
- 16Break the piñata and move on. Climb up through the next room, past 2 Flors de Lengua and 2 Lanzadors, to reach a shop on the right.
- 17After the shop, you will enter an arena with a low roof containing: 4 Esqueleto Tropas, followed by 11 Esqueleto Tropas. Use throws to knock enemies into each other for combos.
- 18Move on into Santa Luchita. A citizen will direct you to the Temple of Rain in the upper-left.
- 19Enter the building signed "Viva Piñatas!" to find a free $250 piñata that regenerates.
- 20Go right and climb stairs. Once you run out of stairs, go left and jump up. On the roof of "Isabella's Kitchen!" is a treasure chest.
- 21Continue left to find your path blocked by a giant chicken. You must undergo a training session with the Combo Chicken. Head back right and enter Combo Chicken's Gym.
- 22You must perform specific combo sequences on Poncho, the skeletal training dummy. The first set of combos are: AAA, JAAA, ^A JAAA, ^S AAA, and ^A J ^S AAA. Missing any hit requires starting over.
- 23After successfully performing the five sequences, you can leave. If you wish to stay for another session, you will receive $500. The second set of combos are: ^A J vA, ^A J A ^S vA, and AAA R ^S AAA. You cannot perform more combos until you acquire new moves.
- 24Head back left past where the giant chicken was. You will see an Olmec head trying to eat a chicken. Break this up. Finding more Olmec heads allows for teleportation between them.
- 25Continue left into the Temple of Rain.
- 26Upon entering the Temple of Rain, head up the stairs on the left. Note the Heart Chunk on the left for later.
- 27Move right past a shop and find a man who explains the temple is sealed. Jump up the platforms in front of the entrance and touch the dead portal (swirly black thingy) to enter the dead world. A living portal (swirly white thingy) allows you to return.
- 28Before entering the temple, head back left and cross the dead bridge to retrieve the Heart Chunk.
- 29Enter the temple. Defeat the 3 Tropas and 1 Lanzador in the first room.
- 30In the next room, X'tabay will appear and leave after some dialogue.
- 31You will then face an arena containing: 2 Aluxes, followed by 4 Aluxes, and then 15 Aluxes. Aluxes are weak but numerous; flail around to hit them.
- Use the Rooster Uppercut to reach higher platforms and break red blocks.
- Interrupting your roll with the Rooster Uppercut can help with precise platforming.
- Utilize throws in arenas to knock enemies into each other for efficient clearing and combo building.
- The piñatas provide valuable currency ($125 and $250).
- The $250 piñata in "Viva Piñatas!" regenerates, allowing for repeated collection.
- The Olmec head allows for fast travel once more are found.
- Remember to grab the Heart Chunk in the dead world before entering the Temple of Rain.
- $125 from the first piñata.
- Heart Chunk from the alcove on the house roof.
- $500 for a second training session with Combo Chicken.
- Heart Chunk from the dead world bridge.
- $250 from the "Viva Piñatas!" piñata.
Part 4
Complete Guacamelee! Super Turbo Championship Edition Part 4 walkthrough. Learn how to get the Goat Jump and Olmec's Headbutt, and navigate portal puzzles.
- 1After learning to hop through portals, proceed right to a puzzle room. Jump into the dead portal, then the living portal, and use Rooster Uppercut to land on the upper-right floor. Use the dead portal to get the Stamina Chunk, then the living portal to exit.
- 2Climb the next room, hitting the dead portal to activate platforms. Note the yellow block on the left (*MARK IT* for later). In the room above, you'll find a shop and two doors (dead world and living world). The game suggests the right (dead) door first.
- 3Right Door Path: Head right down the corridor. Bust the red block to wake the Alebrije, then climb the shaft. At the top, go left into an arena with 1 Esqueleto Tropas (living) and 1 Esqueleto Tropas (dead). You cannot damage enemies in the opposite world, but they can damage you. Use portals to switch worlds and defeat them.
- 4The next room is an arena with 3 barrels, 1 Armadillo Rodando, 2 Armadillo Rodandos, and 1 Armadillo Rodando (living) and 1 Armadillo Rodando (dead). The game warns you cannot dodge fire attacks; jump over them or punch them to halt them.
- 5After clearing the arena, drop down, roll through spikes, and fall into the Alebrije's cage. Climb up and jump into the ceiling. To the right, find a Choozo Statue. Break it to get the Goat Jump, allowing you to stick to walls and jump off them.
- 6Use the Goat Jump to leave the area by wall jumping up the shaft to the left. A sombrero chicken will explain that holding the grab button lets you hang on walls without sliding.
- 7Navigate the jumping puzzle: Jump left, walljump to the dead portal, walljump to the far living portal, walljump up to the dead portal, and use Rooster Uppercut if needed to reach the left platform.
- 8Go down the left shaft to return to the starting area. You can now enter the left door.
- 9Left Door Path: Climb the room, jumping through the dead portal to activate platforms. Kill the Tropas and Rápido enemies. Go up the platforms on the right, avoiding the living portals. At the shop at the top, go right first into an arena with 2 Armadillo Saltos.
- 10Take the Stamina Chunk on the right. Return to the left of the shop into an arena with 8 Esqueleto Lanzadors. You must run back and forth, activating/deactivating platforms until they fall into the lava.
- 11Head left to a treasure room. Four chests contain Esqueleto Tropas, and two contain money. Break all chests for completion.
- 12Exit left into another arena with 1 Esqueleto Gigante (living), 3 Esqueleto Tropas (living), and 3 Esqueleto Tropas (dead).
- 13After defeating enemies, drop down and break the Choozo Statue to obtain the Olmec's Headbutt. Use it to break yellow blocks.
- 14Use the shop and break the next two yellow blocks to exit. These teach you that the headbutt can be used in the air, even after a Rooster Uppercut.
- 15The final room before looping back requires you to roll through spikes off a platform and quickly interrupt the roll with a Rooster Uppercut as you touch a portal to land on a new platform.
- 16Re-Merge: Go back to the *MARK IT* location (yellow block below the current room) and break it for a $500 chest.
- 17Head up the shaft where the arrow points. At the top, turn right. Navigate the walljump puzzle, using Rooster Uppercut to get under a pointy wall and high enough on the right wall to jump left. Slide down and jump through gaps to get the Heart Chunk.
- Enemies in the opposite world can still damage you even if you cannot damage them.
- When fighting fire attacks, jumping or punching them is safer than dodging.
- Holding the grab button allows you to hang on walls without sliding.
- The Olmec's Headbutt can be used in the air, including after a Rooster Uppercut.
- Remember to break all chests in the treasure room for completion percentage.
- Goat Jump ability
- Olmec's Headbutt ability
- Stamina Chunk
- Heart Chunk
- $500
Similar guides you might like


100% Human-Written. AI Fact-Checked. Community Verified. Learn how AntMag verifies content