Full walkthrough and guide for Professor Layton and the Diabolical Box on Nintendo DS, featuring puzzle solutions, tips, and strategies for every chapter.
This is a walkthrough for the Nintendo DS game called Professor Layton and the Diabolical Box. It's a puzzle/mystery game containing a lot of brainteasers.
I made a video walkthrough for this game, so if you would rather watch me solve various puzzles rather than read about them, you can see them all at: https://www.youtube.com/playlist?p=PL13F1E536E5D98573
The game begins with Professor Layton and his apprentice, Luke, taking a trip on a luxurious train. Our heroes are preoccupied with the mystery of the diabolical box, which is called the Elysian Box. This box is rumored to kill anyone who opens it.
A few days earlier, Professor Layton received a letter from his friend, Dr. Andrew Schrader. The good doctor has the Elysian Box, and he has decided to open it. Professor Layton gets the feeling that something horrible is going to happen. After all, everyone who opens the box dies. Therefore, he decides to check up on Dr. Schrader.
First, Layton needs his keys. You can look for them by tapping on the various items on the touchscreen. The keys are in the middle drawer of the desk. A brief tutorial appears, which teaches you how to move. Tap on the shoe icon in the lower/right, then tap on an arrow. Try this out by moving to the right, two times in a row.
Puzzle #001: Dr. Schrader's Map
Summary: There are five empty places on the map, and six pieces (including the one already placed on the map). Put the pieces on the map so all the roads connect to each other.
Solution: The trick to this puzzle is determining which of the six tiles do NOT go on the map. The tile that doesn't go on the map is actually the tile which is on the map at the start of the puzzle. From left to right, the five pieces at the bottom of the screen go... 1. The leftmost space. 2. The bottom space. 3. The top space. 4. The right space. 5. The middle space.
With the puzzle solved, Professor Layton and Luke drive to the Doctor's apartment complex. Which apartment, er, flat belongs to Dr. Schrader?
Puzzle #002: The Doctor's Home
Summary: The doctor's room has a flag hanging over it, the doctor's room faces the rising sun, and a nearby flat has music coming out of it.
Solution: All you need to know is that a flag hangs over the doctor's flat. There's only one window with a flag over it, the one in the upper/left corner.
Talk to the man here. He tells you to tap on the mailbox for something special. Do this, and you get a hint coin. All throughout this game, you can get hint coins by tapping on things, and you can use the hint coins to help solve puzzles. Try this out by finding hint coins at the base of the street lamp and the awning above the door.
Go through the door. Our heroes approach Dr. Schrader's flat, but the door is locked by another puzzle.
Puzzle #003: The Right Key
Summary: You have three keys. Which key opens the door?
Solution: It's the key on the bottom. The trick is that you have to rotate the key, so its circular end goes into the keyhole.
Our heroes enter the room to find the window open and Dr. Schrader dead. They also find a mysterious train ticket. Inspector Chelmey, of Scotland Yard, appears, along with his assistant, Barton. Luke is suspicious of the Inspector due to the events of the last game, but this is the real Inspector Chelmey. Chelmey figures that Dr. Schrader's death isn't a murder, because the door was locked. Perhaps the doctor died from a heart attack. Layton believes there is a possible escape route from the room, one which is suspicious.
Puzzle #004: A Secure Room
Summary: What is in this room which is an escape route and also suspicious?
Solution: Examine the closed window. The curtain to the window is ripped. Now that's certain suspicious!
Our heroes look out the window, where someone clearly used the curtain to escape. Layton notices a torn photo in Dr. Schrader's hands. Chelmey gets mad that they are disturbing the crime scene, so he takes the photograph pieces and kicks our heroes out of the room. Layton is puzzled by the fact that the Elysian Box was not in the apartment. He is also puzzled by the mysterious train ticket. Layton and Luke decide to take the train, in hopes of solving the mystery.
Chapter 1: The Legendary Molentary Express
Time to explore the train! But first, there are two puzzles in this room. One is on the trunk, and one is on the table.
Puzzle #005: Luke's Trunk
Summary: Put everything in the trunk, without having things overlap.
Solution: The teddy bear is in the upper/right corner, and directly under it is the bag with the ribbon and the telescope. The books are in the upper/left corner, and below them is the spatula and frying pan. The boomerang is in the up/left area, next to the shirts. The gray thing is on the bottom.
Puzzle #017: The Worker Ant
Summary: Draw the longest line possible, from start to finish.
Solution: Go down, left, up, left, left, down, right, right, down, right, up, right, down, left, left, up, up, left and down.
Leave the room by going right. If you talk to the girl, you learn that there is a fancy carriage on the train. However, if you try to go there by leaving south, the conductor stops you. Instead, talk to the girl again for a puzzle.
Puzzle #024: A Strip of Paper
Summary: A piece of paper has been folded twice. On each fold, one end was an inch away from the other end. How far apart are the folds, in terms of a tenth of an inch?
Solution: This is kind of tricky. If you fold a piece of paper, and one end is an inch away from the other, that must mean the fold is half an inch away from the center of the paper. Since this happened twice, both folds are half an inch away from the center of the paper, making them a full inch away from each other. The solution is 10. 10 tenths of an inch is one inch, which is how far apart the two folds are.
Go to the next carriage by leaving through the door at the back of this carriage. Here, you can go inside the open door on the left and tap on the water pitcher to get a puzzle.
Puzzle #023: Pitchers and Poison
Summary: You have two pitchers. A third pitcher, containing poison, is placed left or right of them. The third pitcher moves left and right fifty-five times. You want the poison to be in place #2, so which starting position do you put the poison in, left or right?
Solution: The answer is B, on the right. If the poison starts on the right, it will always end up on the right after an odd number of switches.
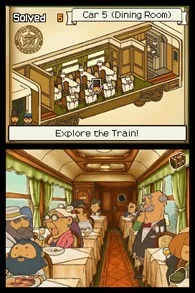
Leave the room, then go to the next carriage. This is the dining room. Talk to the waiter for a puzzle.
Puzzle #007: Dining Couples
Summary: Based off of the clues and the picture, figure out which character is Mrs. Hadley.
Solution: Mrs. Hadley is in position E. The O'Connors are in A and B because they're sitting together, the Jonses are C and G because they both have aisle seats, and the Lamberts are D and H, across from each other.
There are two doors that lead out of this room. The one of the left goes to the kitchen. The one on the right leads to the rest of the train. Go to the kitchen and talk with the chef. He gives you a hamster, which is a metapuzzle in this game. Sometimes, when you solve puzzles, you get an item which will help you solve the hamster challenge. For example, the chef gives you an apple that you can use in the hamster puzzle.
Leave the kitchen and go through the other exit. Talk to the woman here for a puzzle.
Puzzle #006: Pancake Stacks 1
Summary: Solve the Tower of Hanoi puzzle with three pancakes.
Solution: Simple! If the plates from left to right are Plate A, Plate B and Plate C... 1. Move a pancake from A to C. 2. Move a pancake from A to B. 3. Move a pancake from C to B. 4. Move a pancake from A to C. 5. Move a pancake from B to A. 6. Move a pancake from B to C. 7. Move a pancake from A to C.
You can't go inside a room in this train car, so move to the next train car. This has a room you can go inside, but nothing is there for you to do, so instead, go down through the door at the end of the hall. You've reach the end of the train! The view here is so good that it reminds Professor Layton of a puzzle.
Puzzle #011: Trees in the Forest
Summary: You have a four by four grid. Draw lines of the grid, so there are four sections. Each section must have all four types of trees.
Solution: Here's a picture of the solution, with different letters indicating different areas: ABBB AABD CADD CCCD
100% Human-Written. AI Fact-Checked. Community Verified. Learn how AntMag verifies content