
Punishing: Gray Raven is a fast-paced, ultra-stylish hack and slash Action RPG where you'll master intense combat and strategic team building. As a Commandant, you'll lead cybernetic soldiers called Constructs against the Punishing virus, a force corrupting all life on Earth. You'll be diving into missions, executing slick combos, and optimizing your team to conquer the post-apocalyptic battlefield.
This guide covers everything you need to dominate the game, from installation and early game progression to advanced techniques and boss strategies. We'll help you conquer every challenge, optimize your Constructs, and master the game's mechanics to achieve victory on both iOS and Android.
Installation & Account Setup
New to Punishing: Gray Raven? This guide covers choosing your server, understanding banner currencies like Black Cards, and which banners to prioritize for F2P players.
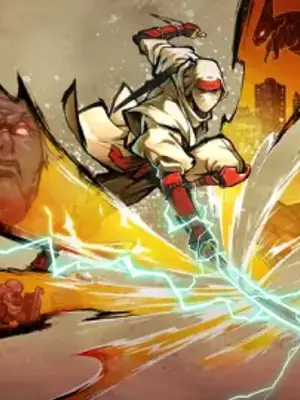
Construct Roles & Types
Navigate Punishing: Gray Raven's Construct system. Learn about roles, types, and how to best utilize your characters in combat with this essential guide.
Construct Roles & Types
Navigate Punishing: Gray Raven's Construct system. Learn about roles, types, and how to best utilize your characters in combat with this essential guide.

2-8: Goliath
Learn the best strategies and tips to overcome the Goliath boss in Punishing: Gray Raven. Master its attack patterns and weaknesses to emerge victorious.
Stats / Weaknesses:
- Weakness: [Information not available in source]
- Resistances: [Information not available in source]
- Recommended Damage Type: [Information not available in source]
Phases:
- Phase 1: Goliath employs basic melee attacks and charges. Dodge and counter-attack when openings appear.
- Phase 2: Goliath introduces AoE attacks and more aggressive combos. Maintain distance and look for safe windows to attack.
- Phase 3: Goliath becomes enraged, increasing attack speed and power. Prioritize survival and chip away at its health when possible.
Strategy:
- Focus on dodging Goliath's wide swings and charges.
- Utilize your character's mobility skills to reposition quickly.
- Exploit any brief pauses after its powerful attacks to deal damage.
- If possible, target specific weak points if they are revealed during the fight.
- Bring characters or weapons that exploit its elemental or physical weaknesses if known.
Musashi IX
Learn the best strategies and tips for defeating Musashi IX in Punishing: Gray Raven. This guide covers attack patterns, weaknesses, and optimal team compositions to overcome this challenging boss.
Boss Fight: Musashi IX
Stats / Weaknesses:
- Musashi IX is a formidable opponent with a focus on swift, powerful melee attacks.
- Exploit openings after its combo finishers to deal damage.
- Elemental weaknesses are not explicitly stated, suggesting a focus on physical damage or general combat proficiency.
Phases:
- Phase 1: Initial Assault
Musashi IX begins with a series of rapid sword slashes and lunges. Dodge these attacks by moving laterally or using dodge skills. Look for brief pauses after its attack chains to counter-attack. - Phase 2: Enhanced Aggression
As its health decreases, Musashi IX may become more aggressive, introducing new combo variations or faster attack speeds. Pay close attention to its tells and be prepared to dodge more frequently. - Phase 3: Desperation Moves
In its final phase, Musashi IX might unleash more devastating attacks, possibly including area-of-effect (AoE) slams or extended combo strings. Prioritize survival and chip away at its health when safe opportunities arise.
Strategy:
- Dodge and Weave: Musashi IX's primary threat comes from its melee combos. Mastering the dodge mechanic is crucial for survival.
- Identify Openings: Attacks are often followed by a short recovery period. Learn these patterns to safely land your own hits.
- Ultimate Skills: Use your character's ultimate skills during Musashi IX's recovery phases or when you have a significant advantage to maximize damage output.
- Team Composition: Bring characters with good mobility and damage-dealing capabilities. Consider characters who can provide buffs or debuffs to exploit any potential weaknesses.
- Patience is Key: Rushing in without a clear opening will likely lead to taking significant damage. Focus on consistent, safe damage rather than risky, high-damage bursts.
Similar guides you might like


100% Human-Written. AI Fact-Checked. Community Verified. Learn how AntMag verifies content