
Eight years after the Boonta Eve Classic, Sebulba returns with a souped-up podracer, seeking revenge against a now-expert Anakin Skywalker. Star Wars: Galactic Racer throws you into the cockpit for high-speed, combat-heavy races across the galaxy. It’s a pure arcade racer with a focus on aggressive maneuvering and taking down opponents, not just crossing the finish line first. If you enjoy fast-paced, destructive racing with a Star Wars twist, you’ll find plenty to love here.
This guide is your pit crew for mastering the intense races and challenging opponents. We’ll help you navigate Sebulba’s quest for vengeance, conquer tricky tracks, and understand the nuances of podracer combat. Get ready to achieve victory and prove yourself the galaxy’s best pilot.
Amateur Courses:
Conquer the Boonta Training Course in Star Wars: Galactic Racer! Learn Sebulba's favorite track, navigate tricky canyons, and master the narrow passage for victory.
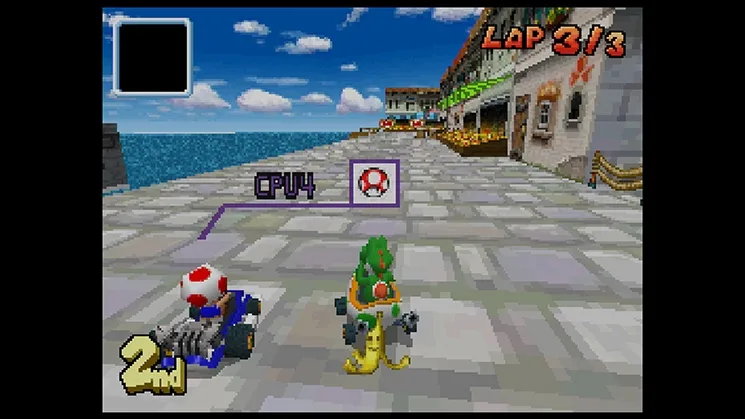
Alright, let's get you started with the basics in Star Wars: Galactic Racer. The first course you'll tackle is the Boonta Training Course, set on the familiar sands of Tatooine. Sebulba apparently loves this one, and it's marked as 'Easy,' so it's the perfect place to get your bearings.
You'll kick things off on a sandy track with some pretty gentle turns. Honestly, you should be able to pull ahead without breaking too much of a sweat here. The real challenge starts when you dive into the canyon. The turns get a bit tighter, so pay close attention to your line to avoid sliding into the walls and losing precious speed.
Right after the canyon, you'll spot a super narrow opening you absolutely *have* to race through. This is probably the trickiest part for newcomers. It's easy to misjudge it and smash right into the canyon wall, which is a definite race-ender. Make sure you line up your podracer perfectly with the gap. If you're feeling nervous, or if your podracer is on the wider side – think Aldar Beedo's or Ark Roose's models – don't hesitate to hit the roll button. It'll help shrink your pod just enough to slip through more easily.
Once you're through that tight squeeze, you'll be back out on the desert. Keep an eye out for rocks littering the path ahead. Most of them are small and will just break apart if you hit them, so they're not much of a threat. Just keep pushing forward, and you'll see the finish line before you know it.
Heads up: Beating this race won't unlock Sebulba himself; you'll need to race him directly later on.
him two more times.
Star Wars: Galactic Racer Mon Gazza Speedway is a very easy track. Unlock Teemto Pagalies by beating it.
- 1Race on the Mon Gazza Speedway.
- 2Be mindful of the thin structures that occasionally line the road.
- 3A character with good top speed will have no trouble lapping the other characters.
- 4Beat the race to unlock Teemto Pagalies.
- Focus on maintaining high top speed.
- Avoid colliding with the trackside structures.
balanced, good in all categories.
Conquer Beedo's Wild Ride on Ando Prime! Learn to navigate tricky ice caves, dodge obstacles, and master Aldar Beedo's unique handling for a winning race.
Alright, let's talk about Beedo's Wild Ride on Ando Prime. This one's a step up from the first couple of races, but totally doable. Aldar Beedo is the favorite here, and while he might feel a bit clunky at first with his wide engines, he's got some serious top speed that'll help you out if you can handle him.
You'll start off on a pretty straight path, which is great for getting up to speed. Keep an eye out, though, because soon enough, rocks will start popping up. Most are easy to dodge, but there's one with a tiny gap – seriously, don't even try to go through it. Just steer around it. After that, you'll hit a bridge and head into an ice cave. The turn inside the cave is a bit tricky, but the real challenge is the ice you jump onto right after leaving it. Steering on ice is tough, but here's the trick: use the roll button! Holding down the roll button gives you way better control on the ice. So, once you're on that third icy patch, hold that roll button and point yourself straight. If you mess up the steering or hit a glacier, it's not the end of the world – your lead is probably big enough to still win, but it's best to avoid it.
Keep pushing through the snowy paths, and you'll enter another ice cave. Dodge those icicles and make your way through. When the cave splits, definitely go right – it's the faster route and will save you time. After that, it's just a matter of some simple dodging and racing to the finish line.
Shortcut Alert!
Here's a pro tip: on your second lap, a tent on the left side will open up, revealing a shortcut. It's a super straight shot and lets you gain a lot of speed, but it can be tricky to slide into without losing momentum or even crashing. I'd recommend practicing this shortcut a few times, or if it's just not clicking for you, it's probably best to skip it and stick to the main path.
he's the racer for you.
Conquer the Aqualaris Classic course in Star Wars: Galactic Racer! Learn the best paths, ramp strategies, and how to navigate tricky door sections with this expert guide.
Alright, let's talk about Aqualaris Classic. This is the longest course you've tackled so far, but don't sweat it! With some smart steering, you'll be crossing the finish line in no time. Clegg Holdfast is the favorite here, and honestly, he's a solid pick for this track if you want an edge.
- 1As soon as you start, you'll hit some narrow corridors that snake left and right. Honestly, pick the path that feels most natural to you. Just try your best to avoid smashing into the walls or those big dividers between the paths.
- 2Once you break free from those corridors, watch out for the pillars smack-dab in the middle of the road. Keep your ride smooth.
- 3Next up, you'll get a pretty view as you zip through some tube-like paths around Aqualaris's sea. The turns here are super forgiving, so this part should be a breeze.
- 4After you exit the tubes for the first time, you'll find yourself on a dirt road with two ramps. Hit the first ramp, and as soon as you're airborne, hold down the 'tilt up' control. This will give you a nice boost right into the next section of pipe.
- 5Coming out of that pipe, you'll need to quickly swerve left. There's a path there that's easy to miss, but it'll save you precious time.
- 6After a bit more pipe travel, you'll reach an area where crashing is a real possibility if you're not paying attention. You'll see two paths, and right after each one are two iron doors that open and close slowly. You'll need to steer carefully to pick the doors with the most clearance. Don't get stuck dithering, or you might miss both!
- 7You'll then move onto a wider dirt road with a big ramp right in the center. Do what you did before: hit it hard and, once you're in the air, hold 'tilt up' again.
- 8Keep pushing through more pipes until you arrive at a section that looks a lot like the start of the race. This time, the path is split by a large triangular wall, but the turns are way sharper, making it trickier.
- 9Keep your podracer steady through these sharp turns. When you reach the next split in the path, you'll need to make a quick decision. Pick a new path – ideally, the one diagonal from you, as it requires less sharp turning. If you hesitate or pick the wrong way, you'll likely crash into the wall separating the paths.
- 10After that, it's pretty much a straight shot to the finish line to complete your lap!
- Clegg Holdfast is a great choice for this race due to his speed and acceleration.
- Don't be afraid to use the 'tilt up' control on the ramps to gain extra airtime and distance.
- When navigating the closing doors, prioritize speed and decisiveness over perfect positioning – a slight bump is better than a full stop.
- The sharp turns in the second half of the track require precise steering; practice them if you're having trouble.
Similar guides you might like


100% Human-Written. AI Fact-Checked. Community Verified. Learn how AntMag verifies content