Total War: Warhammer III throws you into the Realm of Chaos, a dimension of pure, malevolent magic where the four Ruinous Powers whisper promises of power and seek to engulf the world. You'll lead legendary lords from the Warhammer universe in a grand campaign, engaging in turn-based strategy on a world map and massive real-time battles. It’s a game for anyone who loves epic fantasy, brutal warfare, and the grim darkness of the Warhammer setting.
This guide will help you master the unique Monstrous Arcanum mechanic, available to Norsca factions. We’ll cover how to undertake hunts for powerful rewards, tame unique monster units, and achieve Supreme Hunter status. You'll also find insights into facing formidable foes like Gorbad Ironclaw and understanding the brutal might of Orc armies, ensuring you can conquer the chaos and claim victory.
Ambush & Stalk Stances
Master Ambush and Stalk stances in Total War: Warhammer III to control battles and cripple foes. Dictate engagements and gain the upper hand with these potent .
Mastering the Ambush and Stalk stances in Total War: Warhammer III can turn the tide of many campaigns, allowing you to dictate engagements and cripple enemy forces before they even know they're under attack. These stances are particularly potent for factions that excel in guerrilla warfare or have units with strong vanguard deployment capabilities.
Understanding the Stances
- Ambush Stance: This stance allows your army to hide in suitable terrain (forests, tall grass, certain ruins) and initiate a surprise attack on passing enemy armies. If successful, the battle will begin with your units already deployed and often flanking the unsuspecting foe, granting significant tactical advantages.
- Stalk Stance: Similar to Ambush, Stalk stance reduces your army's visibility on the campaign map, making it harder for enemy armies and agents to detect you. While it doesn't grant the immediate battle advantage of an Ambush, it's crucial for maneuvering into position for an Ambush or for evading stronger enemy forces.
Factions and Lords Excelling in Stealth
While many factions can utilize these stances, some are inherently better due to racial bonuses or specific Lord skills:
- Skaven: The undisputed masters of subterfuge.
- Lord Skrolk (Clan Pestilens): Benefits from various skills that enhance Ambush success chance and reduce upkeep for stealthy units.
- Queek Headtaker (Clan Mors): While more direct, his faction benefits from Skaven's inherent Ambush success bonuses.
- Eshin Sorcerers: Can use the "Concealment Bombs" ability to further reduce detection range for armies they are embedded with.
- Unique Skaven Under-Empire Buildings: Constructing a "Hidden Warren" in a province can provide local army Ambush defense and success chance bonuses.
- Wood Elves: Masters of the forest.
- Orion: His "Hunters of the Wildwood" skill line significantly boosts Ambush success chance and movement range in forests.
- Drycha: Her faction's focus on forest spirits makes them naturally adept at hiding in woodland.
- Forest Spirit Units: Units like Dryads and Treekin gain bonuses when fighting in forests, making Ambush attacks in such terrain even more devastating.
- Dark Elves: Ruthless raiders.
- Malekith: Can invest in skills that improve Ambush success, particularly useful for his "Black Ark" fleets.
- Shadows: These elite skirmishers excel in vanguard deployment and can be devastating in an Ambush.
Strategic Application: Walkthrough Steps
Here's a step-by-step guide to effectively using Ambush and Stalk stances:
1. Reconnaissance and Preparation
- Scout Ahead: Before committing to an Ambush, use a cheap hero (e.g., a Skaven Assassin, Wood Elf Waywatcher, or Dark Elf Death Hag) to scout the enemy army's movement path and composition. Identify their strengths and weaknesses.
- Terrain Analysis: Look for suitable Ambush locations. Dense forests, mountainous passes, and even certain ruins on the campaign map provide excellent cover. Hover your mouse over terrain features to see if they offer an Ambush bonus.
- Army Composition: Tailor your army for an Ambush.
- Flanking Units: Units with Vanguard Deployment (e.g., Skaven Gutter Runners, Wood Elf Glade Guard, Dark Elf Shades) are invaluable for immediately encircling the enemy.
- Ranged Dominance: Archers and artillery can decimate an ambushed foe before they can react. Position them on elevated ground if possible.
- Shock Cavalry/Monsters: Use fast, hard-hitting units to charge into the enemy's flanks or rear once the Ambush is sprung.
- Lord Skills & Items: Prioritize Lord skills that boost Ambush success chance (e.g., Skaven's "Guerrilla Tactics," Wood Elf's "Forest Stalker"). Equip items like the "Cloak of Shadows" (generic magic item) or faction-specific artifacts that enhance stealth or movement.
2. Executing the Ambush
- Enter Stalk Stance: Before moving into the Ambush zone, activate Stalk Stance (usually costs movement points). This reduces your visibility and makes it harder for the enemy to detect your intentions.
- Positioning: Move your army into the chosen Ambush location. Ensure your entire army is within the designated Ambush zone. The game will visually indicate if your army is in a valid Ambush position.
- Activate Ambush Stance: Once positioned, select Ambush Stance. This will consume a portion of your movement points. Your army will now be hidden.
- Lure the Enemy (Optional but Recommended): If the enemy isn't moving directly into your Ambush, consider using a smaller, weaker army or a single hero as bait. Position them just within the enemy's movement range, but far enough from your main Ambush force to avoid being caught in a direct engagement.
- The Attack: When the enemy army moves into your Ambush zone, a battle will automatically trigger. You'll have a deployment phase where you can position your units for maximum impact, often with units starting on the flanks of the enemy.
3. Post-Ambush Considerations
- Pursuit: If you decisively win the Ambush, consider pursuing the routed enemy. This can lead to a second, easier battle to finish them off or capture their Lord.
- Replenishment: Ambushes can be costly in terms of casualties. Ensure you have adequate replenishment rates or access to healing spells/abilities for your next engagement.
- Repeat: Once you've successfully ambushed an army, don't be afraid to set up another. The AI often doesn't learn quickly from its mistakes.
Advanced Tactics
- Double Ambush: Position two armies in Ambush stance in adjacent tiles. If the enemy walks between them, both armies can potentially join the Ambush, leading to an overwhelming force. This is particularly effective in narrow passes or chokepoints.
- Ambush on Settlements: While you cannot directly Ambush a garrison, you can Ambush an enemy army that is marching to reinforce a besieged settlement. This allows you to eliminate the reinforcements before they can join the defense.
- Agent Actions: Use agents like Skaven Assassins or Dark Elf Assassins to wound or block enemy Lords/Heroes before an Ambush. A weakened or immobile enemy is an easier target.
Basic Controls & Camera — Total War: Warhammer III Guide
Learn the essential controls and camera functions for Total War: Warhammer III. This guide covers movement, unit commands, camera manipulation, and battle interface to enhance your strategic gameplay.
This guide covers the basic controls and camera functions for Total War: Warhammer III. Understanding these fundamentals is crucial for effective gameplay, from navigating the campaign map to issuing commands on the battlefield.
| Action | Default Keybind |
|---|---|
| Camera Pan (Left/Right/Up/Down) | Arrow Keys / WASD |
| Camera Zoom In/Out | Mouse Wheel / Page Up/Down |
| Rotate Camera | Q/E |
| Tilt Camera | Z/C |
| Select Unit | Left Click |
| Deselect Unit | Right Click / Esc |
| Move Unit | Right Click (on map) |
| Attack Unit | Ctrl + Right Click (on enemy unit) |
| Group Units | Ctrl + 1-9 |
| Select All Units | Ctrl + A |
| Center Camera on Selected Unit | Spacebar |
| Open Battle Menu | Esc |
| Pause Game | P |
| Speed Up Game | + |
| Slow Down Game | - |
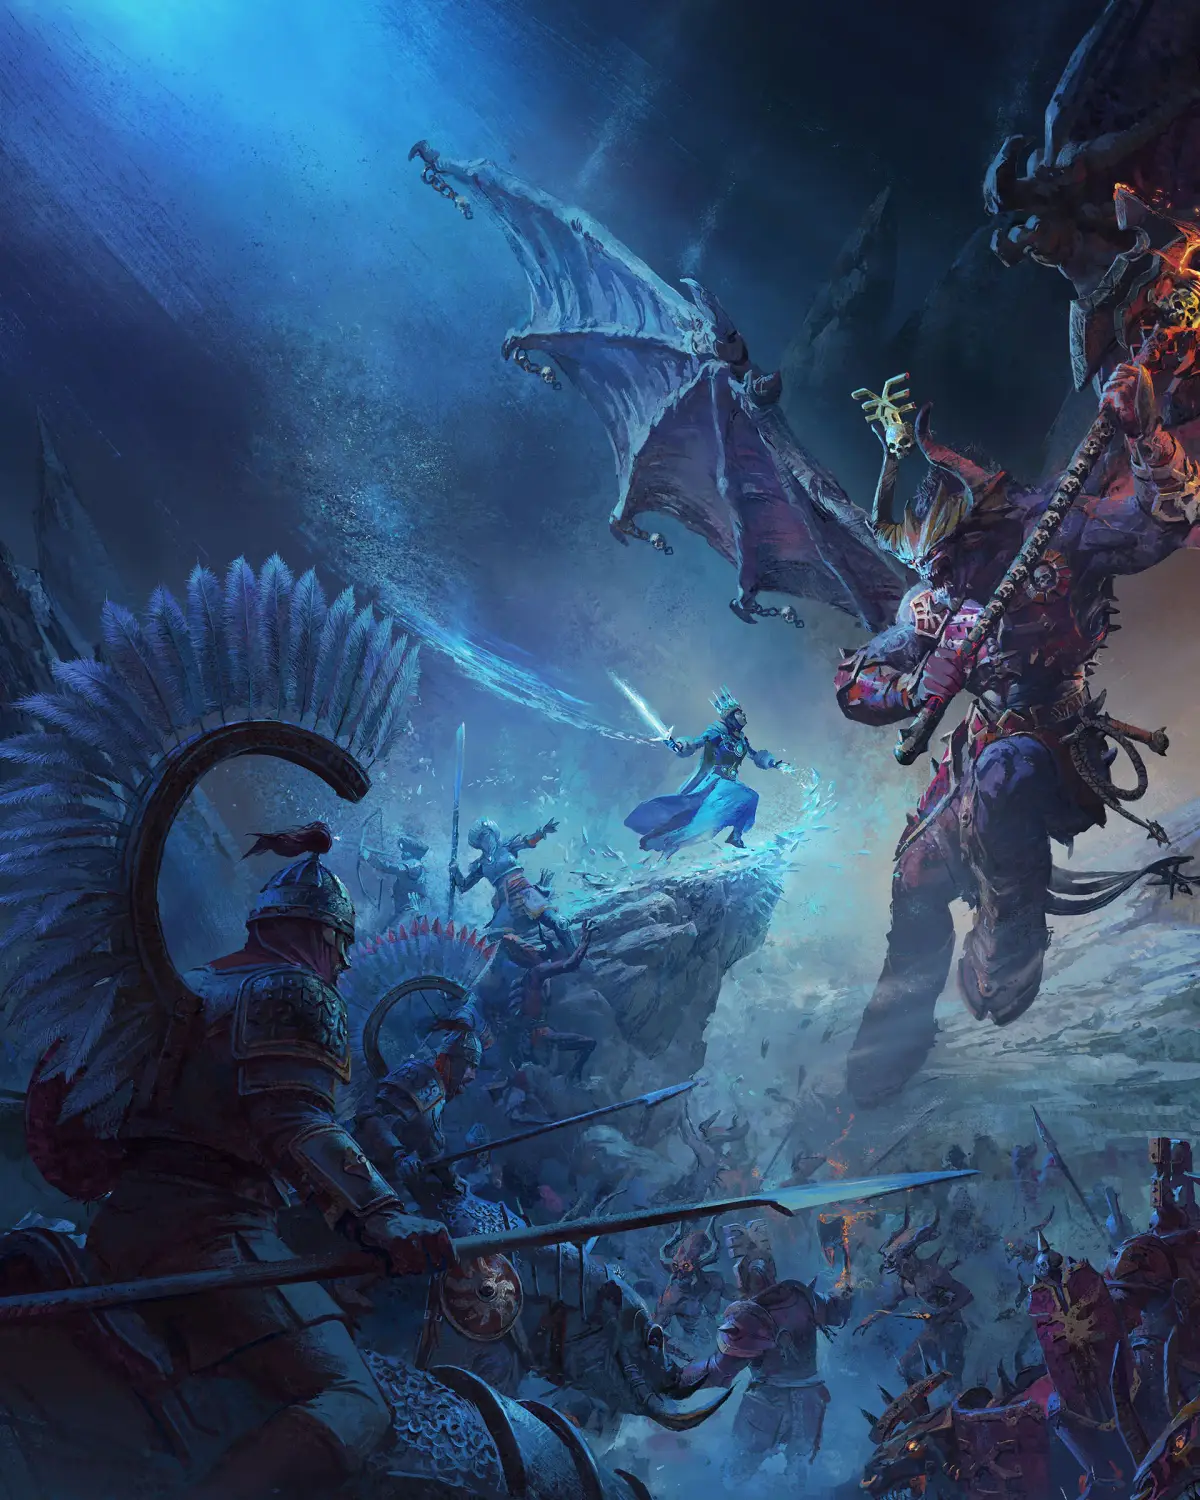
Be'lakor (Forge of Souls)
This guide provides detailed information and strategies for facing Be'lakor in the Forge of Souls in Total War: Warhammer III. Learn his weaknesses and how to defeat him.
Stats / Weaknesses:
- Be'lakor is a formidable melee combatant with high damage and strong defenses.
- He possesses potent magical abilities, often related to the Chaos Gods.
- His primary weakness lies in his susceptibility to focused damage, especially from anti-large units and magic users who can exploit his resistances.
- Pay attention to any specific buffs or debuffs he gains during the fight, as these can significantly alter his threat level.
Phases:
- Initial Engagement: Be'lakor will likely start with a direct assault, utilizing his melee prowess and initial spells. Focus fire with your strongest units and spellcasters.
- Summoning/Empowerment: He may summon daemonic reinforcements or empower himself further. Prioritize eliminating summoned units to prevent being overwhelmed, and continue to apply pressure on Be'lakor.
- Desperation/Rally: As his health depletes, Be'lakor might enter a more aggressive phase or attempt to rally his forces. This is the critical moment to commit your reserves and finish him off before he can turn the tide.
Strategy:
- Army Composition: Bring a balanced army with strong anti-large units (e.g., Greatswords, Dragon Princes, Chosen), missile units to soften him up, and powerful spellcasters (e.g., Lore of Fire, Lore of Heavens, or specific anti-daemon spells).
- Hero Support: Utilize heroes with abilities that can debuff Be'lakor or buff your own units. A Lord or Hero with strong magical capabilities can be invaluable.
- Positioning: Keep your vulnerable units away from his direct attacks. Use terrain to your advantage, and try to flank him if possible.
- Spell Usage: Save your most potent spells for when Be'lakor is isolated or when he is most vulnerable. Direct damage spells and debuffs are highly effective.
- Focus Fire: Concentrate the attacks of your best units and spells on Be'lakor to bring him down as quickly as possible. Do not let him dictate the engagement for too long.
- Manage Reinforcements: If Be'lakor summons daemons, deal with them swiftly to prevent them from overwhelming your lines or distracting from your main assault on him.
Campaign Victory Conditions
Achieve victory in Total War: Warhammer III by understanding campaign victory conditions. Master objectives beyond conquest with strategic planning.
Achieving victory in Total War: Warhammer III's grand campaign is a multi-faceted endeavor, moving beyond simple conquest. While military dominance is always a factor, each campaign presents unique objectives that require strategic planning, resource management, and often, a bit of diplomatic finesse. Understanding these conditions from the outset is crucial for guiding your faction to ultimate triumph.
The Realm of Chaos Campaign: Forge of Souls
The primary narrative campaign, "The Realm of Chaos," centers around the pursuit of Ursun, the Bear God, and the ultimate confrontation within the Forge of Souls. This victory condition is universal for all starting factions in this campaign and requires a specific sequence of actions.
- Step 1: Gather Souls of the Daemon Princes
- Objective: Collect the souls of four powerful Daemon Princes. These souls are acquired by defeating the Daemon Prince of each Chaos God within their respective Realms of Chaos.
- Locations & Strategy:
- Khorne's Realm (The Brass Citadel): Focus on overwhelming military might. Khorne's trials often involve intense, attrition-heavy battles. Bring strong melee units and Lords/Heroes with high combat stats.
- Nurgle's Realm (The Garden of Nurgle): Prepare for debilitating attrition and plague effects. Units with high physical resistance or magical attacks are advantageous. Consider bringing units that can heal or have high leadership to counter Nurgle's debilitating aura.
- Tzeentch's Realm (The Impossible Fortress): This realm is a maze of teleportation and illusions. Prioritize Lords and Heroes with high movement range and scouting abilities to navigate efficiently. Be prepared for magical duels and ranged engagements.
- Slaanesh's Realm (The Palace of Slaanesh): This realm tests your resolve with temptations and offers of power. Resist Slaanesh's seductive gifts, as accepting them can lead to negative campaign effects or even defeat. Focus on speed and decisive strikes to overcome the Prince's champions.
- Timing: Rifts to the Realms of Chaos open periodically throughout the campaign. You must send a Lord or Legendary Lord into each rift to challenge the Daemon Prince. Be mindful of the "Souls Race" – other factions are also vying for these souls.
- Step 2: Enter the Forge of Souls
- Objective: Once all four Daemon Prince souls are collected, a final rift will open, leading directly to the Forge of Souls.
- Preparation: This is the ultimate confrontation. Ensure your chosen Legendary Lord is high level, equipped with powerful items, and leading a full, elite army. Reinforcements from allied factions can be invaluable here.
- Step 3: Defeat Be'lakor
- Objective: Within the Forge of Souls, you will face Be'lakor, the first Daemon Prince. This is a multi-stage boss battle that will test your tactical prowess.
- Strategy:
- Phase 1: Focus on eliminating Be'lakor's initial retinue and damaging him directly. Utilize ranged units and magic to chip away at his health.
- Phase 2: Be'lakor will often summon reinforcements or employ powerful area-of-effect abilities. Adapt your formations and protect your key units.
- Phase 3: The final push. Concentrate all available firepower on Be'lakor. Don't be afraid to sacrifice less critical units to secure the kill.
Immortal Empires Campaign: Domination and Faction-Specific Objectives
The "Immortal Empires" campaign offers a more sandbox-style experience with diverse victory conditions tailored to each faction. While a "Long Victory" typically involves significant territorial control and the defeat of specific rival factions, many factions also have unique "Short Victory" and "Ultimate Victory" conditions.
- Long Victory (General):
- Territorial Control: Conquer and hold a specified number of provinces or settlements across the map. This often includes key strategic locations or faction capitals.
- Eliminate Rivals: Defeat and destroy specific enemy factions that are historical adversaries or pose a significant threat to your empire.
- Economic Power: Achieve a certain level of income per turn or accumulate a large treasury.
- Lord/Hero Level: Have your Legendary Lord reach a high experience level.
- Short Victory (Faction-Specific Examples):
- Kislev (Katarin Bokha): Often involves uniting the Kislevite lands, securing key Ice Court technologies, and defeating specific Chaos incursions.
- Grand Cathay (Miao Ying/Zhao Ming): May focus on completing sections of the Great Bastion, establishing trade routes, and defeating encroaching Chaos or Skaven threats.
- Ogre Kingdoms (Greasus Goldtooth): Often involves expanding their nomadic empire, securing valuable resource outposts, and defeating rival Ogre tribes or other factions that hold rich hunting grounds.
- Chaos Daemons (e.g., Skarbrand): Typically revolve around spreading corruption, razing settlements, and defeating specific "order" factions.
- Ultimate Victory (Faction-Specific Examples):
- These are often extended versions of the Long Victory, requiring even greater territorial control, the defeat of more powerful or numerous rivals, and the completion of unique faction mechanics or dilemmas. For example, an Ultimate Victory for a Chaos faction might involve conquering the entire Old World and spreading their specific brand of corruption to every corner.
Tips for Campaign Victory
- Read Your Victory Conditions Early: Always check your faction's specific victory conditions at the start of a campaign. This allows you to plan your early game expansion and diplomatic efforts effectively.
- Prioritize Key Objectives: While it's tempting to conquer everything, focus your resources and armies on the settlements, provinces, or enemy factions directly tied to your victory conditions.
- Diplomacy is Key: Forming alliances and trade agreements can secure your borders, provide economic benefits, and even draw enemies away from your primary objectives. Don't be afraid to use vassals or defensive alliances to protect your flanks.
- Manage Public Order and Corruption: Unrest can cripple your economy and lead to rebellions, stalling your progress towards victory. Invest in public order buildings and agents.
- Develop Your Legendary Lord: Your Legendary Lord is often central to achieving victory. Invest in their skills, equip them with powerful items, and ensure they lead your strongest armies.
- Adapt to the Map: The dynamic nature of Total War: Warhammer III means that unexpected events, rival faction expansions, and emergent threats will constantly challenge your plans. Be flexible and ready to adapt your strategy.
100% Human-Written. AI Fact-Checked. Community Verified. Learn how AntMag verifies content