
Learn efficient navigation in "A Game About Digging A Hole". Master the world map to maximize digging and find all hidden treasures across your dig site.
Welcome, aspiring digger! Mastering the world map and efficient navigation is crucial for maximizing your digging efforts and uncovering all the hidden treasures "A Game About Digging A Hole" has to offer. This guide will walk you through understanding your environment, utilizing key items, and finding those elusive secrets.
Understanding Your Dig Site
Your primary interaction with the game world is through the dig site itself. While there isn't a traditional overhead "world map" in the sense of sprawling landscapes, the game's core navigation revolves around the layers of earth you excavate. Think of each layer as a distinct zone, with varying resources and challenges.
The Digging Grid
- Visual Cues: Pay close attention to the visual differences in the soil. Lighter tiles often indicate softer earth, easier to dig. Darker, more textured tiles suggest harder ground, requiring better tools.
- Resource Indicators: Keep an eye out for subtle glints or color variations within tiles. These often signify embedded resources like Copper Ore, Silver Veins, or even rare Gem Clusters.
- Structural Integrity: As you dig deeper, you'll notice structural elements like Loose Rock Formations or Ancient Support Beams. These can sometimes collapse, creating new pathways or blocking old ones. Always be prepared for dynamic changes in the environment.
Essential Navigation Tools & Upgrades
Your ability to navigate and progress is directly tied to the tools you possess. Investing in upgrades is paramount.
Shovels & Drills
These are your primary means of interaction with the world. Each tier allows you to break through tougher materials and dig faster.
- Basic Shovel: Your starting tool. Effective for the initial layers of soft soil.
- Iron Shovel: Unlocked after collecting 50 units of Iron Ore and purchasing the blueprint from the Tool Merchant for $500. Required to break through Compact Dirt layers.
- Steel Drill: A significant upgrade. Requires 100 units of Steel Ingots (crafted from Iron Ore in the Smelter) and a $2,500 blueprint. Essential for penetrating Hardened Clay and Shale Deposits.
- Gold Shovel / Drill: The ultimate digging tool! This prestigious item is unlocked by completing all game achievements. It offers unparalleled digging speed and can break through any material with ease.
Lighting & Visibility
As you descend, darkness becomes a significant obstacle. Proper lighting is crucial for identifying resources and navigating safely.
- Mining Helmet: Your first light source. Automatically illuminates a small radius around your character. Purchase from the General Store for $150.
- Lantern Upgrade: Increases the radius and intensity of your light. Requires 20 Glowstone Shards (found in deeper caves) and $750 for the upgrade at the Workshop.
- Portable Floodlight: A deployable item that provides a large, stationary area of illumination. Excellent for setting up temporary bases or illuminating large resource veins. Blueprint available after reaching depth 50 for $1,500.
Strategic Digging & Pathfinding
Don't just dig aimlessly! A strategic approach will save you time and effort.
Vertical vs. Horizontal Digging
- Vertical Descent: Prioritize digging straight down initially to unlock new layers and discover deeper resources. This often reveals new biomes and challenges.
- Horizontal Exploration: Once you've reached a new depth, explore horizontally to uncover all resources and hidden pathways on that layer before continuing your descent.
Identifying Points of Interest
- Resource Veins: Look for concentrated areas of valuable materials. These are often larger than single tiles and can be mined for significant profits.
- Hidden Chambers: Occasionally, you'll break through a tile to reveal a larger, open space. These Hidden Chambers often contain rare items, large quantities of resources, or even unique challenges.
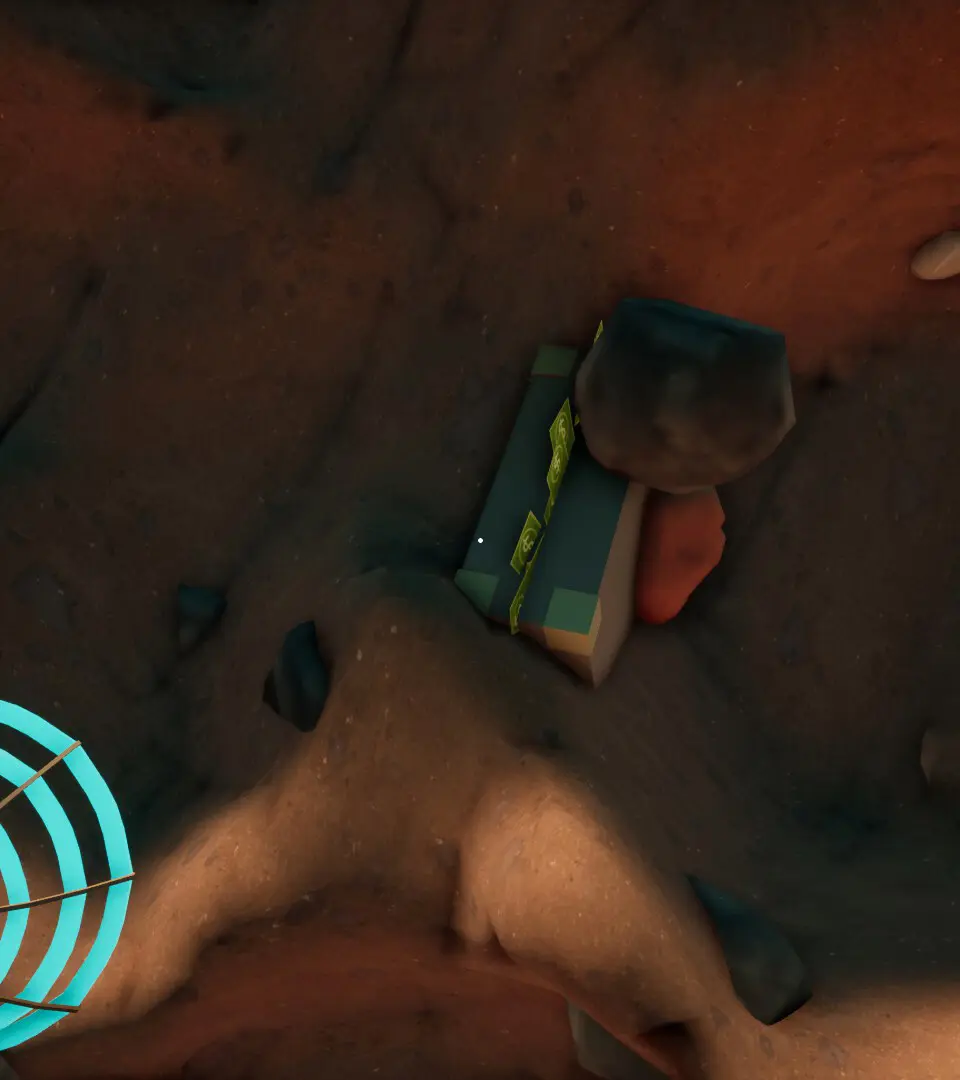
- Secret Tiles: Keep an eye out for unusual tiles. For instance, the Free $10,000 PC secret involves a specific tile with a small dot near a table and chair. Position yourself near the right side of this dotted tile (near the darker tile) and click repeatedly for easy cash. These secrets are often found in the initial layers near your starting point.
Returning to the Surface
Knowing how to efficiently return to the surface is vital for selling your haul, upgrading tools, and recovering.
- Ladder Construction: The most basic method. You can craft Wooden Ladders using 5 Wood Scraps at any workbench. Place them to create a direct path back up.
- Teleportation Device: A late-game item that allows instant travel back to your base. The blueprint is acquired after reaching depth 100 and costs $10,000 to construct. Requires 5 Teleportation Crystals (rare drops from deep-level enemies).
- Emergency Rope: A single-use item that instantly pulls you back to the surface. Useful in dangerous situations or when your inventory is full. Can be purchased from the General Store for $200.
100% Human-Written. AI Fact-Checked. Community Verified. Learn how AntMag verifies content