
Discover the locations of Relics like Helix Crystal and Tarnished Tag, along with Charmed Fragments and other valuable items within the Magicite Mine in Ender Magnolia: Bloom in the Mist.
This section covers the Magicite Mine area, detailing the locations of various items, including Relics, Charms, and materials. It also describes the path through the mine, including a mini-boss encounter.
- Magicite Mine Entrance: Follow the tunnel down. To the left, blocked by a barrier, is a path leading to a mini-boss. Continue down into the next room.
- First Item: Follow the tunnel left. At the end, you'll find Relic - Helix Crystal.
- NPC and Lore: Return to the hole you skipped and go down. Take the left path to a dead end with an NPC and Findings - Writing Etched Into the Wall.
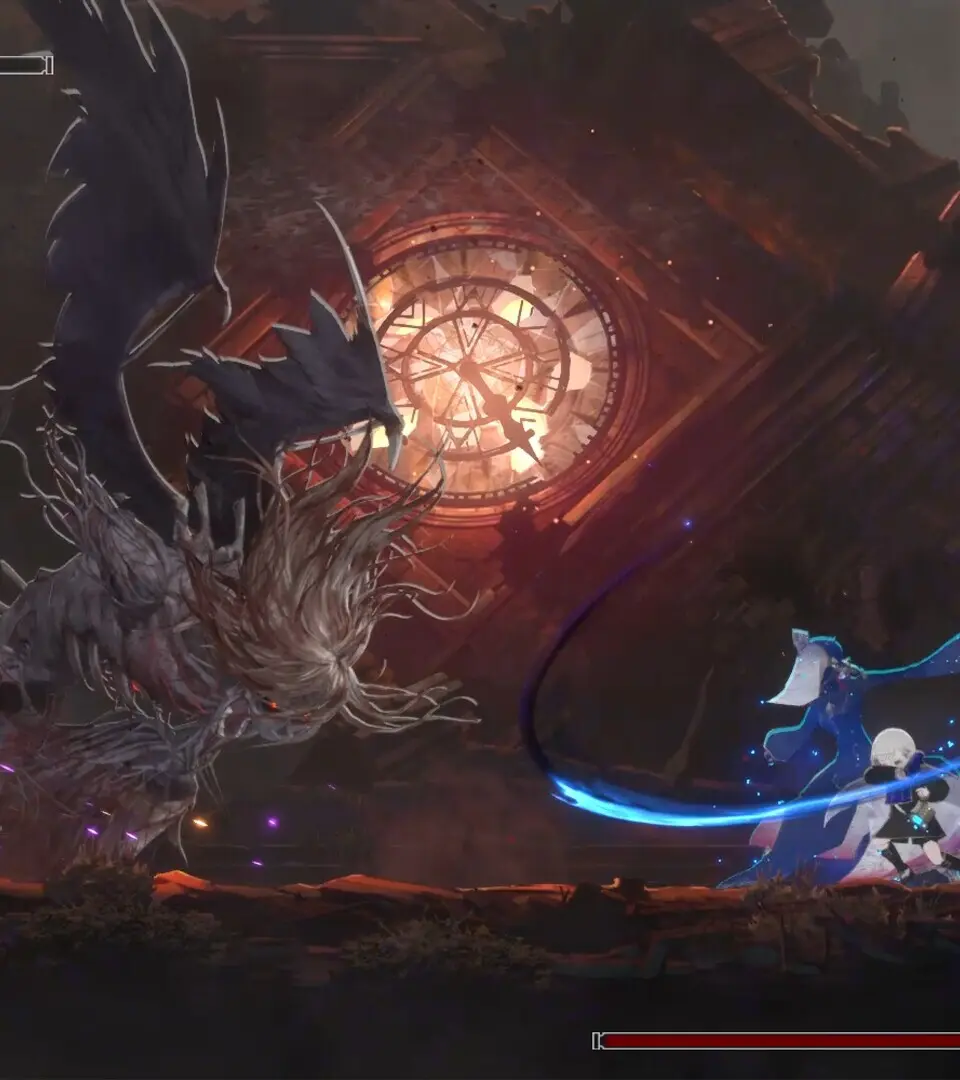
- Mini-Boss Area: Return to the fork and go right. You'll find a Respite. After saving, drop down and head left.
- Materials: Before sliding down the wall, jump left and dash to a ledge to find Materials x140.
- Charmed Fragment: Drop down and go right. Climb the platforms above to find Charmed Fragment in the upper right.
- Next Area: Drop down and go left into the next room.
- Second Charmed Fragment: Go left, jumping up a ledge. Follow the upper path to find another Charmed Fragment.
- Vertical Shaft: Drop down and head left into the next room. This is a long vertical shaft. Go to the very bottom, kill enemies, and find a hidden zone on the right.
- Materials x160: Go through the hidden zone back to the previous room, then right. At the end, you'll find Materials x160.
- Healing Flowers: Note that white flowers found before the Materials x160 pickup replenish healing dots.
- Relic - Tarnished Tag: Return to the vertical shaft room. Go left into the circular room. Move to the left-most side to find a chest with Relic - Tarnished Tag.
- Respite and Homunculus: Return to the vertical shaft room and take the center lift up. Enter the next room to the left, which is a Respite. After a scene, you will receive the homunculus Muninn.
- Dynamite Enemies: Go left up the platforms and enter the next room. Follow the upper path right, avoiding dynamite enemies.
- Machine Enemies: Drop down and defeat the machine enemies. The counter homunculus is recommended.
- Blocked Area: To the left, you'll find another area that cannot be broken yet.
- Mini-Boss Preparation: Go all the way right. There's an exit to the right for the mini-boss and an upward diagonal lift. Go right first.
- Mini-Boss Fight: Squad Leader, Mining Unit 1: This mini-boss is found to the right. Its attacks include Blast, Grenades, and Missile.
- Experimental Amplifier: After defeating the mini-boss, you'll receive Experimental Amplifier. Flip the lever to raise the wall, connecting paths.
- Findings - Notification of Restricted Areas: Return to the previous room and take the lift up. Jump left to grab Findings - Notification of Restricted Areas.
- Materials x130: Go right. In the upper right corner of this long room, find a hidden zone containing Materials x130.
- Upgrade - Grimoire: Continue right through a tunnel to find a chest with Upgrade - Grimoire.
100% Human-Written. AI Fact-Checked. Community Verified. Learn how AntMag verifies content