Kirby's Dream Land Stage 4 (3) walkthrough: navigate bomb blocks, grab 5 Energy Spheres, and use the Spear ability.
Walkthrough
- 1Dive in, swim to the bottom, and hit the switch for underwater terraforming.
- 2Enter the door, break through the bomb block, and carefully navigate the passage until it turns downward.
- 3Go up through the bomb blocks and enter the next door.
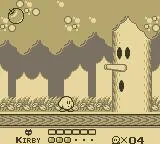
- 4Hit the switch, then pull the lever once the bridge closes.
- 5Jump over the switch, grab the key, use it to get the first Energy Sphere, and exit.
- 6Continue down the path to the door at the bottom and enter it.
- 7Keep hitting switches to open paths, grabbing Water along the way if desired.
- 8Enter the door leading to a lollipop, grab it, then swim around the rock formation.
- 9Enter the door concealed by seaweed and blast your way to the second Energy Sphere, then exit.
- 10Continue on, jumping out of the water for meat and stars if desired.
- 11Proceed to the door at the end and enter it.
- 12Proceed along the path, avoiding the large, spiky shell, and grab the Spear ability.
- 13Hit the pink switch, then hit the blue one and outswim the giant shell.
- 14Keep going until you reach the next pink switch, repeat the process, ducking into the alcove to let the shell pass over you. This clears the path to the third Energy Sphere.
- 15Proceed upward to the door and enter it.
- 16Go down the left side, continue down to a rotating sphere with stars and a skull on it.
- 17Run, clinging to walls when you fall from platforms, then throw the sphere at the blocks along the way for a 1-up. Try to stay out of the way of the explosion. The bomb will not explode until flashing and stops ticking when put down until picked up again.
- 18Keep going until you find another bomb, repeat the process, hitting switches to extend bridges as you cannot fly while carrying it.
- 19Cling to the insides to slip through cracks and throw the bomb at the gold blocks at the end to reveal the fourth Energy Sphere.
- 20If a Waddle Dee is a problem, put your bomb down, deal with it, then retrieve your bomb.
- 21Go back to the platform before the gold blocks, slide down the ladder underneath it, and through the door at the bottom.
- 22Enter Eel City. Watch the eels closely and time your movements to get by them.
- 23When you see a place to pop out of the water, do so, and grab the Spear ability if you don't have it.
- 24Continue through the bomb blocks to the top of the new chamber.
- 25Use your spear to hit the bomb block above the upward-facing eel to get the last Energy Sphere.
- 26Continue to the right, through the bomb blocks, and take the exit.
Tips
- Grab the Spear ability when you see it to help with certain obstacles.
- Be mindful of the bomb's explosion radius; it's a big one.
- The bomb will not explode until it's flashing, and putting it down stops it from ticking until you pick it up again.
- You cannot fly while carrying the bomb, so ensure bridges are extended.
- Cling to walls to save time when falling from platforms.
- Time your movements carefully in Eel City to avoid the eels.
100% Human-Written. AI Fact-Checked. Community Verified. Learn how AntMag verifies content