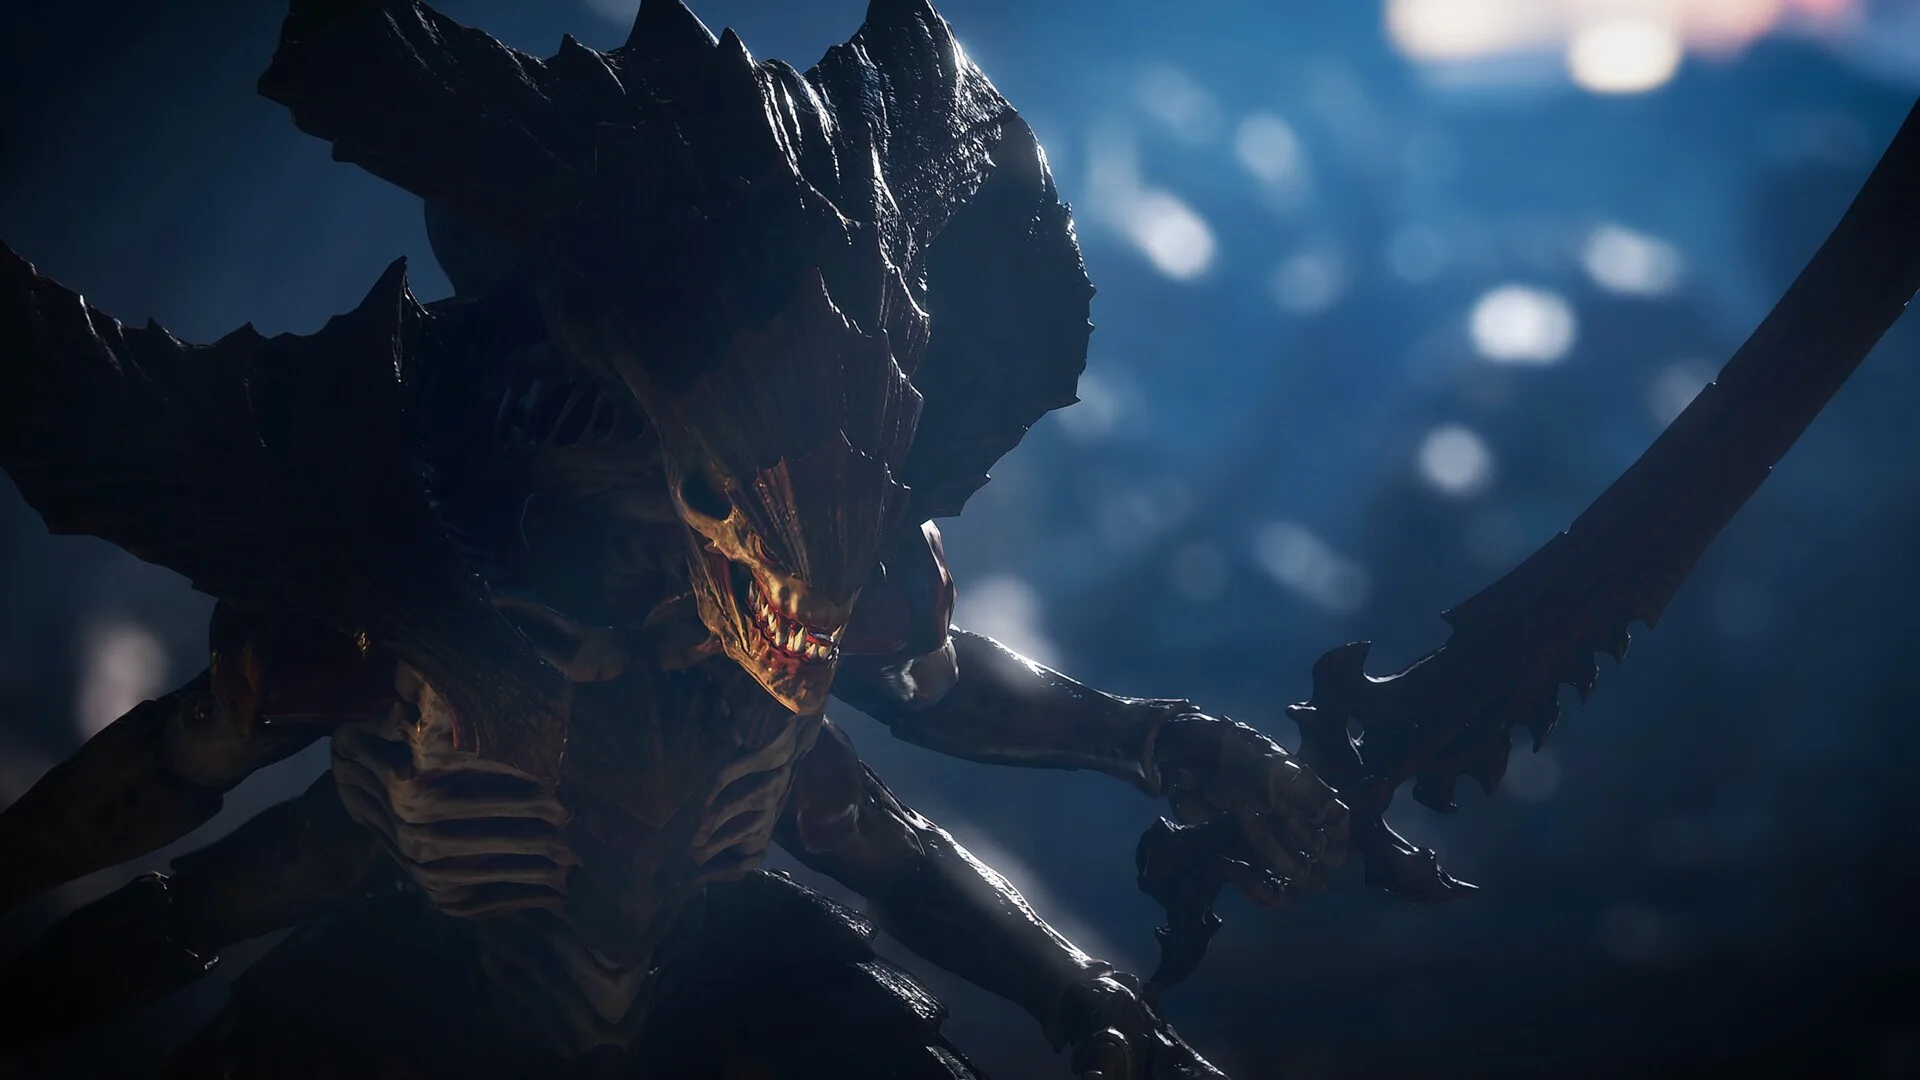
Welcome to the grim darkness of the far future, Marine. In Warhammer 40,000: Space Marine 2, you step into the power armor of Lieutenant Demerius Titus, a Primaris Space Marine tasked with defending the Imperium of Man against the ravenous Tyranid swarms. As a third-person horde shooter, you’ll be unleashing a devastating arsenal and brutal melee attacks to push back the alien threat across diverse worlds like Avarax. Master Titus's abilities and uncover a conspiracy that threatens the Imperium itself.
This guide is your essential companion for conquering the single-player campaign. We'll provide a step-by-step walkthrough for every Operation, from the Prologue: Rain of Terror through to Operation IV: Voidsong. Expect detailed coverage of mission objectives, including where to find those tricky collectibles scattered throughout the game's challenging chapters.
Part 1
Space Marine 2 PC walkthrough by a1ka1in, updated 09/17/2011. Find all chapters and servo skull locations.
- 1The guide is structured by chapters, starting with Chapter 1 - Planetfall (section 4001) and progressing through to Chapter 18 - Epilogue (section 4018).
- 2Specific section codes (e.g., 4001) are provided in the Table of Contents to jump directly to a chapter.
- 3The guide also details Servo Skulls / Audio Logs (section 3004).
- Use Ctrl+F (find function) with the provided codes to navigate the guide quickly.
- The guide is specifically for the PC version of Space Marine 2; console players may need a different guide.
- Servo skull locations are still being updated as of Version 1.0.
Part 2
Master the combat of Space Marine 2 with this guide covering essential controls, devastating melee combos, and effective battle strategies for all enemy types.
This section of the guide covers the core combat mechanics of Space Marine 2, including controls, melee combos, and general battle strategy.
Controls
The controls in Space Marine 2 are designed for constant switching between melee and ranged combat.
| Action | Button |
|---|---|
| Shoot Ranged Weapon | Left Click |
| Use Melee Weapon | Right Click |
| Move Forward | W |
| Move Backward | S |
| Strafe Left | A |
| Strafe Right | D |
| Run | Shift |
| Stun | F |
| Use / Interact | E |
| Zoom | Z |
| Evasion Roll / Fire Jump Pack | Space Bar |
| Switch Ranged Weapons | Mouse Wheel |
| Select Pistol | 1 |
| Select Assault Rifle | 2 |
| Select Sniper | 3 |
| Select Bomber | 4 |
Combos
Combos are crucial for progressing through the game. All melee weapons share the same combo button sequences. To execute a combo, use the stun button (F) after the previous hit finishes. For a 4-button combo, after three Right Clicks, press F just as the third hit is about to land, or hold the last Right Click and press F.
Combos can be followed up with an execution if a red skull appears above an enemy's head. Get close to the enemy and press E. Some enemies can only be defeated with Combo 3.
Combo 1
Sequence: Right Click + F
Area of Damage: One enemy
Combo 2
Sequence: Right Click + Right Click + F
Area of Damage: Multiple enemies if hits connect
Combo 3
Sequence: Right Click + Right Click + Right Click + F
Area of Damage: All surrounding enemies in a short distance (radial damage)
Battle Strategy
Treat each enemy type differently, as new enemies are introduced to be learned before facing them in large numbers. Using the same attacks on all enemies will lead to failure.
- Melee weapons are highly effective, especially against larger enemies and when surrounded. Combo 3 is essential when facing many enemies due to its radial damage.
- When facing a large enemy, initiate the combo sequence before they reach you to land a powerful blow.
- Against Orks, avoid combos and use normal Right Click attacks.
- Always use ranged weapons first as enemies approach. Let them come to you, and resort to melee only when they are too close.
- If a strong opponent is among weaker ones, retreat to eliminate the weaker enemies first before engaging the stronger one.
- Fury is vital on high difficulties. Use it when health is low to regenerate health, or against large enemies to shorten battles.
Part 3
Space Marine 2 Part 3 walkthrough covers reaching the planet surface in Chapter 1 and rendezvousing with your squad in Chapter 2. Learn how to use executions and find Servo Skulls.
- 1In Chapter 1, Objective - Reach planet surface: Leap from your spaceship onto another ship and immediately face a horde of Orks. Keep melee attacking using the right click (default) to deal with the large groups.
- 2If your health is low, use the execution move: stun an enemy by hitting "f" when a red skull appears above them, then hit "e" near the enemy to execute and gain health.
- 3After the initial wave, move forward and look up to the right for a shooting Ork. Shoot the fuel tank next to it to clear a path.
- 4Walk forward and kill all approaching Orks. Near the end, the path will be blocked by pipes again. Kill the Ork shooting from the right and then shoot the fuel tank next to it to clear the path.
- 5A cutscene (a non-interactive cinematic the game plays automatically) (an in-game cinematic) ensues, showing a large Ork. To the left is a shooting Ork; take it out first, then deal with the horde. Use executions if health is low or run backward while shooting.
- 6To the right, opposite the first shooting Ork, is another gunner. Take it out and shoot the fuel tank at the top in front of it to make more Orks appear.
- 7Look for blue gears on your HUD (heads-up display — the on-screen icons showing health, ammo and the minimap) (Heads-Up Display). Go to the gears icon and use grenades (small orange bottle-like icons) by rolling away with space and a direction button, then hit "e" near the turret to disable the Ork ship.
- 8After a cutscene, a new objective appears. Follow the fist icon on your minimap (the small circular map in the bottom-left corner of your screen) (a small map usually in the corner of the screen).
- 9In Chapter 2, Main Objective - Rendezvous with the squad, Go to the command bunker: Continue forward, fall down, and listen to Orks speaking.
- 10Move to the two large arch doors and fight approaching Grechins.
- 11Opposite the arch doors is a barricade. Shoot the red canisters to make the barricade burst.
- 12Keep going up and pick up a blue icon (a Servo Skull, which is an audio log) floating above a dead soldier by hitting "e". You can listen to it via the pause menu (esc).
- 13Enter the large arch doors.
- 14Near a crashed blue space vehicle, hit "e" to gain your first assault rifle with ammo.
- 15Hold "ctrl" to enter aim mode and shoot the two gunners emerging from the door in front of the craft.
- 16Go through the door they came from and through a hole in the wall. Ignore the Orks on the upper floor for now.
- 17Go left to an area with a glowing blue box. A cutscene shows your teammate Leandros fighting Orks. Help him by shooting the approximately 5 Orks on the upper floor with your Bolter.
- 18If your health lowers, run back to where you entered this area. Your armor will regenerate, but health does not in battle.
- 19After the first batch of shooters, two Orks will attack; you can perform executions on them. Keep an eye on gunners on the upper floor.
- 20After clearing the shooters, a horde of Grechins will attack. You cannot perform executions on them.
- 21Go left, up the sand floor, and into an open area. Pick up another audio log near the wall.
- 22Continue right to see soldiers and an Ork. Follow them to a central area where a horde of Orks is killing soldiers. Stay at a distance.
- The execution move is crucial for healing when your health is low.
- Shoot fuel tanks and pipes to clear paths blocked by Orks or debris.
- Use cover (an environmental object that provides protection from enemy fire) when necessary, though the source text emphasizes aggressive melee and shooting.
- Servo Skulls provide audio logs that can be accessed through the pause menu.
- Leandros cannot die, but don't stay away from him for too long during combat.
- Your armor regenerates, but health does not during combat.
Part 4
Space Marine 2 Part 4 walkthrough: Learn how to defeat Orks, find the Chainsword, and use the heavy Bolter.
- 1Assault the Orks, kill them all, and speak to the guardsman.
- 2Pick up ammo if needed and go through the bunker door.
- 3Listen to the aggrieved soldiers as you move through the bunker.
- 4Go onto the stairs and keep going until you meet up with Sidonus.
- 5After the cutscene (a non-interactive cinematic the game plays automatically) (an in-game cinematic event), go to the blue support craft and pick up the Chainsword.
- 6To see the Chainsword's execution visuals, perform executions on the Orks that show up.
- 7Leandros mentions in a cutscene that the Orks are guarding the cannon; kill them all.
- 8Continue through a bunker lane, dealing with shooters on the sides of the wall who can use cover (press the cover button to crouch behind walls or objects) (a mechanic where characters hide behind objects to avoid damage).
- 9Move a bit to hit the shooters and take out any Orks on the ground.
- 10When the path branches left and right, go left, destroy barriers by shooting explosive canisters, and pick up ammo.
- 11Go back to the other route to encounter a new enemy that explodes.
- 12From your standing position, shoot the Orks on the wall first.
- 13Encounter the suicide bomber enemy; shoot them from a distance and never let them get close.
- 14Be ready to shoot Grechins and Bomb Squigs that appear.
- 15Shoot the little bomber first to make it explode and take out nearby Orks.
- 16Continue until the game saves and you hear a soldier say "there are too many of them."
- 17Find grenades in the weapons box.
- 18Stay near the weapons box for the first wave of enemies instead of going into the central area, as that is suicide.
- 19Run to the soldiers at the far end for the second wave.
- 20Deal with shooters near explosive barrels; do not shoot the barrels yet.
- 21After the shooters are gone, a wave of Grechins will appear; smash them to bits.
- 22For the third wave, consisting of many Orks, shoot the Ork gunner first, then bombard the Orks when they are in a group.
- 23Conserve grenades for later.
- 24More gunners will appear; shoot them out.
- 25When the Captain mentions the dropship, prepare to use grenades. Pick up more from the two boxes if low on grenades.
- 26Wait for all the Orks to fall out of the dropship and throw all your grenades at them.
- 27If you preserve some grenades, that is great, but use them up if necessary.
- 28After this attack, an Elite Ork will fall out of the ship; this enemy is very tough.
- 29Use combos or grenades on the Elite Ork. If out of grenades, use kicks.
- 30To perform a combo, go near the Elite Ork, hit right click, then immediately hit right click and F. Another combo is RT, RT, RT, F.
- 31Keep kicking the Elite Ork and mash buttons until an execution symbol appears.
- 32Hit 'E' and start left-clicking rapidly to perform an execution. The Elite Ork dies if you hit left-click properly.
- 33After the Elite Ork is defeated, go near the bunker door and go down after it opens.
- 34Speak to the Lieutenant and follow her.
- 35Pick up the purity seal from a yellow weapons craft.
- 36Do not hit the fury button just to see how it works; it will be needed soon.
- 37Follow the Lieutenant outside and continue until you see the Ork Diggah.
- 38Face dozens more Orks. Unleash fury (T) or fall back and shoot from a distance if fury is depleted.
- 39Move to the end of the path and go into the guard post to the left to find an audio log (
). - 40Go back outside and to the right, through a small space between two Diggas.
- 41Pick up grenades from a weapons box in the distance.
- 42Take out two Orks near a Diggah.
- 43Look to the right for more Orks and use grenades on them.
- 44Take out any remaining Orks.
- 45Kill the Orks fighting a soldier, then run to the heavy Bolter, break it, and take it.
- 46Use the heavy Bolter on the dozens of Orks that appear.
- 47Look behind you occasionally to see if any Orks slipped past.
- 48After the Orks are dealt with, go up the stairs at the far end.
- 49At the weapons craft, pick up the Stalker Bolter (the sniper rifle).
- 50Move forward and use the Stalker Bolter on an Ork gunner on the stairs.
- 51Take out all Orks with one shot close to the head using the Stalker Bolter.
- 52Look to your right in the building for more Orks to kill with the Stalker Bolter.
- 53Enter the building to the right of the current one.
- 54Face an Ork on the upper floor of the building.
- 55Continue forward and find a weapons crate.
- 56Opposite the crate is a space to the left.
- Conserve grenades for tougher waves, especially the dropship attack.
- The Elite Ork requires specific combos or grenades; do not rely on normal attacks.
- If fury is depleted, fall back and use ranged weapons.
- Use the Stalker Bolter's precision to eliminate enemies from a distance.
- Remember to check behind you for flanking enemies, especially when using the heavy Bolter.
Similar guides you might like


100% Human-Written. AI Fact-Checked. Community Verified. Learn how AntMag verifies content