
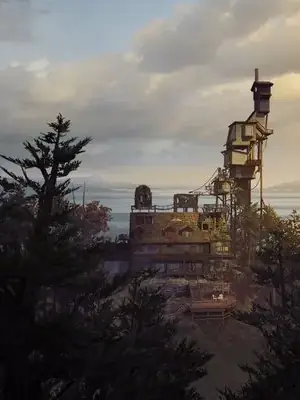
Outlast 2 throws you into the desolate Arizona desert as Blake Langermann, an investigative journalist searching for answers about a brutal murder. You and your wife, Lynn, are not fighters; your survival hinges on your ability to run, hide, and document everything with your camera. Prepare to navigate the terrifying cults and nightmarish landscapes of Temple Gate, where every shadow could hide a threat.
This guide will help you survive the horrors of Outlast 2. We cover a complete walkthrough of the game's six chapters, from 'Genesis' to the final confrontations. You'll find detailed information on all collectibles, ensuring you don't miss any secrets, and a comprehensive breakdown of all Steam Achievements and Trophies to help you unlock every accomplishment.
Part 1
Outlast 2 Part 1 walkthrough covering The Nightmare, The Crash, The Compound, Saint Sybil School, and The Fields.
- 1Begin with 'The Nightmare' section.
- 2Proceed to 'The Crash'.
- 3Continue through 'The Compound'.
- 4Navigate 'Saint Sybil School'.
- 5Complete 'The Fields'.
- 6Progress through 'Heretic Cave'.
- 7Explore 'Temple Gate Town Square'.
- 8Experience 'Jessica's Death'.
- 9Make your way through 'The Chapel'.
- 10Follow 'The Road to the Mine'.
- 11Conclude Chapter 1 with 'Inner Demon'.
- Press Ctrl+F and enter the code [OUT 1] to quickly navigate to this section.
- This guide is best viewed using a fixed-width font.
Part 2
This guide covers Part 2 of Outlast 2, detailing controls and offering tips to help you survive the horrors ahead. Get ready to face the darkness!
Hey there! Bkstunt here, ready to guide you through the terrifying world of Outlast 2. If you've played the first game or its DLC, you'll feel right at home, but don't worry if you haven't – this guide will get you through.
This walkthrough is designed to help you not only survive but also to find all the hidden documents and recordings. We want you to experience everything Outlast 2 has to offer! So, thanks for joining me again, and let's get started.
Before we dive into the thick of it, let's go over the controls so you're prepared for what's coming:
Controls
Here are the controls for Outlast 2:
| Left Analog Stick | Movement |
| Right Analog Stick | Camera |
| Directional Buttons: Up/Down | Zoom in and out (Camcorder) |
| Directional Buttons: Left | Activate Microphone (Camcorder) |
- Mastering the camcorder's zoom and microphone features will be crucial for spotting threats and gathering information.
- Always be aware of your surroundings; the game is designed to keep you on edge.
- Don't be afraid to run and hide – direct confrontation is rarely the best option.
Part 3
Master Part 3 of Outlast 2! Learn essential controls, tips for managing batteries and bandages, and how to use your camcorder's microphone to detect enemies. Get ready to run, hide, and survive.
Alright, so you've made it to Part 3 of our Outlast 2 journey. This section is going to cover some crucial controls and general tips that'll keep you alive. Think of this as your basic training before we dive back into the real horror.
First off, let's get you familiar with the controls. You'll be using your camcorder a lot, so knowing how to operate it is key. The Square Button is your main 'Action' button, used for interacting with things. Need to reload your batteries or patch yourself up? That's the Triangle Button. For jumping or grabbing onto ledges, you'll be hitting the X Button. And when you need to get low, whether it's to hide or crawl through tight spaces, use the O Button.
Your camcorder itself has a few tricks. The Touch Pad lets you review recordings or check your current battery and bandage count. When things get really dark, you'll want to use R1 to bring up the camcorder and then R3 to activate Night-Vision. Leaning is super important for peeking around corners without exposing yourself – use L2 to lean left and R2 to lean right. And if you need to make a quick getaway, holding down L3 will make you sprint.
- Batteries and Bandages: These are your lifelines, and sometimes they can be a bit random in where they spawn. The game seems to adjust their appearance based on how many you currently have. Keep an eye out near flashlights or in first-aid kits, as that's where they usually pop up. Don't stress too much if you don't find exactly what the guide mentions; just know they're often in those general areas.
- Keep the Camcorder Ready: Seriously, keep that camcorder out as much as possible, especially if you're not sticking to the guide religiously. You'll find lots of 'recordings' (notes) scattered around that give you more insight into the story and the world. Missing these can mean missing crucial context.
- Hiding and Running: Some areas will throw you into a situation where you're trapped with a psycho and have to find a way out. Your best bet is to identify a safe hiding spot first, then explore from there. Remember, you can outrun most enemies. If you're ever in doubt, just run! But be smart about it – don't try to hide when an enemy is literally watching you.
- Use the Microphone: Your camcorder's microphone can be a lifesaver for detecting enemies. It's great for checking around corners, in cornfields, or just generally getting a sense of what's nearby. Just a heads-up, though: in places with a lot of ambient noise, like the mines, it might not be as effective.
Chapter 1: Genesis - The Nightmare
Alright, story time. You're Blake Langerman, an investigative journalist, and your wife Lynn is right there with you. You're in rural Arizona, trying to uncover the truth behind a disturbing murder. You're not fighters, folks. Your only options are to run, hide, or die. So, your main goal is to record everything you see.
To get started, just choose 'New Game'. This walkthrough was written on 'Normal' difficulty, so keep that in mind if you're playing on a harder setting.
Important Note: This guide was created to help you find all the collectibles in the game. Pay attention!
Part 4
Collect all recordings and documents in Outlast 2 Part 4, including The Jane Doe Story Parts 1 & 2, The Wreckage, The Crucified Pilot, and The Impossible Town.
- 1Enjoy the opening audio and the helicopter ride with Lynn, where you will automatically obtain two recordings: The Jane Doe Story Part 1 and The Jane Doe Story Part 2.
- 2After a flashback sequence in a school, you will wake up after a crash. Press SQUARE to remove debris and automatically pick up your camcorder.
- 3Press the TOUCH PAD (the game's radar (your minimap with nearby blips and threats marked)) to view your objective: Find Lynn. You can also press the TOUCH PAD to review recordings and documents.
- 4Head left from the crash site and jump down. Continue left until you see gaps. Press X while moving forward to jump over gaps.
- 5Jump to the rock, turn around, and move to the ledge. Strafe left or right to move along ledges. Press O to drop from a ledge.
- 6Strafe right on the ledge and drop down at the end. Jump the next gap towards the wreckage.
- 7A tutorial will prompt you to press R1 to raise your camera. Recording starts automatically when the REC sign blinks and you are aiming correctly at the event. Aim until the red circle is full to capture the moment.
- 8Record the crash to obtain the The Wreckage recording.
- 9Press the TOUCH PAD to access your camera's menu and review recorded videos.
- 10Continue to the wreckage and look behind it to find a BANDAGE (a healing item). The TOUCH PAD shows how many bandages you have.
- 11Continue past the helicopter, using night vision (raise your camera and press R3) to see in the dark.
- 12Record the body you find near the distant fire to obtain the The Crucified Pilot recording.
- 13Continue forward, using night vision to navigate the linear path. After a slide, you will see a town.
- 14Record the town to obtain the The Impossible Town recording.
- Press the TOUCH PAD at any time to see your current objective and review collected recordings and documents.
- Use night vision (R3 while camera is raised) frequently to navigate dark areas.
- Important events that trigger a recording prompt should be captured by aiming your camera until the red circle is full.
Similar guides you might like


100% Human-Written. AI Fact-Checked. Community Verified. Learn how AntMag verifies content