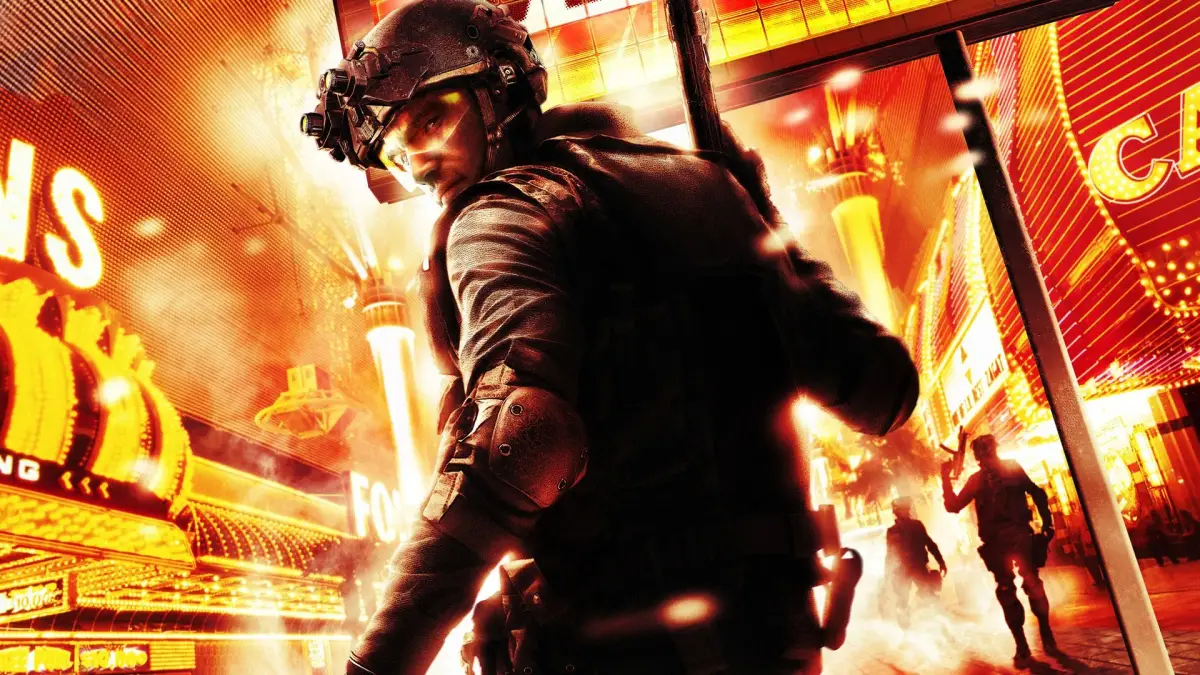
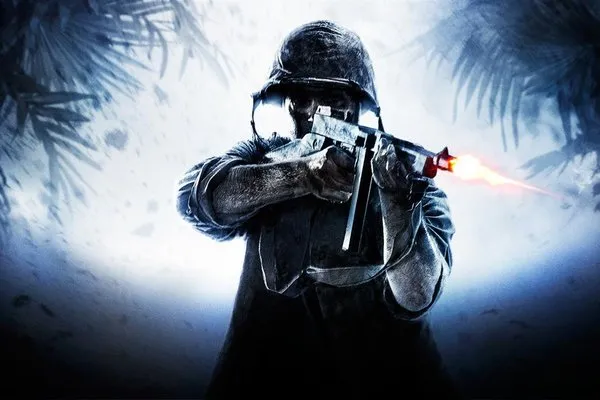
Welcome to Rainbow Six Vegas, a classic first-person shooter where you step into the boots of Logan Keller, leader of a new Rainbow team tasked with stopping a devastating terrorist attack on Sin City. You'll be coordinating with your squad, using cover to your advantage, and executing tactical maneuvers to neutralize threats across iconic Vegas locations like the Freemont Street and the Strip. It’s a tense, strategic experience that rewards careful planning and precise execution.
This guide is your go-to resource for mastering Rainbow Six Vegas. We'll walk you through every step of the single-player campaign, ensuring you can conquer challenging missions and secure victory. We'll also cover the cooperative modes, helping you and your friends tackle the game's toughest challenges together. Get ready to become a Vegas security expert!
Part 1
Your friend's guide to Tom Clancy's Rainbow Six Vegas, Part 1. Learn the controls, basic strategy, and get ready for the Mexican Border mission.
Hey there! Ready to dive into Tom Clancy's Rainbow Six Vegas? This guide's gonna walk you through the game like we're playing side-by-side. We'll cover the basics, some essential tips, and get you prepped for your first mission on the Mexican Border. Remember, enemy placement can be a bit random, so always stay sharp, even if I say a spot should be clear!
A quick heads-up: This guide isn't spoiler-free. I might mention things that happen later to help you out now.
First things first, let's get you familiar with how to move and shoot. Here are the default controls:
| Control | Action |
| Left Trigger | (Hold) Take Cover |
| Left Bumper | Switch Rules of Engagement |
| Right Trigger | Fire |
| Right Bumper | (Click) Toggle Goggles / (Hold) Toggle Goggle Modes |
| Left Stick | Strafe/Run/Walk / (Click) Crouch |
| Right Stick | Aim / (Click) Zoom |
| D-Pad | Issue Team Orders |
| Back Button | (Click) Issue Target Priority / (Hold) Map |
| Start Button | Pause/Menu |
| X Button | (Click) Reload / (Hold) Toggle Weapon RoF/Attachments |
| Y Button | (Click) Quick Weapon Swap / (Hold) Weapon Selection |
| B Button | Throw Grenade |
| A Button | Issue Team Move Order / (Context Sensitive) Interact |
You'll also use some context-sensitive actions:
- Behind Cover: Use the left stick to choose which way you want to peek out.
- On a Ladder: Press [A] to slide down.
- Rappelling: Press [A] to rappel down faster. You can also press the crouch button to invert yourself for a better shooting angle, but you won't be able to push off the wall then. If you're rappelling near a window, pressing [A] will let you breach the room.
- Closed Doors: Aim at the bottom of the door and press [A] to use the 'snake cam' and see what's on the other side.
- Teammate Down: Get close and press [A] to revive them. You can also press UP on the D-Pad to order your other teammate to heal them if they can.
- Special Objectives: When you see a device like a server, bomb, or demolition point, aim at it and press [A] to order your team to hack, defuse, or perform the necessary action.
We'll get into the actual missions soon, starting with Scene 1: Mexican Border. Just get comfortable with these controls, and you'll be ready to roll!
Part 2
Unlock the secrets of Tom Clancy's Rainbow Six Vegas Part 2. Master voice commands, tactical reloading, thermal vision, and advanced combat strategies for ultimate victory.
Voice Commands: Use your headset to issue commands to your team. Supported commands include Move To, Hold, Regroup, Infiltrate, Assault, and Tag.
- Cover is crucial: Utilize any large inanimate object for cover, such as cars, slot machines, doors, desks, crates, and particle board.
- Headshots are key: Aim for the head; 1-3 bullets are usually enough to neutralize any enemy, regardless of armor or tactics.
- Flanking: Shooting enemies in the back is the second most effective tactic after headshots.
- Patience is a virtue: Be prepared for random, unexpected deaths, often from headshots.
- Reloading: Always reload when possible, even if the magazine isn't empty. Speed reloading is faster and provides a full magazine plus an extra round.
- Thermal Vision: Useful for identifying targets in low-light conditions and gaining a reflex advantage in close-quarters combat. It does not penetrate walls or doors.
- Suppressed Weapons: Your team carries suppressed SMGs for infiltration. You can force them to use SMGs in assault mode by using a suppressed weapon yourself, including your pistol.
- Suppressor Use: Suppressors reduce damage by 25-33%. Use them strategically for stealth, lining up headshots, and avoid using them for body or limb shots if you anticipate a firefight.
- Weapon Handling: Use full-auto for SMGs and the FAMAS. Switch assault rifles like the MTAR21 or SCAR-H CQC to semi-auto for better control.
- Alternate Paths: Use alternate routes to scout ahead, flank enemies, and manage chaotic firefights.
- X-fire Tactic: Have your team attack from a different angle than yours to split enemy focus and create openings.
- Coordinated Breaching: When entering rooms, have your team breach one door with explosives while you breach another, ready to engage. Prioritize targets not immediately downed by the breach.
- Avoid Recklessness: Unlike other games, R6 Vegas requires more caution. Avoid being too reckless, especially when leaning out.
- Blind Fire: Inefficient and a waste of ammo. Use only as a last resort for suppression or at extremely close range. Blind firing a sniper rifle can yield humorous results.
- Peeking Safely: Never peek from a corner under enemy fire. Peek from a different direction or move to new cover.
- Target Priority/Tag: Use the Tag command even without the snake cam. Infiltrate with your team, position them, then switch to assault mode for coordinated takedowns.
- Spamming Tag: If unsure about a target through the snake cam, spam the Tag button to confirm if it's an enemy.
- Jung Park's Hacking: Expect assaults from multiple directions, enemies shooting the computer, and Jung not finishing until most enemies are eliminated.
- Murphy's Law: Even in ideal stealth situations, expect to be detected and attacked.
Part 3
Navigate Part 3 of Tom Clancy's Rainbow Six Vegas. Learn enemy tactics, character roles, and master the 'Mexican Border' mission with our expert guide.
Alright, let's dive into Part 3 of Tom Clancy's Rainbow Six Vegas. This section really hammers home that things aren't always as they seem, especially when you think you've got a room cleared. Remember, just because you see blood doesn't mean the job's done – sometimes it's just a ketchup bottle! We'll also get a closer look at the folks you're working with and against.
Characters:
You play as Logan Keller, the Team Leader. He's the one right in the middle of all the action.
Your team consists of:
- Alpha Team:
- Gabriel Nowak: Electronics and Recon Specialist. He's the smart-mouthed one who's great with tech.
- Kan Akahashi: Heavy Weapons and Demolitions Expert. The experienced guy, good for breaking down doors.
- Bravo Team:
- Jung Park: Electronics and Recon Specialist. Quiet but knows how to get you vital intel.
- Michael Walter: Heavy Weapons and Demolitions Expert. The cheerful one, ready to blow things up.
The support crew is crucial too:
- Joanna Torres: Information Officer. She's in the chopper, feeding you info to keep you on track.
- Brody Lukin: Chopper Pilot. He gets you into the hot zones smoothly.
On the other side, you've got the terrorists:
- Irena Morales: Seems to be the main leader, holding key information. Her true motives are a mystery.
- Marcello: Part of the Mexican group you meet early on. He's not much of a threat and you'll take him out in the first scene. His death causes a stir among his comrades.
And some important civilians you might need to rescue:
- Doctor Smythe & Doctor Williams: These two are part of a NATO research team working on a Micro-Pulse bomb. They're taken hostage and are vital to the terrorists' plans.
- Trish Gracie: A reporter who gets caught up when she overhears sensitive information at a Chinese restaurant. Rescuing her is a secondary objective.
Scene 1: Mexican Border
Scene Notes:
- Enemies here don't wear armor, so body shots are fine for now.
- Expect enemies to use weapons like the AK47, G3KA4, 21E, 870MCS, MAC11, 92FS, MP5N, and SV-98.
Inbound
You're starting solo with an MP5N, 552 Commando, MK.23, frag grenades, and smoke grenades.
NEW OBJECTIVE: Regroup with Team
Head up the street to find your first target. He's walking perpendicular to you and likely won't see you coming. Take him out, then hug the right wall as you round the corner. Near the first car, two enemies will burst from a side alley – try to get them as they appear. Immediately after, two or three more will come from the right further down the street. Again, try to shoot them as they run out before they take cover. Don't hesitate to use the side alleys to flank them if needed.
Continue up the street and turn right. You'll see a house on your left with an open door. Before going in, slap a suppressor on a weapon if you have one. Sneak up to the lone enemy with his back turned and get a silent headshot. Now, approach the door. Use your snake cam to scout the two enemies inside. If you want a good angle, you can open the door on the far corner to line up both targets.
Once that's clear, head upstairs to find a room with a ladder leading to the roof. Climb up and take out the single enemy with his back to you. Move to the rappel point at the edge of the roof and start descending. You'll see about four guys below, but they won't spot you until you open fire. Find cover quickly and line up your shots. Snipe as many as you can. When things quiet down, check the alley to your left – you can use it to flank if you still need to.
When you reach the end of the street, take cover behind the truck. Identify the...
Part 4
Follow this comprehensive walkthrough for Part 4 of Tom Clancy's Rainbow Six Vegas, detailing enemy encounters, objectives, and strategies to reach the Train-Yard and rescue hostages.
- 1Proceed around the railing to the alley. Take cover at the corner and identify the tango on the balcony and the one on the ground. Eliminate the balcony target first, then the one hopping the fence.
- 2Hop over the fence and head towards the church. Upon seeing the church, a video message will play indicating your team has landed on the roof.
- 3Get to the corner and peek out to eliminate the 3-5 tangos on the ground. They may be looking upwards, providing an opportunity to take them down before they notice you. Alternatively, wait for your team's smoke grenades and use your goggles to see through the smoke.
- 4Enter the church and head to the roof to rejoin your team. Tangos will appear on adjacent rooftops. Use the available cover, direct your team to cover, and eliminate all visible enemies, including two snipers behind you.
- 5With your team, head downstairs towards the other side of the church. Double doors will open, releasing a dozen enemies. Use cover provided by the altar, pews, and pillars. Enemies will also break in through the windows on the right.
- 6OBJECTIVE UPDATED: Reach the Train-Yard
- 7Head outside and order your team to set up explosives on the large double doors (press A). Take cover behind the truck bed and prepare to snipe. Provide cover for your team as they enter.
- 8Move with your team into the alley on the right. You will reach a small building with doors on two sides. Use the snake cam to identify targets, choose a door to enter, and have your team enter from the other. Breach with C4 and eliminate the 3 targets inside.
- 9Exit the building and move into the courtyard. For the next building, send your team to the bottom door and run up to the top door. Order your team to frag and clear. Open your door and eliminate the enemy behind it. Move inside and take cover by the railing. Your team should handle the bottom floor, while you deal with enemies on the top.
- 10Regroup and move to the other end. Be cautious of a potential enemy hiding behind crates. You should find a fast rope at the end; send your team down or climb down yourself.
- 11Trainyard [S102]
- 12In the starting room, pick up equipment. It's recommended to bring a long-range weapon (assault rifle with ACOG or rifle scope) and a close-range weapon (SMG or shotgun). Flashbangs are optional.
- 13Keep your team in infiltrate mode until a serious firefight. Consider equipping suppressors if using infiltrate mode.
- 14NEW OBJECTIVE: Rescue Civilian Hostages
- 15Move outside into a large area with train cars. Slowly advance and identify enemies on the ground, in a second-floor window, and a sniper on the bridge. Engage the ground enemies first, then any emerging from the building.
- 16Move towards the building and up the stairs. Deal with any enemies around the corner and the sniper on the bridge if not already done. Go down the ladder on the other side and run through the crates. Flank an MG and other scattered enemies on the left.
- 17At the end of the area, two ladders lead up. Watch for a hidden enemy behind a flat train car. Climb the ladders and go through two empty rooms until you hear people talking. Use the snake cam on the room to prioritize targets. Switch to Infiltrate, stack your team on a door, and order a flashbang and clear. Avoid shooting hostages or using frag grenades inside.
- 18NEW OBJECTIVE: Capture Irena Alive in the Mines
- 19Outside the room, find another equipment crate for ammo. If you brought a sniper rifle, switch to a close-medium range weapon. Bring a comfortable pistol for later use.
- 20Head down the ladder or fast rope. Sneak around the corner to eliminate a hidden enemy. Engage in a firefight with scattered tangos. The safest route is to go around the train cars on the left.
- 21You will see a building. Enter through the front door or go around the side and down the stairs. Deal with 2-3 targets on the ground floor. There may be more enemies.
- Use the snake cam to identify enemy positions and plan your approach, especially before breaching rooms.
- Direct your team's actions (cover, frag, clear) to maximize their effectiveness and minimize your risk.
- Utilize the environment for cover during firefights, especially on rooftops and in the church.
- Prioritize eliminating snipers and enemies on elevated positions early in engagements.
- Be mindful of hostages when using explosives or during room breaches.
- Progression to the next part of the game.
- New objectives to pursue.
Similar guides you might like

100% Human-Written. AI Fact-Checked. Community Verified. Learn how AntMag verifies content