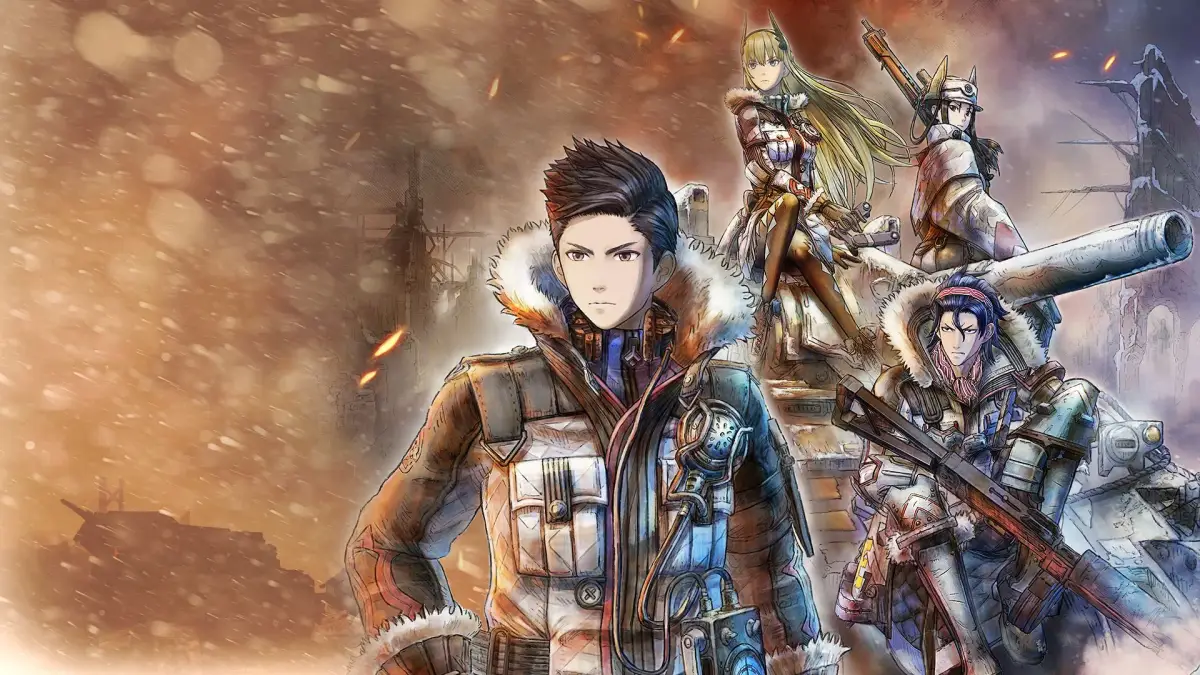
Valkyria Chronicles 4 drops you into the boots of Claude Wallace and Squad E of the Federation as they fight against the Gallian Empire in a desperate war. This is a story-rich, tactical RPG where you'll command your units on a battlefield, using a mix of turn-based strategy and real-time action to overcome enemy forces. You’ll manage unit positioning, exploit enemy weaknesses, and utilize special abilities to push through challenging missions, from the initial deployments like Operation Northern Cross to intense battles such as the Liberation of Reine.
This guide is here to help you conquer every skirmish and master the intricacies of each unit. We’ll cover detailed walkthroughs for every chapter, including tough fights like The Battle of Fort Krest and Rangers in the Storm, ensuring you can lead Squad E to victory and achieve all your objectives.
Part 1
Valkyria Chronicles 4 Challenge Run Walkthrough by fatgamecat. Details on mission conditions, playthrough results, and combat advice for intermediate to advanced players.
This guide details a challenge run of Valkyria Chronicles 4, focusing on no mid-mission saves, no class leveling, no orders, minimal damage taken, and efficient strategies. It is intended for intermediate to advanced players, though beginners may find the advice section useful.
Run Conditions:
- New Game, normal difficulty.
- No reloading from mid-mission saves; missions are restarted via 'give up and retry'.
- No orders or ship orders.
- No class leveling.
- Mission strategies balance low turn counts, command point efficiency, minimal/no damage taken, and killing leaders, tanks, and aces.
- Restricted use of 'last stand': if a unit enters last stand, 'stand up' is selected, followed immediately by ending their turn. If it occurs on enemy turn, 'counter' is used. 'Inspire' is avoided; if used, the extra command point is considered unusable.
- Missions are played with appropriate equipment and recruits, or used in a restricted manner.
- DLC missions are reserved until after on-disc content is completed and played in a new game manner, with rewards not used across DLCs.
- No repeating missions for grinding unless all non-DLC missions are complete.
- Videos are recorded in a single take, with idle times selectively sped up.
Table of Contents:
- [01] Revision History
- [02] Playthrough Results
- [03] Combat and General Advice
- [04] Squad Stories, A Rank Turn Limits
- [05] Main Game Walkthrough
- [06] Squad Story Walkthrough
- [07] Skirmish Walkthrough (non-DLC)
- [08] DLC Walkthrough
Revision History:
The no-reload run started on January 15, 2019, and concluded on April 18, 2019, including guide and video creation.
- Revision 1 - 2/25/19: First version.
- Revision 1.1 - 2/26/19: Organized, added to, and fixed typos/errors in the advice section.
- Revision 1.2 - 2/27/19: Organized, added to, and fixed typos/errors in the advice section.
- Revision 1.3 - 2/28/19: Organized, added to, and fixed typos/errors in the advice section. Added skirmish 4 Hard.
- Revision 1.4 - 3/03/19: Organized, added to, and fixed typos/errors in the advice section. Added skirmish 5, 6, and 7 Hard.
- Revision 1.5 - 3/06/19: Organized, added to, and fixed typos/errors in the advice section. Added skirmish 8 and 9 Hard.
- Revision 1.6 - 3/12/19: Added challenge skirmishes 1-3.
- Revision 1.7 - 3/14/19: Added the 3 postgame squad stories.
- Revision 1.8 - 3/17/19: Added squad 7 DLC and Captainless 1.
- Revision 1.9 - 3/21/19: Added Captainless 2-3.
- Revision 2.0 - 3/23/19: Added beach 1-2. Added section on unlocking squad stories, recruiting characters, and A rank turn limits.
- Revision 2.1 - 3/31/19: Added expert 1-2.
- Revision 2.2 - 4/06/19: Added expert 3-4.
- Revision 2.3 - 4/12/19: Added expert 5-6.
- Revision 2.4 - 4/18/19: Added Valkyria 1-2. All missions, including DLC, are now covered.
Playthrough Results:
A 'D' indicates damage was taken on the mission (NPC Raz excepted); otherwise, zero damage was taken.
- Prologue (2t)
- Chapter 1 (3t)
- Chapter 2 (3t)
- Interlude 1 (2t)
- Chapter 3a (2t)
- Chapter 3b (3t)
- Chapter 4a (3t)
- Chapter 4b (3t)
- Chapter 4c (3t)
- Chapter 5 (2t)
- Chapter 6 (2t)
- Chapter 7a (4t)
- Chapter 7b (3t)
- Interlude 2 (1t)
- Chapter 8a (1t)
- Chapter 8b (2t)
- Chapter 9 (3t)
- Chapter 10 (4t)
- Chapter 11 (3t)
- Chapter 12 (2t)
- Chapter 13 (3t)
- Chapter 14 (2t)
- Chapter 15a (2t)
- Chapter 15b (3t)
- Chapter 16 (3t)
- Chapter 17a (3t D)
- Chapter 17b (2t)
- Chapter 18a (3t)
- Chapter 18b Normal (5t)
- Chapter 18b Hard (5t)
Skirmishes (Normal):
- Skirmish 1 (1t D)
- Skirmish 2 (1t)
- Skirmish 3 (2t)
- Skirmish 4 (2t)
- Skirmish 5 (2t)
- Skirmish 6 (1t)
- Skirmish 7 (2t)
- Skirmish 8 (2t)
- Skirmish 9 (1t)
- Skirmish 10 (2t)
Skirmishes (Hard):
- Skirmish 1 Hard Into the Woods (3t)
- Skirmish 2 Hard Out of the Box (3t)
- Skirmish 3 Hard Beneath the Frost (3t)
- Skirmish 4 Hard Off the Rails (3t/4t)
- Skirmish 5 Hard Through the Fire (3t)
- Skirmish 6 Hard Across the Bridge (3t)
- Skirmish 7 Hard Within the Ruins (3t)
- Skirmish 8 Hard For the Centurion (2t)
- Skirmish 9 Hard From the Capital (3t)
Skirmishes (Challenge):
- Skirmish 1 Challenge A True Battlefield (2t)
- Skirmish 2 Challenge The Dream Team (2t)
- Skirmish 3 Challenge Blitzkrieg on the Canal (3t)
Squad Stories:
- A Prayer For the Broken (2t)
- All the Single Ladies (2t)
- Gambler's Ruin (3t)
- Honor, Pride and Regret (2t)
- Legacies Left (3t)
- Like Old Times (3t)
- Love and Logic (2t)
- The Price of Skill (3t)
- To Live Unbound (2t)
- Treading New Ground (3t)
- Unfortunate Souls (3t)
- Worlds Apart (3t D)
- Mischief Makers (4t)
- Girl in the Iron Mask (2t)
- A Chivalrous Heart (3t)
- Reluctant Solitude (2t)
- Soul of the Navy (4t)
DLC Missions:
- Edy's Advance Ops (2t)
- Squad 7 1 Team Building (3t)
- Squad 7 2 Two Fronts (3t D/4t)
- Squad 7 3 Brilliant Minds (3t)
- A Captainless Squad 1 A Sleuth of Bears (4t)
- A Captainless Squad 2 Snowball Fight (3t/4t)
- A Captainless Squad 3 The Price of a Picnic (4t)
- Beach 1 Raiding the Base (1t/2t)
- Beach 2 Bathing Suits and Bullets (3t D)
- The Two Valkyria (No turn count specified)
Part 3
Learn about unit positioning, target swapping, gender differences, and reward weapons in Valkyria Chronicles 4 Part 3.
- 1To change the position of recruited units relative to your leader, dismiss and re-recruit them in your desired order. The first recruited unit is to the leader's left, and the second is to the leader's right.
- 2To perform a 'target swap' (a tactic to attack without immediate counterfire), adjust your camera or position allied units nearby so the target indicator shifts away from your intended target. This is also useful for destroying sandbags near enemies without drawing their attention.
- 3Be aware of gender-based unit differences: male snipers can shoot over barricades that female snipers cannot, some areas are only accessible to male scouts, and female shocktroopers may navigate landmines more easily due to a thinner hitbox.
- 4Snipers can achieve surprise attacks by positioning themselves around corners of fences and anti-mortar shelters.
- 5Baiting an enemy counterattack from a safe position can distract other enemies.
- 6Enemy behavior changes based on who is in their line of sight and their position.
- 7Observe the frequency of enemy footsteps during the enemy turn to identify their class.
- 8If aiming for a headshot (a shot that lands on the enemy's head, usually an instant kill) is difficult, aim for the neck area. While this slightly reduces headshot chance, it can increase damage if a body shot occurs.
- 9Accessories that boost range only apply to weapons researched through R&D; they do not affect reward or ace weapons.
- A ranks in missions are determined by completion speed.
- Some missions offer up to 5 royal weapons for completing them with specific additional objectives: defeat all non-boss/non-Ace leaders, destroy all tanks, ensure no units are downed (redeployment does not count), ensure no units are killed (forced retreats do not count), and achieve an A rank.
- Reward weapons can be earned separately on different attempts of a mission.
- The 13 missions that reward weapons are: Chapter 2, Interlude 1, Chapter 4a, Chapter 4c, Chapter 6, Chapter 7b, Chapter 8b, Chapter 9, Chapter 11, Chapter 13, Chapter 14, Chapter 15a, and Chapter 17a.
- The tier of reward weapon obtained is linked to the current R&D level for that weapon type.
- Reward weapons cannot be ground for but can be purchased with renown in the post-game infirmary. The tier available in the infirmary depends on the total number of reward weapons earned from the 13 missions.
- Units are promoted to corporal by spending command points during missions, reaching 40 points. Normal skirmishes grant 1 point, main game missions grant 2 points, and hard skirmishes grant 3 points per command point spent.
- Using characters who are already corporal or higher rank still contributes to unlocking squad stories. For example, using Claude unlocks the squad story "Treading New Ground".
- Enemy Ace weapons' usefulness varies. Ace rifles are good early for interception and surprise attacks, but any 7-shot rifle is superior. Ace machine guns are effective against high-HP infantry bosses and crouched enemies. Ace lances are useful early but less so mid-to-late game, with reward and R&D lances being generally better. Ace sniper rifles are often unnecessary due to high damage and short range; any 3-shot sniper rifle is usually better. Ace Grenadier antipersonnel mortars are very useful throughout the game, while antiarmor mortars lack accuracy.
- Weapon accuracy is a numerical value; the in-game letter grade is an estimate and can be misleading.
- Proximity-based personal potentials are reliable and effective. Brittany and Gertrude gain antitank buffs near allies (Brittany requires female allies). Mabel and Louffe get an attack buff near allied camps; trigger this by moving back and forth on the camp border. Jester gains an attack buff near female units, useful for grenade throws. Claude and Riley have powerful proximity potentials for each other later in the game.
- To reliably trigger proximity potentials, use grenades (range 90) and position yourself about two steps back from the grenade line's blue indicator, then move forward and back. Using the camera at maximum vertical can provide a solid reference frame.
Part 4
Master line of sight and visibility in Valkyria Chronicles 4. Learn how enemy interception fire, spotting, and unit stats affect gameplay.
- 1Understanding Proximity Potentials: These potentials can activate when a trigger appears or disappears, like a change in line of sight. They also trigger when units enter or exit a certain proximity range (e.g., 100 range) of another unit. You cannot stack proximity proc chances; a unit must leave and re-enter range to get another chance.
- 2Triggering Interception Fire: Enemies have different interception fire radii for noticing and turning towards your units. Scouts have the largest, while shocktroopers have the smallest. You can provoke enemies to turn and intercept fire by getting close (about 25 range) or by firing a targeted weapon at them. This allows you to reorient them without taking damage.
- 3Using Cover (press the cover button to crouch behind walls or objects) and Line of Sight: Hiding units in grass or breaking line of sight can make them lose enemy sight. Enemies cannot dodge attacks from directly behind them, but can dodge from the front or sides.
- 4Exploiting Reload Animations: Enemies cannot dodge attacks if you start firing while they are in their reload animation. However, they still gain a defense bonus from dodging during this time. Time your attacks towards the end of their reload to prevent dodging and avoid their defensive boost.
- 5Understanding Unit Stats: Units have two sight statistics: interception fire radius (determines the angle they can start turning and firing) and visibility (determines the range they can see enemies). Scouts have the highest interception fire radius and fastest turn speed, while elite snipers have the lowest. Scouts can also spot hidden enemies further away than other classes.
- 6Environmental Effects on Visibility: Environmental conditions like fog/whiteout reduce visibility to 100 range, and night reduces it to 250 range, making surprise attacks easier.
- 7Grenadier and Exhaustion Mechanics: Grenadiers can lower their height by sitting down, reducing their visibility and potentially changing enemy sightlines from yellow (visible) to blue (hidden). This can be used for surprise attacks. Similarly, when infantry units become exhausted and slouch over, their sightlines might change from yellow to blue.
- 8Enemy Aces and Night Battles: Enemy aces can have significantly different dodge rates. Night mode stages offer reduced enemy sight range, making surprise attacks easier. Spot enemies, then move out of sight to attack them.
- 9Safe Firing Positions: Utilize safe spots like trees, flagpoles, lampposts, fences, and terrain variations to fire at enemies while they cannot hit you back. Ensure your targeting reticule is red and focused before firing to confirm shots won't be blocked by terrain.
- 10Sneaking Past Hidden Enemies: Enemies hiding in grass tend to stay hidden and not intercept fire. Once spotted, they are more likely to fire. Classes with lower visibility than scouts (like engineers and shocktroopers) can sneak past hidden enemies that a scout would spot.
- 11Hiding Mechanics: If your unit is within an enemy's visibility radius when trying to hide in grass, they will be instantly spotted. Units hidden in grass can still act as spotters, preventing surprise attacks even if you haven't spotted them.
- 12Explosives and Unsighted Units: Unsighted units receive a significant defensive bonus when hit by explosives. It's generally beneficial to spot an enemy before attacking with explosives, even if you know its location.
- 13Dodging Mechanics: All units in a weapon's line of fire or explosion have a chance to dodge, even if not the intended target.
- Frequently check enemy stats, especially their dodge rating and weapon range.
- Use the aiming mode to repeatedly trigger interception fire potentials if an enemy is firing on a unit behind cover.
- Provoke enemies to turn, then sneak past them or kill them.
- Use scouts to quickly reorient enemies by running past them and then moving away before they enter interception fire radius.
- Be aware that some terrain that looks passable might block shots; a white reticule indicates blocked shots.
- If a grenadier attack isn't working as expected, check for enemies hidden in grass or potential terrain/sightline bugs.
Part 7
Master vehicle controls, AP conservation, and APC defense upgrades in Valkyria Chronicles 4. Learn how to use smoke and direct command effectively.
Vehicle Controls:
- Moving the camera stick up or down aligns it with the vehicle's forward/backward movement. If the camera is aligned along the vehicle's side, controls are reversed.
- To turn a tank 360 degrees, slowly adjust the camera angle as you turn the vehicle. Tanks require significant clearance to turn.
- Avoid hugging corners with vehicles as terrain can easily cause them to get stuck. Some areas may drain AP without moving the vehicle.
- Vehicles can use momentum to slide down hills and stairs, conserving AP.
Vehicle Defense and Damage:
- Tanks are nearly immune to damage from anti-personnel Grenadier mortars.
- Vehicles can knock enemies into environmental hazards like fire, particularly in Chapter 6.
- The APC deploys units on its right side by default, even with nearby enemies or hazards. If the right side is blocked, it will attempt the left. Orient the APC for desired deployment.
- APC defense upgrades increase its defense, potentially making it immune to damage from some Gatling turrets and heavy/ultimate tank turrets when hit from the front. The APC starts at 183 defense and can reach 192. Defense increases occur at Chapters 6, 8, 11, and 13, with postgame upgrades reaching 190/192.
- Vehicle plating (non-radiator) defense differs from infantry defense. Radiators always take at least one damage. However, vehicles can take 0 damage from vsArmor attacks if their plating defense exceeds the attack's vsArmor value. If a grenade does no damage to your tank, its defense is likely higher than the grenade's vsArmor.
Smoke Mechanics:
- When an Allied vehicle fires from within smoke, it becomes compromised and must exit and re-enter the smoke to become hidden again. This applies even if using a Gatling weapon, achieving a surprise attack, or if not spotted.
- If a tank inside smoke is hit with cannon fire, the smoke dissipates. However, if a tank fires cannon fire from within smoke at a target outside, the smoke does not dissipate. Tanks exploding inside smoke also do not dissipate it.
- Vehicles have difficulty spotting other vehicles inside smoke.
AP and Command Point Efficiency:
- Before Scout Leaders are available, Riley is a useful leader for directing units due to her non-scout leader status.
- Deploy leaders to gain more command points (CP) per turn. Some squad stories allow leader deployment after a mission begins.
- Move characters like a race track, hugging corners tightly to maximize AP usage.
- Areas like ladders can be used by approaching slowly and pressing the 'x' button when displayed to save AP.
- Climbing up and then down ladders can reposition units to the center of the ladder, saving AP for forward movement.
- Consider the 'cost of CP' for strategies. For example, a Shocktrooper might kill an enemy behind sandbags in one CP with a flamethrower, but if reaching the enemy takes 3 CP, a Scout using a grenade and gun might be more efficient (2 CP total) if its movement costs only 1 CP.
- Use team attacks against entrenched enemies like turrets and tanks.
- Moving over sandbags does not cost AP, allowing for increased travel distance if used strategically.
- Enemy units can inflict friendly fire on their own units. This is most effective with bulletproof vehicles. The time it takes depends on the firing enemy and the target's HP.
- The APC can board units through solid objects like fences and walls in map mode, which is not possible in action mode if line of sight is blocked.
- Aim at enemies' feet or use explosives if they have very low HP, as this can still result in a kill even if they dodge.
- Sometimes throwing a grenade is more effective than firing shots that might miss.
- To ensure a scout reaches a target without AP loss, clear the path with other units first and use the scout only for highly reliable actions.
- Pay attention to enemy movement to maximize interception fire kills and save CP.
- Disrupting an enemy Grenadier with an explosive will cause them to stand up and be unable to fire until they set up on the next enemy turn, potentially allowing safe passage.
- Using direct command on a leader unit resets their AP to full. This allows for covering large distances or performing multiple actions before resetting AP to assist allies.
- Direct command can reorient a unit's facing for optimal interception fire. This can be combined with unit movement by recruiting and disbanding multiple units.
- When using direct command, if your leader crouches in grass or at a sandbag, the units following them will also crouch.
Similar guides you might like

100% Human-Written. AI Fact-Checked. Community Verified. Learn how AntMag verifies content