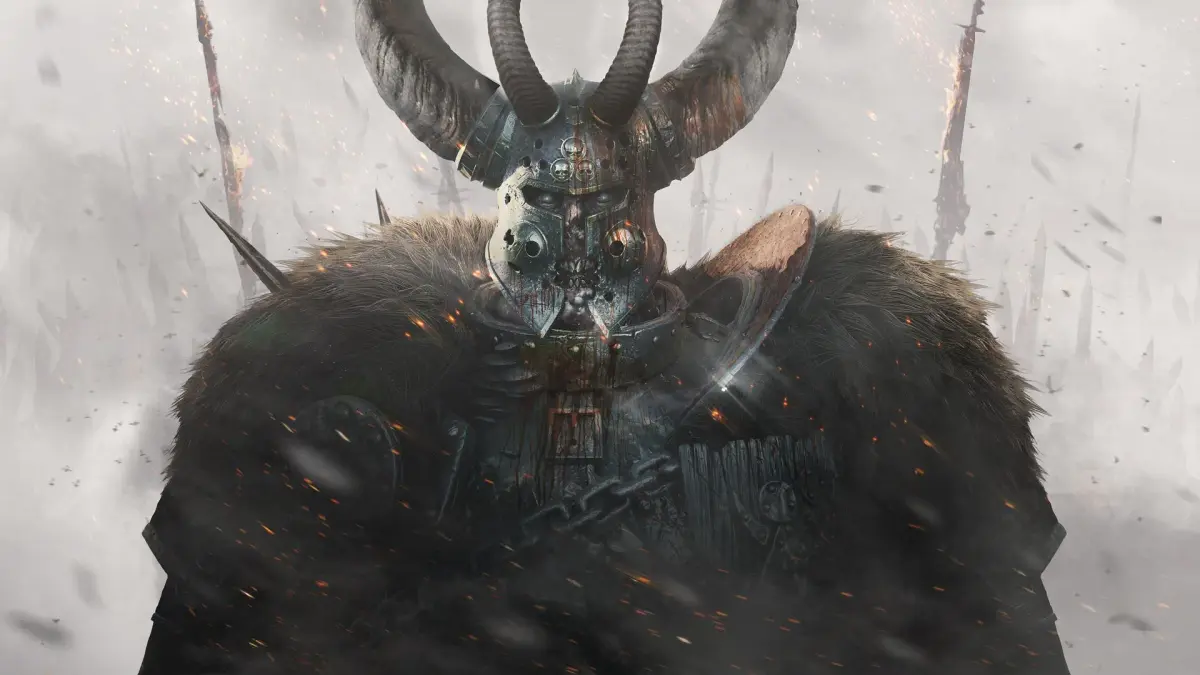
Prepare for Warhammer: Vermintide 2's enemies. Understand each faction, their units, and specialist threats to survive the Empire's corrupted lands.
Welcome, brave Ubersreik Five (or Four)! This detailed guide will prepare you for the horrors that await in the corrupted lands of the Empire. Understanding your foes is paramount to survival in Warhammer: Vermintide 2. We'll break down each major faction, their common units, dangerous specialists, and effective strategies to send them back to the hell-spawned pits they crawled from.
Remember, teamwork and communication are key. No hero can face the tide alone!
The Skaven: The Horned Rat's Pestilence
The Skaven are a race of malevolent, intelligent rat-men, driven by their god, the Horned Rat, to conquer and corrupt. They are numerous, cunning, and often overwhelm their enemies through sheer numbers and insidious tactics. You'll encounter them in almost every mission, from the sewers of Ubersreik to the corrupted forests of Bögenhafen.
Common Skaven Units:
- Clanrat: The backbone of the Skaven army. Weak individually, but dangerous in swarms. Prioritize cleaving attacks to thin their ranks.
- Stormvermin: Heavily armored elite infantry. These units can withstand significant damage and deal heavy blows.
- Strategy: Aim for headshots with ranged weapons. For melee, use armor-piercing attacks (e.g., Kruber's Greatsword overheads, Bardin's Axe attacks) or flank them. Pushing them can create openings.
- Specifics: Found frequently in areas like the Skittergate and Righteous Stand.
Skaven Specialist & Elite Units:
- Gutter Runner: A stealthy assassin that pounces on isolated heroes, pinning them down.
- Strategy: Listen for their distinctive shriek and watch for their green smoke trail. If a teammate is pounced, quickly switch targets and attack the Gutter Runner to free them. Ranged weapons are ideal for taking them down before they strike.
- Location: Can appear anywhere, but often in more open areas or during ambushes.
- Packmaster: Wields a long polearm to hook and drag heroes away from the group, often into environmental hazards or other enemies.
- Strategy: Their "whoop-whoop" call is a clear warning. Prioritize them immediately. A well-aimed ranged shot will interrupt their grab. If a teammate is hooked, focus fire on the Packmaster to break its hold.
- Item Tip: A well-timed Grenade can clear a group and often hit a Packmaster hiding within.
- Poison Wind Globadier: Throws globes of toxic gas that create persistent clouds, dealing damage over time and obscuring vision.
- Strategy: Their gas is deadly. Prioritize these units with ranged attacks from a distance. If you're caught in gas, move out immediately.
- Specifics: Often found on elevated positions or behind other units. Look for their distinctive gas mask and green glowing globes.
- Warpfire Thrower: A heavily armored Skaven wielding a flamethrower, capable of sustained area denial and high damage.
- Strategy: Stay out of its cone of fire. Flank it or use armor-piercing ranged attacks to quickly dispatch it. Pushing can interrupt its attack, but beware of its armor.
- Location: Common in tight corridors or choke points, such as the tunnels in Horn of Magnus.
- Rat Ogre: A monstrous, hulking beast that charges and smashes heroes.
- Strategy: Focus fire on its head. Dodge its charges and ground slams. use environmental hazards like cliffs or tight spaces to your advantage. Keep your distance if possible, and have one hero kite it while others deal damage.
- Item Tip: Strength Potions are excellent for quickly bursting down a Rat Ogre.
The Rotbloods: Nurgle's Corrupted Champions
The Rotbloods are Nurgle-worshipping Chaos warriors, bringing plague and decay wherever they go. They are generally tougher and more resilient than Skaven, often appearing in smaller, but more impactful, groups. Their presence signifies a more direct and brutal confrontation.
Common Rotblood Units:
- Marauder: The basic infantry of the Rotbloods, often wielding two-handed axes or swords. They hit harder than Clanrats and have more health.
- Strategy: Treat them like tougher Clanrats. Cleave through them, but be mindful of their slower, more damaging attacks.
- Chaos Warrior: Heavily armored, towering champions of Nurgle. These are the toughest standard enemies you'll face.
- Strategy: Similar to Stormvermin, but even more resilient. Armor-piercing attacks are essential. Headshots are critical. Use pushes to stagger them and create openings. Avoid getting surrounded by them.
- Location: Frequently encountered in missions like Against the Grain and Dark Omens.
Rotblood Specialist & Elite Units:
- Blightstormer: A Chaos sorcerer who conjures damaging whirlwinds that chase heroes.
- Strategy: Listen for their chanting and look for the green glow. Prioritize them immediately with ranged attacks. Their whirlwinds can split the party and deal massive damage. Interrupting their cast is crucial.
- Location: Often found on high ground or at a distance, making them difficult to reach in melee.
- Leech: A Chaos sorcerer that teleports and attempts to grab a hero, draining their health and disabling them.
- Strategy: Similar to the Gutter Runner, but with a teleport. Listen for their distinctive gurgling sound and watch for the purple glow. Quickly shoot them to free a grabbed teammate.
- Item Tip: A Fire Bomb can be effective for clearing a Leech and any surrounding enemies if it teleports into a group.
- Chaos Spawn: A grotesque, multi-limbed monster that charges, slams, and can grab and chew on heroes.
- Strategy: Similar to the Rat Ogre, but often more aggressive and with a dangerous grab attack. Focus fire on its head. Dodge its attacks and use the environment. If a teammate is grabbed, deal damage to the Spawn to force it to release them.
- Specifics: Its grab attack is particularly dangerous, as it can quickly down a hero.
- Plague Monk: Fanatical, fast-moving melee units that attack in frenzied flurries. They are unarmored but deal rapid damage.
- Strategy: Treat them like a more aggressive version of Clanrats. Use cleaving attacks and pushes to control them. Do not let them surround you.
- Location: Often appear in waves, especially in Nurgle-themed areas.
Beastmen: The Children of Chaos
Introduced with the Winds of Magic DLC, the Beastmen are savage, brutal creatures of the wilderness, serving Chaos with primal fury. They are highly aggressive and can quickly overrun an unprepared team.
Common Beastmen Units:
- Ungor: The weakest Beastmen, but still more resilient than Clanrats. They attack in packs.
- Strategy: Use cleaving attacks to manage their numbers. Don't underestimate their collective damage.
- Bestigor: Heavily armored, bull-headed Beastmen that charge heroes, knocking them down.
- Strategy: Listen for their roar and watch for their charge animation. Dodge to the side to avoid their charge. They are armored, so use armor-piercing attacks or headshots.
- Specifics: Their charge can be devastating, especially if it knocks multiple heroes off a ledge or into other enemies.
Beastmen Specialist & Elite Units:
- Standard Bearer: A Bestigor carrying a banner that buffs all nearby Beastmen, making them tougher and more aggressive.
- Strategy: This is the highest priority target. The banner's aura is incredibly dangerous. Focus all ranged fire on the Standard Bearer to take it down quickly. If you cannot reach it, try to draw the Beastmen out of the banner's radius.
- Location: Often appears during Beastmen hordes or ambushes.
- Minotaur: A towering, bull-headed monster that charges, slams, and can perform a devastating stomp.
- Strategy: Similar to other monstrous enemies, but the Minotaur is particularly aggressive. Dodge its charges and swings. Focus fire on its head. Its stomp attack can deal massive damage in an area.
- Item Tip: A well-placed Incendiary Bomb can apply significant burn damage over time to a Minotaur.
By understanding these enemy types and employing the recommended strategies, you'll significantly increase your chances of survival and success in the treacherous world of Warhammer: Vermintide 2. Good luck, and may Sigmar guide your blades!
100% Human-Written. AI Fact-Checked. Community Verified. Learn how AntMag verifies content