Learn how to strategically place Residential, Commercial, and Industrial zones, along with essential services, to maximize your city's efficiency and appeal in SimCity.
Alright, let's talk about how you can lay out your city blocks in SimCity to make things work best. It might seem simple, but the way you arrange your zones and buildings can make a huge difference in how your city grows and how happy your Sims are.
We're going to cover a couple of popular block layouts, like the 'Donut' and the 'Present' block, and break down why they work (or don't work) in different situations.
The "Donut" Block
Imagine you've got a 6x6 grid to work with. Since both Residential (R) and Commercial (C) zones take up a 2x2 space, you can fit nine of them in there. The trick with the 'Donut' is what you put in the middle – the hole of the donut. You can't put R or C zones there because they need road access, but you can place buildings like Police Departments, Fire Departments, or Parks since they don't need roads right next to them. This is super handy for keeping your city safe and happy without wasting valuable road frontage.
Now, the NES version of the game changed things up a bit. The 'Presents' (which are 3x3 squares) don't really boost land value, and they mess with the classic 'Gift Donut' layout. If you're playing that version, you're better off putting Police Departments or Parks in the middle. Just a heads-up: if these central buildings don't have road or rail access, their coverage area shrinks, so you might need more of them to protect your city.
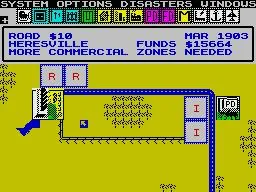
Basic Donuts and Industrial Zones
This 'Donut' style isn't the best for a big block of Industrial zones (I). Why? Because all that industry creates a ton of crime and pollution right next to each other, which is a recipe for disaster in your city. It's better to mix things up or use the 'hole' for other services. Think of 'O' as 'Other' – like a Park, Police, or Fire Department.
Here’s a visual of a basic donut layout:
| R | R | C |
| R | O | C |
| C | R | R |
And another example:
| R | R | R |
| R | O | R |
| R | R | R |
And one more:
| C | C | C |
| C | O | C |
| C | C | C |
And a variation:
| C | R | R |
| C | O | R |
| C | C | R |
And another:
| C | O | R |
| C | C | R |
| C | C | R |
Power Plants
This is a bit abstract, but it shows a basic layout for power plants, possibly indicating their placement relative to other zones. It's not a full block layout, just a representation of how they might be situated.
| N | \ | N |
| = | = | = |
| N | \ | N |
The "Present" Block
Because the 'Presents' are 3x3 squares, which is an odd number, they don't fit neatly with the standard 2x2 zones like Residential and Commercial. The best way to handle them, especially if you want to recreate that 'Gift Donut' feel from other versions, is to group four of them together. This creates a 6x6 block, which is an even number and much easier to work with around your other zones.
In the NES prototype, the land itself has a smaller size, and that 'Land Value diamond' you usually get from filling the map doesn't really affect the corners. So, if they ever patch the game to make Presents boost land value again, this 4-Present block would be a really solid strategy.
100% Human-Written. AI Fact-Checked. Community Verified. Learn how AntMag verifies content