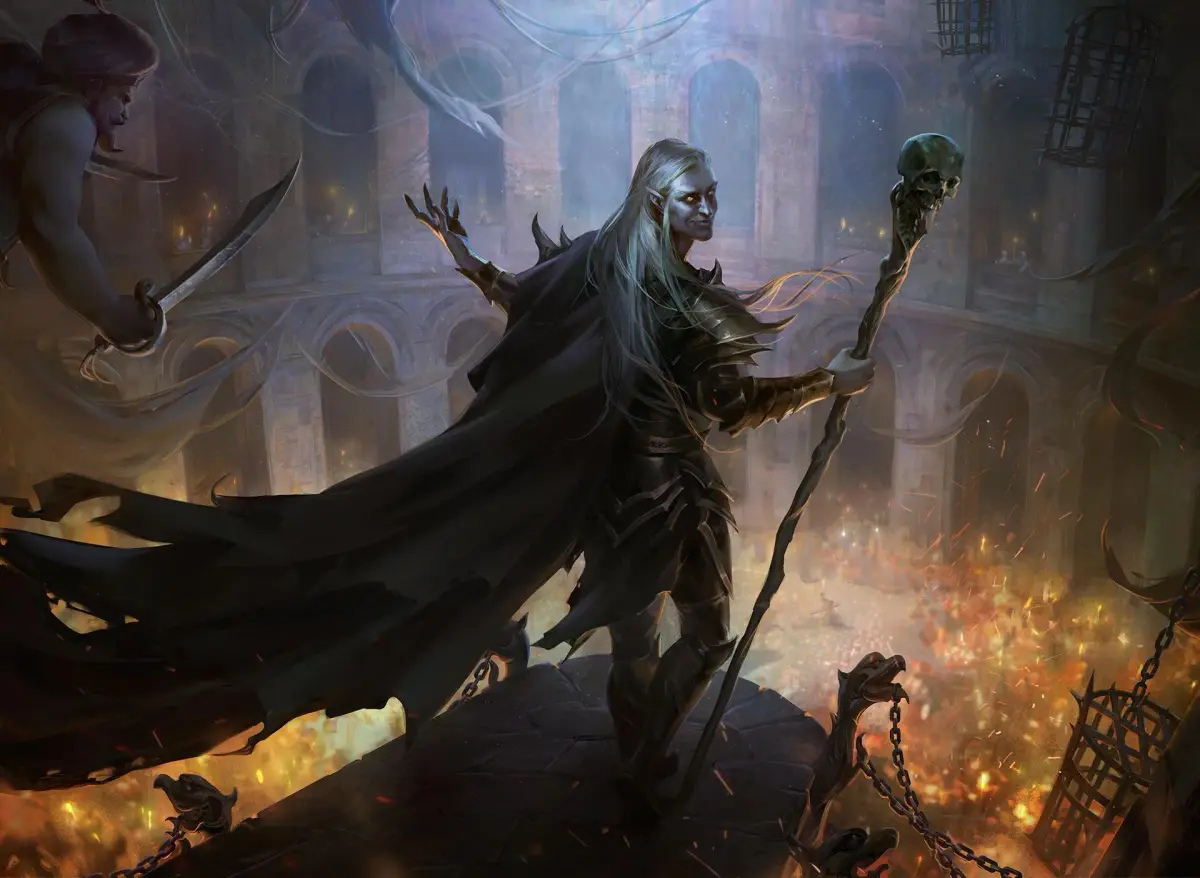
Welcome to Baldur's Gate, a legendary CRPG that set the standard for Dungeons & Dragons computer roleplaying games. You'll customize your hero, recruit a party of companions, and embark on an epic journey across the Sword Coast. Forced to leave your home under mysterious circumstances, you'll soon find yourself embroiled in a conflict that threatens to plunge the land into war, uncovering sinister forces far beyond your initial understanding.
This guide is here to help you navigate the complexities of the Sword Coast, from understanding the intricacies of character creation and class builds like Fighters and Mages, to mastering the divine spellcasters such as Clerics and Druids. We'll cover the mechanics of combat, the spells you'll need to wield, and the challenges that await you on your path to uncovering the conspiracy threatening the realm.
Part 1
Detailed walkthrough for Baldur's Gate: Siege of Dragonspear, Part 1, covering the conclusion of Chapter Seven in Baldur's Gate, including the Tomb Safehouse.
- 1Tomb Safehouse (Level 1 - BD0120): A cutscene plays before returning to the game. Imoen speaks to you, explaining her apprenticeship to Liia Jannath prevents her from joining.
- 2Move through the door to a broken bridge. A mage named Porios appears, stating you are too late and mentioning a sword. He wishes you luck if you are pursuing Korlasz.
- 3Enter the next room and speak with Ammon, a mage seeking rare components.
- 4Search the room for treasure: scrolls (identify, protection from cold), potions (wine, elixir of health), a scroll from Korlasz, a gem bag, and 147gp.
- 5Enter the next room and open the crypt, summoning a tattered skeleton. Search the room for treasure: scrolls (invisibility 10' radius, cursed scroll of monster summoning), a scroll (shocking grasp), 1gp, a potion (invisibility), and a skull.
- 6Cross the bridge to encounter Iron Throne soldiers and Sarevok followers. They carry bolts (+1), and potions (healing).
- 7Open the left door to find Porios and more Sarevok followers. They will surrender if asked. Porios explains the sword was Sarevok's and Korlasz had a buyer. You can turn them over to the Flaming Fist. They drop their possessions (3gp, arrows +1, biting arrows, potions (healing, speed), cloak of minor archana) and you receive experience as if you defeated them. Porios gives you a key for the lower level. The shelves contain weapons, and the chest contains armor, none magical. The door cannot be opened from this side.
- 8Enter the east room and open the crypt, summoning the mummy of Fanegonorom. Apologize for disturbing his rest and state you seek those hiding within the tombs. He tasks you to remove their leader and return to him. He possesses information about Korlasz.
- Once you move into the next chapter, previous areas become inaccessible. Ensure all quests are completed before proceeding.
- Importing a game or character may result in the loss of all containers and their contents.
Part 2
Baldur's Gate Part 2 walkthrough: navigate Korlasz's crypt, defeat her forces, and find key items like Korlasz's key and the wooden staff.
- 1Move through the east opening and down the stairs to Level 2 (BD0130).
- 2Follow the passage south to a chamber full of undead, including a shattered soul (arrows [3 ice]).
- 3The passage directly right is trapped and leads to a library (scrolls [free action, protection from poison]).
- 4Follow the wider passage across the bridge to more undead (4 random jewelry) and three braziers burning with three different colors. Search the chamber for a potion [cursed healing], splint mail +1, a random spell, arrows [20 +1], random jewelry, a potion [defense], a random ring, and a wand [fire (5/5)].
- 5The passage north leads to several fire and boring beetles (morning star +1, *wooden staff*, 267gp). Three magma mephits appear when you approach the small magma stream at the end of the passage, where there is a small crack (gems [10 zircon]).
- 6Down the west passage are two glass containers. Breaking them releases two ochre jellies (amulet of protection +1).
- 7The passage ends in a chamber with several wights and an undead guardian. There is a trap at the entrance to the chamber and a desk at the far end containing a gem [emerald], scroll [chaotic commands], 171 gp, bolts [20 +1], buckler +1, a random gem, a random scroll, a random ring, a potion [cursed antidote], a ring [fire opal], 37gp, and a scroll [cursed weakness].
- 8There are two sets of three torches along the south wall, with one torch apparently burned out. Take the torch and return to the previous room. Go to the brazier with the purple flame and use it to light the torch. Return the now lit torch to its holder and a secret door will open. Inside are two bookcases, a table, and two chests containing books [the nine hells; Kanaglym: the abandoned city], a page from Sarevok's notes, helmet of unwavering purpose, two-handed sword of ruin +2, and potions [fire giant strength, invulnerability]. Opening the chest with the sword summons several undead (arrows [2 ice]).
- 9Go north to another chamber, filled with followers of Korlasz and Sarevok (potions [2 healing, speed, fortitude], scroll [color spray], arrows [10 biting], 3 random potions, and a random item). Check the sarcophagus for a scroll [hold undead] and a wand [heavens (5)]. Ignore the rope for now.
- 10The left passage leads to a large mechanism guarded by two mercenaries whom you can convince to leave or fight. You will find darts [8 wounding, 40 +1] and potions [healing, invisibility]. Check the table for potions [3 healing, elixir of health].
- 11The entrance to the right passage is trapped and contains several burning skeletons and a skeletal mage (arrows [10 +1, 5 fire +2], scroll [chromatic orb]). Check the weapon racks for an axe +1.
- 12Cross the wood bridge to a body (potion [clarity, defense], 112gp). Opening the crypt summons a restless spirit who has more information on Korlasz and wants his staff returned.
- 13Return to the large mechanism and activate it to open the doors to the north, where Korlasz and her last henchmen are.
- 14Cast protection spells and enter the chamber. After a short dialogue, she attacks with her last forces. Once they are dead (arrows [5 +1, 10 biting, 20 fire +2], potions [healing, speed]) and she is injured enough, she surrenders (robe [knaves], cloak [protection], scroll [vocalize], bracers [AC6], quarterstaff +1, darts [80 +1], Korlasz key). Check the tables and chest (all trapped) for arrows [20 +2, 20 biting, 20 fire +2], bolts [20 +2, 20 biting, 20 lightning], potions [extra healing, hill giant strength, speed], an ornate headpiece, and 9gp.
- 15With Korlasz's key, you may now enter her bedroom (Korlasz's journal, Bhaal research; scrolls [minor sequencer, secret word, animate dead], necklace [laeral's tear], 3000gp).
- 16When you meet Imoen, give her the documents for 5000xp quest reward.
- 17Return to the restless spirit and place the wooden staff and the headpiece in the crypt. The spirit departs (3000xp, gems [10 waterstar, 8 shandon, 5 water opal]).
- 18Take the rope to return to the upper level (Level 1, BD0120).
- 19The rope leads to the sealed room on the first level. There is a broken coffin (206gp, cobalt moss, 2 random gems) which summons a tattered skeleton when raided, and a locked coffin (scroll [cursed clumsiness], potion [fire resistance]) which summons several undead when raided. The door opens easily from this side.
- 20Talk to the spirit of Fanegonorom and let him know Korlasz has been dealt with (3000xp, large shield of Egons +2). He vanishes and you can examine his crypt (gem [emerald], necklace [pearl], 221gp).
- 21Give Ammon the cobalt moss. She plans on using her potion on a tome in Candlekeep. If you tell her you're from there, she'll ask for your signature to get in. Advise her the guards are unmoving on entry requirements and won't accept it (50gp).
- 22You need to talk to Imoen or one of the Flaming Fist to leave the area. Before you do, ensure all quests are completed and put everything you want to keep into any containers your party is carrying. Once you leave, the party splits up, and some characters won't rejoin you.
- 23Imoen wakes you in the Ducal Palace, Third Floor (BD0103). Something isn't right, she warns, telling you she hears footsteps and voices before going to investigate the next room. Open the chest near the bed to get your equipment and any containers your party had before following her. The chest also contains anything the party had in their inventory if not worn or readied.
- 24When you enter the next room, Imoen comes from it and is immediately followed by three assassins. She kills one before another strikes her from the shadows. They then turn on you, stating you are their true target. Defeat them, then take the parchment one of your attackers had, which is a passable likeness of you.
- 25Captain Corwin arrives, followed shortly by D.
- Be prepared for traps, especially when opening chests and entering certain passages.
- Loot thoroughly, as many containers hold valuable items, gold, and scrolls.
- Remember to return the wooden staff and headpiece to the restless spirit to receive your reward.
- Before leaving the area, ensure all party members have stored their important items in containers, as the party will split up.
Part 3
Baldur's Gate Part 3 walkthrough: Find assassins, deal with Korlasz, and locate companions.
- 1Follow Corwin to check for assassins within the Palace. Take the stairs down to the second floor.
- 2On the second floor (BD0100), three assassins are in the dining hall. Enter the middle bedroom, where three more will attack you. Check the drawers for arrows [40 +1]. Corwin will suggest returning to the main hall.
- 3On the first floor (BD0102), you will join the Dukes in the main hall. They will inform you about the Crusade expanding south of the Winding Water and ask for your help. They also mention Captain Corwin can lead you to companions. Meet Corwin near the main doors when ready, but first go to the basement.
- 4In the basement (BD0116), head east to the treasury. Talk to Ophyllis, who reveals all the money is gone, spent on dog races. Let him try to recover it.
- 5The chest in the locked treasury is trapped and locked. It contains 1647gp, a necklace [laerals's tear], and gems [diamond, emerald, king's tear].
- 6Korlasz's cell will burst open, and she will emerge, blaming you and attacking. After defeating her, check the wall of her cell.
- 7Talk to the guards about Korlasz's attackers. They will mention a doppelganger in the locked cell next to hers.
- 8A table by the north wall in the main chamber has a key to the northeast cell. Open the door and suggest the occupant is a doppelganger; he will transform and attack.
- 9When near death, the doppelganger will bargain for its life, mentioning a treasure hoard in the Flaming Fist basement. You can agree to release him, kill him, or refuse.
- 10Return to the first floor (BD0102). Skie will approach you, mentioning her father believes Caelar might be a Bhaalspawn like you and promises more information later.
- 11Duke Eltan is in the northwest room and has more information on Caelar Argent.
- 12Duke Entar is in the southwest room. Ask him about Caelar being a child of Bhaal.
- 13Talk to Jospil, a guard, who seems depressed. Question him a second time for information on the north. He will cheer up and give you Brevin's Quarterstaff +1.
- 14Speak with Corwin near the main doors. She can direct you to companions: Garrick, Safana, and Coran are at the Elfsong; Minsc and Dinaheir are at the Three Old Kegs; Rasaad is in the Iron Throne building; Tiax is imprisoned at the Flaming Fist headquarters; Viconia is part of the expedition; Neera may be near the Boareskyr bridge.
- 15Leave the palace through the main doors.
- 16In the Ducal Palace City Exterior (BD0010), you will find refugees. Ophyllis will meet you, stating he was attacked and has no money. His attackers were at the Three Old Kegs. Exit south.
- 17Two merchants are near the south edge. Talk to Teera, who needs money taken to Lady Sena near Sorcerous Sundries, as she has been mugged the past two days.
- 18Near the left edge, Garachen and Perren are by a door. Perren will reveal Garachen is a profiteer. You can go to the Elfsong for supplies for Garachen or ask the Flaming Fist about him.
- 19At the Three Old Kegs City Exterior (BD0040), Robel near the entrance asks you to have Katheera send him a drink.
- 20East of the door are four adventurers: Golt (400xp, random treasure, potion [healing]), Dirla (250xp), Lluis (450xp, potion [3 healing]), and Asery (400xp, potions [healing, heroism]). One mentions rolling a mage for cash. Confront them; Asery will leave after a warning, but the others will fight.
- 21Behind the Three Old Kegs, Aileen is with her cousin's body. She needs 15gp to reach the 100gp required by the temple for burial. She admits the body is her husband, whom she killed in a drunken rage. You can give her the 15gp (300xp) or refuse (100xp).
- 22Check the crate for a winter wolf pelt.
- 23Inside the Three Old Kegs First Floor (BD0106), Captain Corwin will stay by the door and await your signal to leave.
- 24Katheera is tending bar in the right room. Inform her of Robel's request and that his task is trying. She will send him a drink.
- 25Nantrin Bellowglyn is behind the bar in the left room. He will ask for help stopping a fight between two ship crews led by Lucilla and Autinn. Suggesting everyone enjoy another drink and act civilized can lead to a peaceful solution (500xp). Talk to Nantrin again to have him keep his reward, which grants +1 reputation.
- 26On the Three Old Kegs Second Floor (BD0107), Berahli and company in the northwest corner explain they gave your money to refugees. You can fight them or give them a chance to surrender to Captain Corwin (750xp).
- 27Behind a painting in the northeast corner is a container with 2 random gems.
- 28On the Three Old Kegs Third Floor (BD0108), in the first room north, three nobles are plotting to overthrow the Dukes. You can bribe them for your silence, join them, or tell them to surrender to the Flaming Fist, which results in a fight.
- Keep an eye on your HUD (Heads-Up Display, showing game information) for enemy positions and your health.
- Utilize cover (press the cover button to crouch behind walls or objects) when engaging in combat to reduce incoming damage.
- Remember to check containers and bodies for loot, such as the arrows found in the second-floor bedroom or the gems on the third floor of the Three Old Kegs.
- Pay attention to NPC (non-player character — anyone the game controls, not you) dialogue for clues and quest information, like Skie's mention of Caelar or Jospil's information on the north.
- Consider the implications of your choices, such as whether to release the doppelganger or how to handle the plotting nobles.
Part 4
Detailed walkthrough for Part 4 of Baldur's Gate, covering quests, character recruitment, item locations, and rewards in areas like Three Old Kegs, Sorcerous Sundries, and Flaming Fist Headquarters.
- 1Minsc and Dynaheir: In the room west of the starting area, approach Minsc and Dynaheir. Minsc will initiate dialog. You can ask Minsc to join, and then ask to speak with Dynaheir. They are a package deal; you recruit both or neither.
- 2Three Old Kegs (First Floor): Talk to Captain Corwin. If you killed nobles and give her the note, your reputation decreases by 1. Talk to Robel and inform him the drink is on the way to gain 300xp and 30gp.
- 3Sorcerous/Elfsong City Exterior: Corwin directs you to two locations. Near your arrival point, Officer Vida has detained a refugee. Vida asks you to go to the Flaming Fist headquarters for reinforcements. Upon your return, inform Vida of Jenks' reply to receive 500xp and a Potion of Clarity. North of Vida is Lady Senna, a money lender. If you agreed to help Teera, you'll be accosted by Zelma, who is after Teera's money. Catch her picking your pocket and fight her. Talk to Senna, give her Teera's payment, and return to Teera to report the deposit (250XP).
- 4Elfsong (First Floor): Corwin remains by the door. Garrick is in the northeast corner and will speak to you but won't join. He is trying to win the heart of Alyth Elendara. Talk to Alyth to receive a Potion of Agility. If you spoke to Garachen, you can buy him supplies for 1000gp from a chest on the second floor, for which Alyth gives you the key. Take the supplies to Garachen, and Perren will give you a Sphene gem. Zaviak, in a west booth, will give you the Spectacles of Spectacle if you convince him to remove them. Irina needs ruby wine; you can steal it from the Ducal Palace, enchant regular wine with a mage or druid, or a dwarf can offer a substitute, rewarding you with 500xp and a Battle Tankard Helmet.
- 5Elfsong (Second Floor): You'll hear Safana telling Coran to leave from a south room. Approach Coran; he will speak to you but won't join. Approach Safana; she will start a conversation and gladly join your quest.
- 6Sorcerous Sundries (First Floor): Talk to Halbazzar Drin and agree to retrieve a case of potion bottles from the second floor. He will give you a key to a locked cabinet containing a Cloak of Protection +1. Upon returning the case, inform him about thieves to receive 50gp and he rewards you with 750xp and an Amulet of Protection +1. Kazzrem, on the inner staircase, sells various items.
- 7Sorcerous Sundries (Second Floor): The potion case is in the second cabinet from the right. After retrieving it, a drow, flind, hobgoblin, and spider teleport in. Confront and defeat them. Items found on this floor include scrolls (Cursed Petrification, Protection from Cold, Protection from Electricity) and potions (Invisibility, Heroism, Fire Resistance, Mirrored Eyes, Magic Shielding).
- 8Flaming Fist City Exterior: Safana mentions Tiax, whom Duke Eltan wants you to speak with. North of your arrival, two nobles are confronted by Flaming Fist mercenaries. Intervene to break up the confrontation and receive random treasure. Talk to the officer near the headquarters' main doors. You can learn clues about Caelar from her and a drunk man.
- 9Flaming Fist Headquarters: In the main hall, talk to Officer Jenks about Officer Vida's request and ask for leniency. He instructs you to tell Vida that reinforcements are coming, rewarding you with 1000xp. If you spoke to Garachen, talk to Officer Fritz; the Fist can do nothing unless there's a clear issue.
- 10Iron Throne City Exterior: Captain Corwin tells you to talk to Rasaad inside. Talk to Byzon, then again. Officer Riggs is extorting refugees. Find Riggs; a cleric or paladin with high charisma, or Captain Corwin, can convince him to return the money. Return the money to Byzon for 300xp.
- 11Iron Throne (First Floor): Rasaad is in the upper right area. He won't join but suspects more than the Caelar Argent threat due to vanished Selune priests. Berta, a refugee, accuses Lon of stealing her holy symbol. Rasaad intervenes; Lon transforms into a werewolf and attacks. Defeat him to get the Symbol of Selune and 420xp.
- 12Iron Throne Basement: Contains two locked chests with 255gp and 100gp respectively. If you spoke to and released the doppelganger from the Ducal Palace basement, you can gain four random items and hear its insights here.
- Recruit Minsc and Dynaheir as a pair.
- Be mindful of reputation changes when dealing with Captain Corwin.
- Officer Vida requires reinforcements from Flaming Fist HQ.
- Lady Senna offers money lending services.
- Garrick is interested in Alyth Elendara.
- Obtain the Spectacles of Spectacle from Zaviak.
- Solve Irina's ruby wine problem through various means.
- Safana is a recruitable companion.
- Halbazzar Drin at Sorcerous Sundries offers a quest for a potion case.
- Be prepared for combat upon retrieving the potion case on the second floor of Sorcerous Sundries.
- Tiax is mentioned by Safana as someone Duke Eltan wants to speak with.
- Officer Jenks at Flaming Fist HQ will send reinforcements.
- Officer Fritz at Flaming Fist HQ can be consulted regarding Garachen's situation.
- Rasaad is found in the Iron Throne and has information about missing priests.
- Lon transforms into a werewolf when confronted about Berta's stolen holy symbol.
- Minsc and Dynaheir (recruitable companions)
- Reputation changes
- Experience points (XP)
- Gold (gp)
- Potions (Clarity, Agility, Healing, Invisibility, Heroism, Fire Resistance, Mirrored Eyes, Magic Shielding)
- Gems (Sphene)
- Amulet of Protection +1
- Cloak of Protection +1
- Spectacles of Spectacle
- Battle Tankard Helmet
- Symbol of Selune
- Random treasures, items, scrolls, and arrows.
100% Human-Written. AI Fact-Checked. Community Verified. Learn how AntMag verifies content