Complete Tomb Raider III Area 51 walkthrough. Find the MP5, Large Medi-packs, and Secret #1 by avoiding laser traps and defeating enemies.
Walkthrough
- 1Step out of the truck and take the Small Medi-pack from the crates to the left.
- 2Move forward and an MP (military police officer) will spot you. Gun him down before he reaches the alarm panel. If he does, you won't be able to get the MP5 (a submachine gun), in which case you should restart the level.
- 3In the room with the rifle sign outside, you can get the MP5 along with some ammo for it.
- 4Do NOT throw the switch.
- 5Go back out and push the button to raise the grating nearby.
- 6Go through and take the Large Medi-pack from the right before pulling up into the crawlspace.
- 7Stay low as you go into the laser trap. Wait for the lasers to go right and then quickly crawl to the space to the left for another Large Medi-pack.
- 8Crawl back to the middle section and then wait for the lasers to go left. When they do, stand up and run for the ladder.
- 9Climb up into the crawlspace and you will see an MP walk by. Crawl out and shoot him. If he manages to activate the alarm, a set of laser traps will be activated but you won't lose anything.
- 10Before going further, throw the switch nearby to open the door and let out an inmate. He will be able to help you later.
- 11Inside his cell is Small Medi-pack (it's behind the door on the left).
- 12Crawl under the first laser trap (if it's there) and then go through the space on the right.
- 13Take the Flares and climb up into the next room. The green lasers will activate the turret, so avoid them and move on.
- 14In the next hallway, crouch down and crawl up to the box on the right to stay out of the MP's sight.
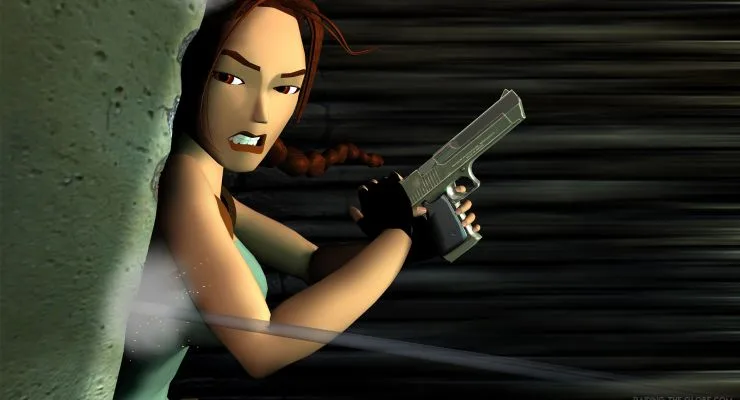
- 15Draw your Desert Eagle and then stand up and quickly fire two shots to drop him.
- 16If he makes it to the alarm pad, it will seal off the nearby storage room containing Grenades, Harpoons, and Rocket.
- 17Run to the end of the hall and save your game as this next part is little tricky.
- 18Throw the switch and the trap door will dump you into the outside area.
- 19Turn right and kill the Sniper before he can hit the alarm. If he does, secret 1 will be sealed off and two Dobermans will arrive on the scene.
- 20When all's quiet, crawl under the space to the left of the alarm and take the Grenades (this will be the Grenade Launcher if you didn't get it before).
- 21After going through it, turn right and run to the corner for some Shotgun Shells.
- 22Now drop into the pit and throw the switch.
- 23Run around the grating until a trap door opens beneath your feet.
- 24Drop down and kill the MP.
- 25Crawl through the space with the raised grating and take the Save Crystal. If the Sniper managed to raise the alarm up above, this the secret will be inaccessible.
- 26Crawl through the dark space and take the Desert Eagle Clips from the right.
- 27Move into the small room and pick up the MP5 Clips from the right before stepping on the trap door.
- 28As soon as you land, kill the MP, take his Small Medi-pack, and then follow the hallway he was walking down.
- 29At the end, throw the switch to let out an inmate, who will go and kill the MP that shows up.
- 30You can also go through the tunnel in his cell for a Large Medi-pack.
- 31Head back the opposite way over the glass floor.
- 32Find the crawlspace on the left and go through (the area ahead is a death trap).
- 33Pick up the Large Medi-pack and the Shotgun.
- 34Crawl out of the space and turn left.
- 35Round the corner and you can see a Sniper at the end of the hall. If you wait, your friend will run down and take care of him.
- 36Enter the area to the right and the doors on the left and right will open, letting two Snipers out. If you waited for the inmate, he can kill both of them.
- 37Just sprint back to the crawlspace you were in before, and he will take care of the rest.
- 38One of the Snipers drops a Small Medi-pack.
- 39In the left room there is a switch. Throw it and a grate opens in the right room (if one of the Snipers raised the alarm, a laser trap will block you. Throw the switch at the end of the hall to shut it off).
- 40Crawl through the grate and touch the green lasers.
- 41Kill the MP that comes down the ramp and then go up.
- 42Take a right at the intersection to the missile silo.
- 43Kill the Sniper on the distant platform and then drop down to the floor.
- 44Climb up on the Sniper's ledge and take his Code Clearance Disk.
- 45Return to the intersection and take the other path.
- 46In this room, drop down to the floor and carefully move about to avoid the green laser trap.
- 47To the left of the conveyor belt, you can run down into the dark area and take a Small Medi-pack.
- 48In the opposite corner of the room, jump over the laser and use the Code Clearance Disk on the computer.
- 49Climb up the ledge behind you with the swinging hook.
- 50To the right of the hook, jump up and shoot out the discolored grating.
- 51Follow the path down the ladder to a Save Crystal.
- 52Time your run past the swinging hook and take the Shotgun Shells.
- 53Drop onto the conveyor belt and use a running jump with a grab to reach the ladder ahead.
- 54Climb up to the rafters and kill the Sniper.
- 55Jump across the gaps to his body and take his Hangar Access Key.
- 56Now return to the ground floor and go back to the missile silo.
- 57Drop down to the floor and go through the hallway.
- 58Ignore the hole and run to the end.
- 59Open the door with the Hangar Access Key and then kill the MP inside.
- 60Drop down onto the ground next to the monorail. It's electrified, so stay off of it.
- 61Turn left and run down to the end of the tunnel.
- 62Climb the ladder and push the button to call a train.
- 63Run back down to the train and crawl under the rail to the ladder.
- 64Climb up into the alcove and take the Shotgun Shells and then use a standing jump to the top of the train.
- 65Climb up into the opening and cross the first grating.
- 66For the second, monkey swing across the grating and get as close to the laser as possible. As it moves away, quickly swing f
Tips
- If an MP reaches the alarm panel before you kill him, you will not be able to get the MP5. Restart the level if this happens.
- The inmate you release can help you defeat enemies later in the level.
- Secret #1 (Save Crystal) is inaccessible if the Sniper above raises the alarm.
- Be careful of the electrified monorail.
100% Human-Written. AI Fact-Checked. Community Verified. Learn how AntMag verifies content