Navigate the Crash Site in Tomb Raider III. Find Commander Bishop's Key and Lieutenant Tuckerman's Key, and face a T-Rex.
Walkthrough
- 1Safety drop out of the hut and cross the swamp, using the Swamp Map to identify solid ground with large green plants. All jumps are running jumps.
- 2SECRET #1: From the last plant, make a running jump to the plant beneath the opening in the corner (unmarked on the map). Climb up for MP5 Clips.
- 3After the swamp, move to a slope. Make a running jump to the ledge on the left for Grenades, then slide into the fog.
- 4Kill the Raptor that emerges and move past the pool. Climb the block on the right and use a standing jump with a grab to the opening. Follow it to the plane wreckage.
- 5Kill the Raptor emerging from the tree to the left.
- 6COMPSOGNATHUS ROOM: Facing the plane's nose, go right to a dark hole near the right wall. Pick up MP5 Clips. Move to the gate, which opens as you approach. In the room, shoot the pack of Compsognathus that emerge and collect MP5 Clips (or the MP5 if you don't have it) and a Large Medi-pack. Search niches for two switches opening the exit.
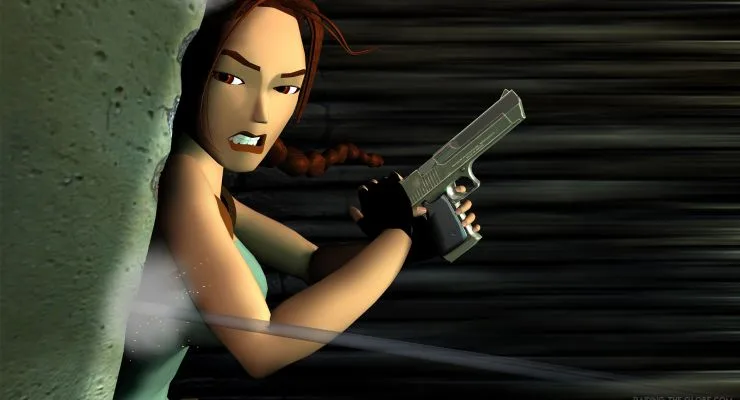
- 7T-REX NEST: Facing away from the plane's nose, enter the pit on the left and climb to the next area. Collect MP5 Clips (or the MP5 if you don't have it) from the ledge. Move into the clearing where three Raptors attack a soldier. Run past them and slide down the slope. Circle the pool to the nest, take Commander Bishop's Key from the body, and a T-Rex appears.
- 8Head over the pool and left. Sprint to the alcove with the torch above it and throw the switch. Sprint back across the pool to the alcove with another torch and throw this switch to open the exit. Raptors from above will fight the T-Rex. You can shoot the T-Rex from the alcoves until it dies.
- 9After the T-Rex is defeated, collect a Small Medi-pack to the right of the nest, another Small Medi-pack opposite the slope, a box of Flares in front of the second switch, and two boxes of Flares and a Small Medi-pack near the first switch. Climb the stairs next to the first switch to return to the upper area.
- 10SECRET #2: Facing away from the slope in the upper area, jump to the ledge on the left. Use a standing jump with a grab to reach the tree branch above for a Large Medi-pack. Turn right and use a standing jump with a grab to reach the branch with Flares.
- 11TEMPLE: Go right of the plane and climb the slope behind it. Help the two Soldiers and enter the second corridor to the right. Follow it to the temple entrance where a Raptor fights a Soldier. Take MP5 Clips inside the entrance, then climb onto the step. Do NOT cross the bridge. If you fall, climb out quickly to avoid piranhas.
- 12Climb to the next ledge, then climb the wall with vines to the top. Backflip onto the slope, jump to a branch, and kill the Raptor. Jump back on the slope, slide down, grab the edge, and shimmy right. Pull up and jump to the triangular ledge in the corner. From here, use a standing jump with a grab to reach the next branch.
- 13Kill the Raptor on the other branch and jump to the Save Crystal, then to the next branch.
- 14SECRET #3: On this branch, walk to the end with the ledge above and the slope. Use a standing jump with a grab to reach the ledge to the left of the slope for MP5 Clips.
- 15Jump to the branch the Raptor was on and shoot the Raptor carcass hanging in the air to distract piranhas. Run and jump to the green ledge for a Small Medi-pack, then dive into the water. Throw the switch and climb out on the other side of the bridge.
- 16Kill the Raptor emerging from the temple and enter. Kill the next Raptor inside. Throw the three switches, jumping atop the block each time to kill the Raptors that emerge.
- 17Once all Raptors are dead, climb to the upper ledge, take the Save Crystal and Lieutenant Tuckerman's Key. Kill the final Raptor that appears when you take the key. Leave the temple.
- 18To enter the plane: Go to the right side of the plane (as you face it) and find the small brown ledge. Jump on it, grab the side of the plane, shimmy left, and pull up to reach the top. Alternatively, a longer, more difficult method exists with additional pickups.
Tips
- Soldiers in this level are allies. Attacking them will turn them hostile. They may drop MP5 Clips when killed by Raptors.
- Use the Swamp Map to navigate the swamp safely.
- The Compsognathus Room and T-Rex Nest can be visited in any order, and two areas are optional.
- If you don't have the MP5, you will find it in the Compsognathus Room and T-Rex Nest.
- Distract piranhas by shooting the hanging Raptor carcass.
- The T-Rex can be defeated by shooting it from the alcoves.
100% Human-Written. AI Fact-Checked. Community Verified. Learn how AntMag verifies content