Follow the Tomb Raider III Temple Ruins walkthrough to find the Ganesha Key and uncover secrets, avoiding traps like boulders and quicksand.
Walkthrough
- 1Enter the small opening in the tree and take the Small Medi-pack. Watch for Cobras in the grass.
- 2Continue forward, throw the switch, run up the steps, and safety drop into the hole.
- 3Crawl through, take the Small Medi-pack, and ignore the path to the left.
- 4Continue, kill the Cobra around the corner and the two monkeys at the end. Climb out into the next jungle area.
- 5Climb up the green ledges to the left and take the MP5 Clips and Shotgun Shells.
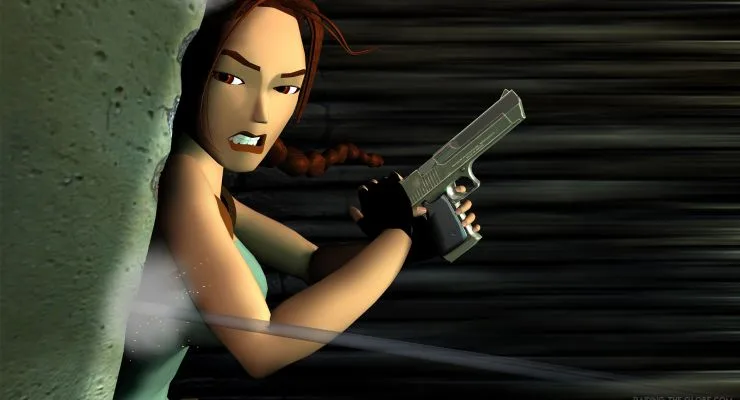
- 6Take a running jump with a grab to the small ledge in the center of the water. Take the Small Medi-pack.
- 7Use a running jump to the ledges ahead. Throw the switch on the right to open a door under water between the gap in the ledges.
- 8Swim down through the door and surface in the next area. Kill the two monkeys and climb up the blocks on the mudslide.
- 9Jump up and grab the upper ledge. Take the Uzi Clips and run across the mudslide, jumping to the next ledge.
- 10Kill two more monkeys and go to the end. Use a running jump to reach the ledge to the left with the Uzi Clips.
- 11Through the dark passageway, arrive in the tree tops with a Save Crystal nearby. Jump to the first branch.
- 12Take a running jump to the next branch ahead to the right. From here, turn right and use a running jump to reach the far branch. Do NOT hold action.
- 13Get Flares from the far branch. Run and jump back, again without action, and jump around the branches until you get to a branch with Desert Eagle Clips.
- 14Return to the first branch and use a running jump with a grab to reach the stone ledge.
- 15From here, use a running jump to the tree with the Small Medi-pack. Use a standing jump to the ledges to the left.
- 16Climb up through the cave and drop down next to the waterfall. Slide down backwards and grab the edge. Shimmy right and pull up on the ledge with the Shotgun Shells.
- 17Drop down on the flat green ledge and use a running jump to the area behind the falls. Kill the Cobra and take the Flares from the cave.
- 18Backtrack to the flat green ledge and climb back up. Jump to the next ledge and kill the monkey before crawling through the opening.
- 19Kill the cobra on the right, then slide down and kill the second Cobra.
- 20Slide down the next slope on the right to avoid the boulder.
- 21In the next room, go to the right of the statue and pull out the block. Shotgun Shells are to the left of the statue (if you didn't get the Shotgun yet, you will find it here).
- 22Crawl through to the next room and a Shiva will animate. You can climb the ledge to the right with the Save Crystal for safety.
- 23Kill the Shiva and use the two switches on the ledge. Approach the pit in the floor to open a trap door. Go into the pit and throw the switch.
- 24SECRET #1: The wall next to the switch is a block. Push it in to reveal a room. Crawl under the darts and approach the pit. Take the Small Medi-pack and jump out of the pit quickly before the boulder crushes you. Go through the room, avoiding the darts, and take the second Small Medi-pack, Flares, and Shotgun Shells.
- 25Leave the pit and go into the nearby hallway. The door closes behind you, so move into the quicksand. Keep wading through to traverse it without taking damage.
- 26Climb out on the mudslide and turn around. Use a running jump with a grab to reach the ledge. Pull up and kill the monkey before taking the Small Medi-pack.
- 27Throw the switch to open the door. Sprint down the hall or jump over the blade, taking a little damage to get through quickly.
- 28Continue up the stairs to the next room. Kill the two monkeys.
- 29SECRET #2: Go right and find the movable block in the second pillar. Pull it out and push it up next to the central structure. Climb atop the block and up to the ledge. Walk around until you spot a dark hole in the ceiling. Use a standing jump with a grab to reach the ladder and climb up for Shotgun Shells and MP5 Clips. Throw the switch before leaving or you can't get secret 3. To get out, climb all the way down the ladder until Lara is hanging and let go.
- 30Use the movable block and push it up against the structure. Find the switch between the gates at the base of the structure and then climb to the upper level.
- 31Go through the door and down into the water. Throw the lever to open the door and swim through the corridor.
- 32Turn right and throw the lever, then roll and swim to the second lever. Pull it and swim back to the corridor, surfacing in the ceiling.
- 33Jump into the water and throw the two levers on the side to start the burners.
- 34SECRET #3: Throw the lever at the base of the steps underwater, then roll and swim for the opening on the right. You should just barely make it inside. Pick up the Flares, Large Medi-pack, and Grenades, and the door will open to let you out. If you did not pull the switch in secret 2, the lever for secret 3 will not work.
- 35The burners will reveal invisible platforms. Use a standing jump with a grab to reach the nearest one and then jump across to the second.
- 36Use a standing jump to reach the ledge with the switch. Throw it and jump left.
- 37Run off the platform down to the ground and then run up through the door before it closes.
- 38In here, run to the right and throw the switch. This will get a spiked wall moving. Sprint down to the far end of the chamber and pick up the Ganesha Key from the left.
Tips
- Watch out for Cobras hiding in the grass and monkeys that can attack.
- Piranhas are in the water but cannot reach you on certain ledges.
- The mudslide requires a running jump to cross safely.
- A boulder trap can be avoided by sliding down a slope on the right.
- A Shiva enemy will animate in one room; a Save Crystal is available on a higher ledge for safety.
- Secret #2 requires pulling and pushing a movable block to reach a ladder.
- Secret #3 is only accessible if the switch in Secret #2 was thrown.
- Burners reveal invisible platforms needed to progress.
- A spiked wall will start moving after a switch is thrown; sprint to avoid it.
100% Human-Written. AI Fact-Checked. Community Verified. Learn how AntMag verifies content