Tomb Raider III throws you back into the boots of Lara Croft for another globetrotting adventure. This classic action-adventure game from 1998 demands precise platforming and skillful combat as you navigate perilous environments, from India's wild jungles to treacherous icy caverns. It's a challenging journey that tests your mastery of Lara's advanced movement and combat abilities.
This guide is here to help you conquer every obstacle TRIII throws your way. We'll detail how to master tricky sections, overcome formidable foes like Puna, and ensure you uncover every secret and hidden item scattered across the game's diverse locations. Get ready to find all the collectibles and achieve that Gold Medal status.
12. Closing and Credits
Concluding Tomb Raider III: Adventures of Lara Croft. Review copyright info, version history, and an intro to Lara's challenging third adventure.
Alright, we've made it to the end of Lara's third adventure! Before we wrap things up, let's quickly go over the closing details of this guide.
First off, some copyright information. This entire guide is protected by copyright from 2004 by Mike Hamlin. You're totally welcome to print it out for your own personal use, but please don't go trying to reproduce or distribute it illegally, especially not to make money. This guide is intended to be found exclusively at gamefaqs.com, so if you see it anywhere else, give Mike a heads-up!
Next, let's look at the version history:
- v1.00: The very first version, completed on January 28, 2004.
- v1.01: A quick update on August 23, 2004, where several typos were fixed. Mike wanted to make sure the guide was as polished as possible!
- v1.02: The latest update on June 12, 2005. Some characters that weren't displaying correctly in the maps have been fixed, making them much easier to read.
And finally, a little intro to wrap things up. Welcome back to Lara Croft's third adventure! If you're new to the Tomb Raider world, get ready, because this game is seriously challenging. Even if you're a veteran, you'll still find plenty of tough puzzles and traps to keep you on your toes across five different global areas. The main goal is to have fun, and hopefully, this guide has been a big help on your journey!
That's it! You've conquered Tomb Raider III!
yourself with the most powerful weapon in the game: knowledge.
Learn every button and move in Tomb Raider III! Master Lara Croft's controls, from basic movement and combat rolls to advanced grabs, climbs, and swimming.
Controls:
- D-pad
- Movement (run forward, turn, hop backwards), swimming, and climbing direction.
- Triangle
- Draws and holsters weapons. Lara automatically draws new weapons or Pistols if ammo is depleted. Weapons drawn limit some actions like grabbing or manipulating objects.
- Circle
- Lara performs a forward roll, finishing in the opposite direction. Useful for combat.
- X
- Action button. Used for picking up objects, manipulating switches, using items, pushing/pulling blocks, and grabbing ledges.
- Square
- Makes Lara jump straight up. Pressing Square followed by a direction makes Lara jump in that direction. Can be used to veer during forward jumps or flip in the air.
- R1
- Walk mode. Lara moves carefully and won't step off ledges or onto sliding surfaces. Press Left/Right to sidestep.
- R2
- Sprint. Press and hold while running forward to increase speed. A red bar indicates sprint duration.
- L1
- Look button. Hold and use directional buttons to pan the camera.
- L2
- Crouch. Use directional buttons to crawl while crouched, allowing passage through tight spaces.
Advanced Actions:
- Grabbing Ledges
- Press and hold Action mid-air after a jump to grab ledges. Press Forward to climb up, release Action to drop, or hold Left/Right to shimmy. Press L2 while hanging to pull up into a crouch.
- Mid-Air About Face
- Press Roll (Circle) immediately after a backwards or forwards jump to flip and land facing the opposite direction. Useful for evading close-range enemies. Can also be executed from a running jump.
- Running Jump
- Allows Lara to jump greater distances than a standing jump. Requires a running start and can be combined with a mid-air grab.
- Climbing
- On textured walls, press and hold Action and Forward to grab. Use directional buttons to climb. Can grab anywhere on a climbable surface, not just the edge. Press Jump to backflip away. Release and re-press Action to descend quickly.
- Vaulting
- If Lara can reach the edge of a block or wall above, press and hold Forward and Action to leap up and grab it.
- Inching
- To jump up and grab a platform when vaulting isn't possible, hold Jump and Action. Lara will repeatedly jump forward, inching closer until she grabs the ledge.
- Pushing Blocks
- Manipulate blocks to clear paths or reach higher ledges using the Action button and directional controls.
- Swimming and Wading
- In water, Lara wades or treads. While wading, she moves slowly and can jump. While treading, use the D-pad to move in any direction. Hold Jump to dive. Underwater, Jump makes Lara swim, and the D-pad controls direction. Press Action near switches or items to interact. Hold Forward and Action at pool edges to climb out.
- Sprinting
- Increases Lara's speed temporarily, indicated by a draining red bar. Turns become wider while sprinting. Hold Jump during a sprint for a diving roll.
- Crouching and Crawling
- Press and hold L2 to crouch. Use directional buttons to crawl through tight spaces. To hang over an edge while crawling, position Lara with her back to the edge and press Down and Action. Crawl over items and press Action to get into a crouch, then Action again to pick them up. Weapons like Pistols, Uzis, or the Desert Eagle can be drawn while crouching.
- Monkey Swing
- Used on textured bars. (Details incomplete in source text).
appropriate item.
Master Lara Croft's movement capabilities in Tomb Raider III. Learn precise distances for jumps, steps, rolls, and slides to conquer any obstacle.
Understanding Lara's movement is crucial for navigating the game's environments. The game world is constructed from square segments, which dictate the distances Lara can traverse with various actions. Familiarize yourself with these distances to execute jumps and reach new areas effectively.
Movement Distances:
- Standing jump: 2 squares (3 with a grab)
- Backwards jump: 2 squares
- Sideways jump: 2 squares
- Roll: Slightly less than 1 square
- Single step forward: Slightly less than 1/3 of a square
- Single step backwards: Exactly 1/3 of a square
- Backwards hop: Slightly less than 1 square
- Running Jump: 3 squares (4 with a grab)
Jumping Mechanics:
- Adding a grab to a standing jump can extend its reach by 1 square, allowing Lara to grab a ledge 3 squares away.
- A running jump with a grab can cover 4 squares, enabling Lara to reach ledges further away.
- These grab distances apply only if the destination platform is at the same height. If the destination is higher, a grab may not be possible. If lower, Lara can reach ledges beyond her normal jumping distance.
- When grabbing in mid-air, Lara will stop after falling a certain distance.
- Avoid using a running jump for ledges that are very high but close, as Lara might hit the ledge before she can grab it.
Precise Distances and Tactics:
- A running jump requires slightly less than 1 square of space. A backward hop or a roll provides this exact distance.
- Taking 3 steps backward covers exactly 1 square, useful for precise positioning.
- Some radically sloping platforms cause Lara to slide. Pressing jump while sliding propels Lara in the direction she is facing, allowing for rebounds off multiple slopes to reach high areas.
- If sliding backward, holding the 'Action' button will make Lara grab the platform's edge as she slides off.
- Holding 'Jump' while pulling up onto a sliding surface causes Lara to backflip away from the slope, preventing her from slipping off again.
- Note that some areas are triangular, essentially half of a square section.
Keep this in mind when moving on triangle sections.
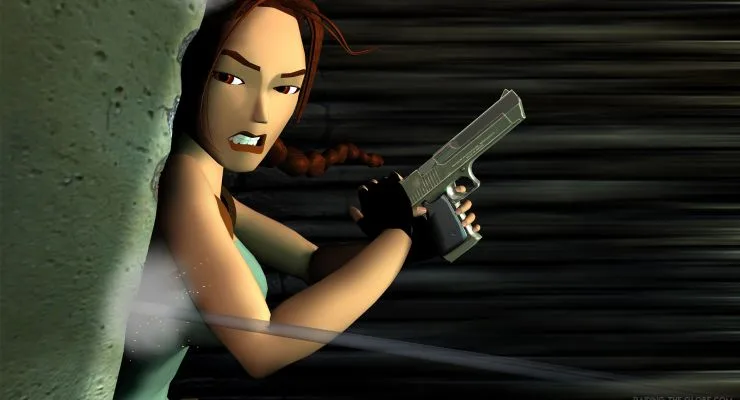
Learn how to defeat enemies with and without guns in Tomb Raider III. Master Lara's mobility and weapon choices to overcome any foe.
Alright, let's talk about combat in Tomb Raider III. It's a big part of the game, and thankfully, Lara's got some serious advantages. Her biggest asset is her mobility – she can dodge, roll, and jump while still lining up perfect shots. Enemies generally fall into two camps: those who charge you and those who shoot. How you handle them changes quite a bit depending on which type you're facing, and the specific enemy will definitely influence which weapon you'll want to pull out.
Enemies Without Guns: For these guys, the key is simple: keep moving! If they need to get up close to hurt you, just make sure they can't. Keep jumping, rolling, and back-flipping to maintain distance, and you can just keep firing until they're down. Usually, you can just shoot them as they walk towards you, but constantly back-flipping is even better. If you find yourself running out of space to back away, try jumping over them, flipping in mid-air, and then immediately back-flipping as they turn around. If one gets behind you, just roll and start back-flipping again. While it's generally easy to keep your distance, some enemies are incredibly fast and will be on you in a flash, so be ready to switch to heavier firepower if needed.
Enemies With Guns: These are definitely more dangerous because they don't need to close the distance. No matter how much you dodge and weave, they're still going to land some hits. However, those same moves – rolling and flipping – are still your best bet. Sidestepping back and forth can really cut down on how many shots hit you. If you're in a tight spot, try this trick: run up to a gun-toting enemy and roll. You'll end up behind them, and they'll have to do a little circle to face you again. The moment they turn, roll behind them again. When you're facing multiple enemies with guns, though, it's time to break out the heavy artillery – those situations are super dangerous.
There's also the advantage of height. For enemies without guns, you can often just find a high ledge and take them out with your Pistols. They simply can't reach you up there. They might walk out of your view, but as long as you keep firing, Lara will shoot whenever they pop back into sight. If you need to, you can even hang from the ledge to draw out the encounter, but be careful not to fall!
Similar guides you might like


100% Human-Written. AI Fact-Checked. Community Verified. Learn how AntMag verifies content