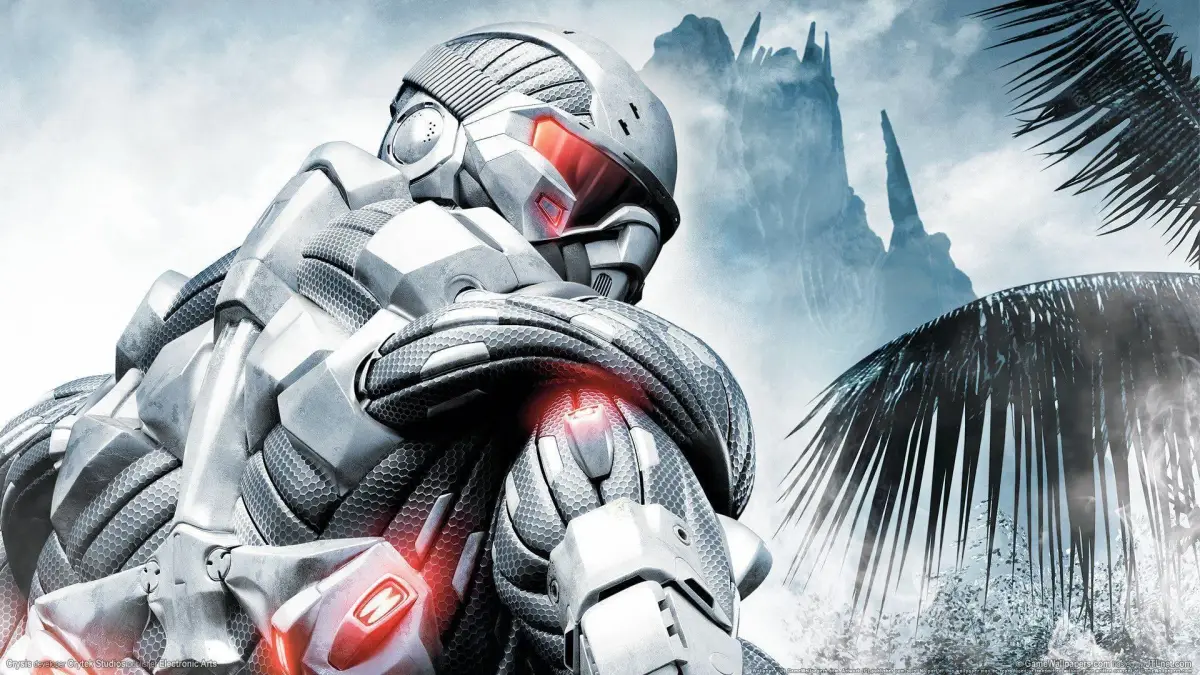
Welcome to Crysis, a 2007 sci-fi shooter that drops you onto a fictional island in North Korea during an alien invasion. You play as Jake Dunn, a special forces operative equipped with a powerful Nanosuit. This suit grants you superhuman speed, strength, armor, and cloaking abilities, letting you approach combat in a variety of ways. Expect intense firefights against both the Korean People's Army (KPA) and extraterrestrial threats across frozen battlefields.
This guide is here to help you conquer every challenge Crysis throws at you. We'll cover comprehensive walkthroughs for storming KPA camps, mastering advanced Nanosuit techniques, and understanding weapon effectiveness. Whether you're aiming to achieve a Gold Medal or just want to defend humanity without getting stuck, we've got the strategic tips and detailed advice you need.
Part 1
Begin your Crysis journey with Part 1 of our comprehensive guide, covering the initial chapters from Contact to Exodus. Learn about the story, weapons, and gameplay.
It is August 14, 2020. A US Special Forces team has been covertly inserted onto the Pacific island of Lingshan. The remote island has been invaded and occupied by a large force of the North Korean military, under the command of their most notorious commander, General Kyong. The US Special Forces team is tasked with the extraction of an archeological team that was researching on the island. There is, however, much more to this mission than a simple rescue of the scientists. The scientists have found something-something truly ancient, intelligent, malevolent and not of this world, and General Kyong is determined to possess it at any cost. The inevitable clash of the two forces is soon dwarfed by the realization that an alien evil has been awakened-an invasion of the planet Earth is underway.
This Crysis walkthrough details gameplay that is viable on all four difficulty levels. Its details were gained through game play on the PS3. The classic 2007 game, Crysis, was released for the PS3 and XBOX 360 on October 4, 2011 as a DLC. The game has transitioned superbly to the console platform, with no serious technical issues, with excellent graphics, good quality AI, minimal glitches and superb game play and gunplay. Accepting the fact that the storyline features first contact with a malevolent alien force, the game features plausible missions rather than contrived ones and their flow is natural, fast paced, varied and the open-world allows great flexibility in strategy and combat tactics.
The open world environment of Crysis allows great flexibility in game play. The highly varied environment will take you from lush tropical jungles through rocky wooded highlands, river valleys and canyons and finally into the heart of an ancient alien stronghold, awakened from an eon of cold slumber by the curiosity of some and a quest for power by others. The environment offers great freedom of movement in the pursuit of missions, which is enhanced by the player’s ability to use effective stealth tactics to modify the flow of the action.
Crysis has four difficulty levels: “Easy,” “Normal,” “Hard” and “Delta.” The gunplay and flow of the game is the same for all. Enemy AI will get a bit tougher, a lot more aggressive and a lot more aware as the level increases; but the most noticeable difference is in Nomad’s own vulnerability-he can take much more damage on “Easy” and live than he can on “Delta.” This fact makes stealth tactics, sniping, picking your battlefields, infiltration and calculated avoidance more important on the tougher levels than on the easier ones. On “Delta,” for example, you can’t use bullying tactics and survive-it isn’t even advised on “Easy.” Stealth tactics work extremely well in Crysis and should be fully exploited on all levels of play.
WEAPONS:
The player can carry two primary weapons and a pistol as a secondary weapon. Finding a second pistol will allow you do wield dual pistols, doubling their damage output. You can also carry a guided missile launcher, C4 explosive charges and a variety of grenades. Both the primary and secondary weapons have selectable options, allowing some of them to be equipped with a variety of sights, with silencers, flashlights, grenade launchers and with the option to shoot tranquilizer darts. Many of these options are original equipment while others are acquired during game play. You start the game with a SCAR assault rifle and a pistol.
Pistol: The standard pistol is carried in addition to your two allowable primary weapons. Ammo for it is plentiful and if you pick up a second pistol they can be dual wielded, doubling their damage output. The pistol, however, will never be a first choice in any scenario. It can be useful on occasion if you aren’t carrying a silenced weapon, since a silencer and laser sighting are its default options.
SCAR assault rifle: The SCAR assault rifle is the main assault rifle carried by the US forces and is an excellent weapon, far superior to the KPAs KY71 assault rifle. Its damage output, rate of fire and accuracy, especially when equipped with a scope, are excellent. When the sniper scope is available it is a respectable long-range option to the Precision Rifle. The iron and reflex sighting also make it a good close-quarters weapon. It also has the ability to shoot tranquilizer darts that render an enemy unconscious for about a minute. When you acquire the grenade launcher attachment it packs additional punch against vehicles, gun emplacements and troop concentrations; but the SCAR has one shortcoming-its ammo is rare, especially in the early chapters of the game when you are solo with the KPA who don’t use it. That said, economical usage would allow you to carry one rather than the weaker KY71 assault rifle for most of the game’s early chapters. In the middle and later stages, its ammo is more available, both from fallen comrades and the occasional US stockpile.
FY71 assault rifle: The FY71 assault rifle is the primary weapon carried by the KPA, especially
Part 2
Explore the arsenal available in Crysis Part 2, detailing weapons like the Shotgun, Precision Rifle, Minigun, Gauss Rifle, and more. Learn their strengths and weaknesses.
Weapons:
- SCAR - The default assault rifle, capable of being equipped with a grenade launcher and incendiary ammo. It also allows for tranquilizer darts.
- Shotgun - The best close-quarters weapon. Its normal mode is powerful, while the alternative choked mode offers greater range at reduced power. Effective with a reflex sight. Slow one-shell loading animation.
- Submachine Gun - Fast-firing with minimal recoil, good for putting a lot of lead on target quickly. Effective when equipped with a scope. Recommended over the KY71 assault rifle.
- Precision Rifle - A powerful sniping weapon with great range and accuracy, capable of killing KPA with a single shot. Ammo is rare at caches but common in sniper towers. Can be used with cloaking tactics and is effective at closer ranges with a reflex sight.
- Minigun - A medium machine gun for concentrated firepower. Has a huge 500-round magazine but requires a brief interval to spin up to speed. Instrumental in the game’s final battle.
- Gauss Rifle - A tremendously powerful sniper rifle, available from chapter 5. Demolishes KPA with a single shot and can be used as a one-shot-one-kill assault rifle with iron or reflex sights. Primary weapon against flying aliens and tougher foes.
- MOAC - An alien weapon, the alien version of the minigun without spin-up time. Useful against aliens but tends to overheat.
- TAC Cannon - Acquired in the final stages. Launches a small tactical nuke, effective against bosses.
- Missile Launcher - Shoulder-mounted weapon vital for destroying helicopter gunships and heavy armor. Contains three guided missiles that can be fired rapidly. Only one launcher can be carried.
- C4 Explosive Charges - Remotely detonated explosives best used against stationary targets like AAA guns or armor. Can be laid at chokepoints.
- Grenades - Includes fragmentation (effective against personnel and APCs), smoke (obscures vision), and flash grenades.
- Ammunition - Primarily KPA ammo found in enemy territory. Can be acquired from any weapon’s magazine if carrying that weapon.
Part 3
Learn about the Crysis Nanosuit's Cloak and Armor modes, and master PS3 controls for enhanced combat and stealth.
The top-secret nanosuit is worn by select members of the Special Forces team and imparts great strength, speed, and partial invulnerability to its wearer. It also has powers that are not quite understood, being able to collect data on and somehow interface with the alien intelligence. Its two modes: armor mode and cloak mode, will be described below. Only one mode can be active at a time.
The Cloak: The nanosuit is equipped with a cloaking device that allows you to virtually disappear, but you can still be spotted if an enemy gets too close or if you make a noisy passage. The cloak gives you the option of using stealth, rather than or coupled with force to accomplish tasks. This perk makes going solo against many doable and also gives the option of bypassing the enemy entirely or choosing your own rules of engagement by choosing the battleground. The cloak can only remain active for as long as your energy level is adequate. The faster you move, the faster your energy drains. You can stand for a prolonged interval in the open and recon an area while cloaked, accessing the enemy numbers, their disposition, vehicles, and weapon emplacements and placing them on your (radar (your minimap with nearby blips and threats marked)) so you know their location. Always take the time to recon enemy positions, identifying (cover (press the cover button to crouch behind walls or objects)) spots, like foliage, boulders, buildings, blind spots, etc. to penetrate enemy installations before plunging into combat. Moving at a snail’s pace can also allow one to cross large exposed areas without detection. Shooting through the cloak or enemy fire into the cloak will deplete its energy. Integral to combat in Crysis is learning to de-cloak to kill and to quickly re-cloak to maintain stealth. This cloaking ability makes combat tactics more flexible than most other first-person shooters.
Armor: The nanosuit also allows you to enhance your resistance to enemy fire by activating armor mode. This does not make you invulnerable but does allow you to take more damage. Like the cloak, this mode drains energy even when you aren’t taking damage, but you can shoot while in armor mode without penalty.
Playstation 3 Default Controls:
Player Controls:
- START button: Pause Action/Game Options
- SELECT button: Mission Screen/Map Screen
- SELECT button (hold): Weapon Options
- LEFT analog stick: Move/Select options (menu/weapon)
- LEFT analog stick (L3 hold): Sprint (drains your energy)
- RIGHT analog stick: Look/Aim weapon
- RIGHT analog stick (R3 press): Melee
- LEFT button (L1): Aim equipped weapon/drop item
- LEFT button (L1): Zoom out with map opened/Zoom in binoculars
- Left button (L2): Activate/Deactivate Armor mode
- RIGHT button (R1): Fire Weapon/Throw grenade
- RIGHT button (R1): Zoom in with map opened
- RIGHT button (R2): Activate/Deactivate Cloak mode
- TRIANGLE button: Select or Switch Weapon
- TRIANGLE button (hold): Weapon options
- TRIANGLE button: Toggle weapon options (With SELECT held)
- CIRCLE button: Crouch
- CIRCLE button (hold): Go Prone
- CIRCLE button: Toggle weapon options (With SELECT held)
- SQUARE button: Reload weapon/pick up item/interact/throw item
- SQUARE button (hold): Power throw item (drains energy)
- SQUARE button: Toggle weapon attachment (With SELECT held)
- X button: Jump
- X button (hold): Power-jump
- X button: Toggle weapon scope options
- UP ARROW: Use binoculars (Hold L1 to zoom in)
- DOWN ARROW: Night vision
- LEFT ARROW: Toggle weapon fire mode options
- RIGHT ARROW: Equip grenade
Vehicle Controls—Vehicle, Boat, Tank:
- SQUARE: Enter/Exit (Vehicle/Boat/Tank)
- RIGHT button (R1): Fire coaxial machinegun (Tank)
- RIGHT button (R1): Fire turret gun from turret (Vehicle/Boat)
- RIGHT button (R2): Forward/Accelerate (Vehicle/Boat/Tank)
- LEFT button (L1): Fire turret weapon from driver’s seat (Vehicle/Boat)
- LEFT button (L1): Fire main canon (Tank)
- LEFT button (L2): Reverse (vehicle/Boat/tank); Brake (Vehicle/Tank)
- LEFT ANALOG STICK: Steer (Vehicle/Boat/Tank)
- RIGHT ANALOG STICK: Look (Vehicle/Boat/Tank)
- TRIANGLE: Switch from driver/gunner position (vehicle/Boat)
- UP ARROW: Change view (Vehicle/Boat)
- Always fill up on all ammo types at weapon caches, though most are plentiful except for sniper rifles (Precision and Gauss) and the SCAR assault rifle.
- Recon enemy positions using the cloak mode and your radar before engaging.
- Identify cover spots before entering combat.
- Learn to de-cloak to attack and quickly re-cloak to maintain stealth.
- Armor mode allows you to take more damage but drains energy even when not taking damage.
Part 4
Follow this Crysis Part 4 walkthrough to complete the covert rescue operation, learn nanosuit functions, and rendezvous with Jester on Lingshan Island.
- 1After your parachute fails and you land in the water, swim straight ahead to reach the beach.
- 2You start with a pistol and a SCAR assault rifle. Prophet remotely reboots your nanosuit, giving you a waypoint to Jester.
- 3Follow the beach and enter the rocky ravine towards the waypoint.
- 4Encounter three KPA soldiers. Attach the silencer to your SCAR (SELECT + TRIANGLE) and toggle reflex sight (SELECT + X).
- 5Access SCAR's Tactical Attachments (SELECT + O), toggle to the dart icon (LEFT ARROW) for the tranquilizer dart option. This silently incapacitates enemies for about a minute.
- 6Switch to your pistol (TRIANGLE + DOWN ARROW) and silence it (SELECT + TRIANGLE).
- 7After jumping a ledge, activate cloak (R2). A soldier is on the elevated rock to your right. De-cloak, dart him, then re-cloak. If his body is visible, finish him with the silenced pistol.
- 8To maintain energy while cloaked, de-cloak or activate armor, perform actions like shooting, then re-cloak.
- 9Once energy recharges, cloak, move around the outcropping, and use binoculars (UP ARROW) to tag two KPA soldiers below. Zoom in (L1) for a closer look. Tagged enemies appear on your map.
- 10Cloak, move past a boulder into foliage near a palm tree. Dart one soldier through the foliage. Re-cloak, move closer, and dart the second soldier. Swap to your pistol and shoot them in the head before they revive.
- 11Examine enemy corpses to acquire an FY71 assault rifle and ammo. This weapon uses more common ammo and is good for finishing darted foes to save SCAR ammo.
- 12Continue through the trees near the shoreline to locate Jester.
- 13Jester leads you through a forest to Aztec's landing site. Aztec's parachute is tangled in a tree, and he is dead, surrounded by four mangled KPA corpses.
- 14Prophet vaporizes Aztec's remains. Take his SCAR ammo.
- 15Continue through the wooded canyon. Power-jump a ledge. A two-man KPA patrol approaches.
- 16Get into foliage near a large boulder. Dart the first soldier, then the second when he investigates. Finish them with your silenced pistol or silenced FY71 assault rifle.
- The tranquilizer dart is a stealthy way to incapacitate enemies without raising an alarm. Ensure you finish them before they revive.
- Conserve energy by de-cloaking or activating armor before performing actions like shooting, then re-cloaking.
- Use binoculars to tag enemies, making them visible on your map and aiding in stealthy approaches.
- The FY71 assault rifle and its ammo are more common than the SCAR's, making it a good secondary weapon for finishing off incapacitated enemies.
- Rendezvous with Jester.
- Acquire the FY71 assault rifle and ammo.
- Learn essential nanosuit functions (cloak, armor, speed) and combat tactics.
Similar guides you might like


100% Human-Written. AI Fact-Checked. Community Verified. Learn how AntMag verifies content