Navigate Dhaka Venu in Lost Sphear! Learn boss strategies for Emperium and Krom, and find treasure like Gold Coins and powerful artifacts.
Alright, let's tackle this section of Dhaka Venu. It's got a couple of tough bosses, Emperium and Krom, but we'll get through it. After that, we'll explore the inner sanctum and grab some goodies.
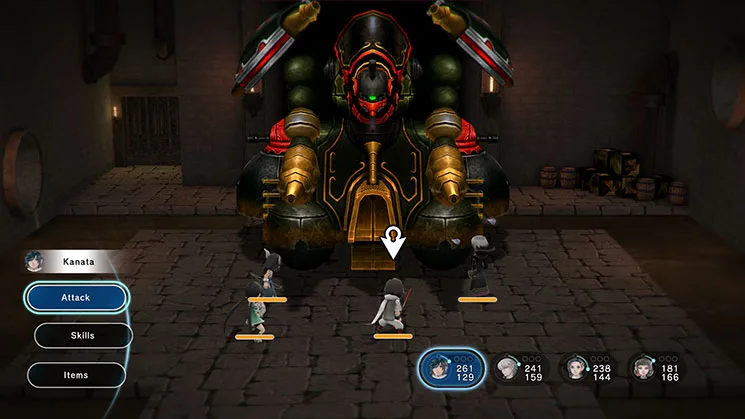
BOSS - Emperium
Emperium is a bit of a pain because it likes to counter your attacks with Intercept, which deals about 30-40 damage. Just a heads-up, if your attack misses completely, it won't counter. This fight has two phases, and its moveset stays pretty consistent.
Slash Attack hits your whole party, but with decent armor, it shouldn't do more than 20 damage. Gather is the scarier one; it can hit a single character up to four times, dealing over 90 damage in the first phase. Pierce is a laser attack that hits in front of the boss.
Once Emperium's health gets low, it'll use Purify to heal itself completely and kick off phase two. After a few turns, it'll use Amplify, boosting all its abilities by 50%. This makes Intercept hit a lot harder, so keep an eye on your health and consider healing instead of attacking.
After Amplify, Emperium adds two new moves: Annihilate and Destroy. Both hit everyone, but Annihilate can instantly kill a character, and Destroy always critically hits.
Strategy for Emperium:
- Positioning is key: Spread your party out. Melee characters should flank the boss, while ranged attackers should hang back in the southeast/southwest corners. This helps avoid the Pierce attack.
- Healing is crucial: Make sure you have skills with the Love Axiom on them for healing. Sherra's Heal and X-Heal are great, and Kanata's Aura can help. If you're using Locke, Potentiate combined with items can provide party-wide heals.
- Seal Amplify: Kanata's skill, Holy Force, is a game-changer. If it successfully seals Amplify the first time you use it, the boss can never use it, making the fight much easier.
- Elemental Resistance: Emperium resists all elements, so stick to physical skills or equip Null Boost on elemental skills.
- The core strategy: Seal Amplify with Holy Force, then focus on physical attacks and healing.
Inner Dhaka Venu
With Emperium down, head through the door behind it to explore deeper into Dhaka Venu. Watch out for new monsters!
Head straight north until you reach a large room with paths to the left and right. Go left first and drop off the bridge. You'll land in a poison area – use Spring Waters or Sherra's Refresh to cure it. Then, head south to find a room with three chests. They contain a Gold Coin, a Sinclair Hilt (this is a locked chest, likely for the Red Key from Emperium), and 3 Silver Coins.
Instead of going back through the poison, head left from the chests, then left again, bypassing a teleporter. This leads to a dead end. Clear out the enemies and loot the sparkle for the Pyramid artifact knowledge. You can take the teleporter if you want; it'll put you on the eastern path from the start, but there's nothing there but enemies before rejoining the main path. Head back to the room with the left teleporter and go north this time, taking the platform at the end.
Continue north to another split. Go right first to find a chest with the Last Elixir. Double back to the split and head west. This path takes you down to another area below. Keep following it to find stairs leading down into a dome-like structure. There's another path to the right of this, but it's just more enemies, so return to the fork and enter the dome.
Inside the dome, the first room has a teleporter and a save point. Use the teleporter to reach an area with a button in the lower right and a sparkle in the upper left. The sparkle gives you the Den of Peace artifact knowledge. The button creates a bridge to its right, leading back to the beginning of the inner sanctum. This is your chance to exit Dhaka Venu to restock if needed.
When you're ready to press on, return to the save point area and head north for your next boss fight.
BOSS - Krom
Krom is another tough one, with most of his attacks hitting hard and affecting your whole party. He has a move called Take Flight, where he leaps into the air, dealing 110-120 damage on takeoff. You can't attack him while he's airborne, so use this time to buff and heal.
On his next turn, Krom uses Black Dive to return to the arena, hitting everyone for about 100-110 damage total. If any characters are close to him when he lands, they'll take about 30 extra damage and get pushed back.
Krom also has Get Lost! to remove debuffs from himself, and Shield of Fury/Shield of Hate to evade physical/magical damage, respectively. He also uses Slash, which hits everyone.
100% Human-Written. AI Fact-Checked. Community Verified. Learn how AntMag verifies content