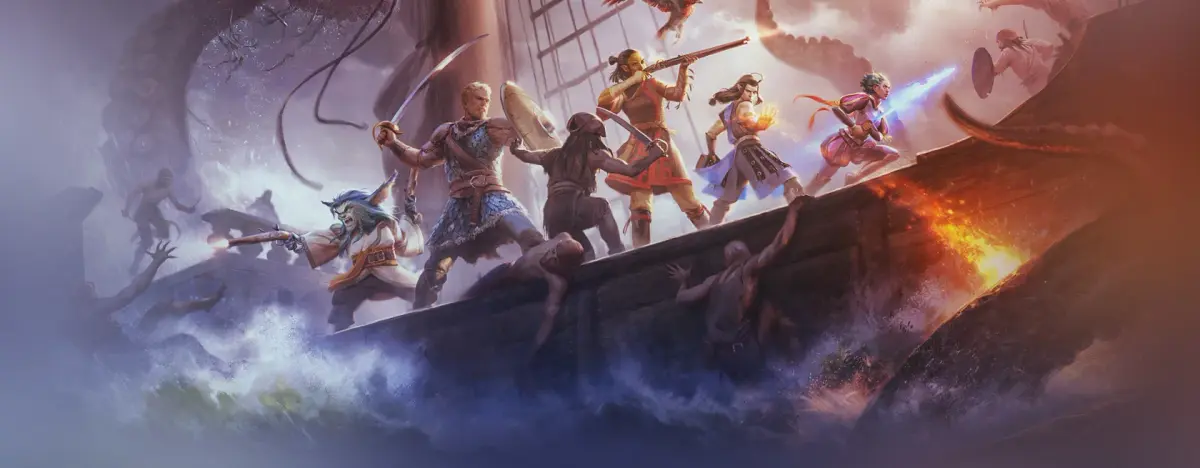
Prepare to set sail in Pillars of Eternity II: Deadfire, a sprawling RPG where your choices shape a vibrant world. This extensive guide offers over 100 sections, covering everything from character builds and advanced combat to companion quests and weapon details. Find strategies for tough boss fights, optimize your character's potential, and navigate the vast world of Deadfire with confidence.
Mechanics
Explore the core mechanics of Pillars of Eternity II: Deadfire, including attack speed, casting speed, engagement, attack resolution, and penetration vs. armor rating.
Pillars of Eternity II uses its own ruleset. This section explains the mechanics behind the various systems.
Attack Speed
Attack speed is governed by how quickly a given weapon can be used (a dagger thrust is quicker than a swing from a great sword) and how long it takes a character to ready another attack (called the recovery time). Certain ranged weapons instead require time to reload before they can be used again. Reloads can be interrupted to do something else but Recovery cannot.
| Type | Speed | Attack | Recovery | Reload |
| Fist | Fastest | 0.5s | 2.1s | N/A |
| Club, dagger, flail, hatchet, rapier, stiletto | Fast | 0.5s | 3.0s | N/A |
| Battleaxe, mace, sabre, spear, sword, warhammer | Average | 0.7s | 4.0s | N/A |
| Estoc, great sword, morning star, pike, pollaxe, quarterstaff | Average | 0.7s | 4.0s | N/A |
| Wand | Fast | 0.5s | 3.0s | - |
| Sceptre | Average | 0.7s | 4.0s | - |
| Pistol | Slow | 1.1s | - | 5.0s |
| Blunderbuss | Very Slow | 0.7s | - | 6.0s |
| Hunting Bow | Average | 0.9s | 4.0s | - |
| War bow, rod | Average | 1.1s | 4.0s | - |
| Crossbow | Slow | 0.7s | - | 5.0s |
| Arbalest | Very Slow | 0.7s | - | 6.0s |
| Arquebus | Slowest | 0.7s | - | 6.8s |
Wearing armour penalises Recovery Speed.
Casting Speed
Spells have their own casting and recovery time as shown in the individual spell descriptions. Casting time ranges from 0.5s to 6s. Some spells have 0 recovery time but most have recovery times around 3-4s.
Since the casting time of an average spell is longer than the attack speed of any weapon, casting most spells in melee is tricky since your attempt may be interrupted. On the other hand, if an enemy caster is preparing a slow spell, you have a decent time window in which to interrupt him.
Dual Wielding vs. One- and Two-handed
If you have a weapon in your main hand and nothing in the off hand, you receive a +12 bonus to Accuracy. If you have a second weapon in the off hand, each weapon gets -30% reduction in Recovery Time. Wielding a two-handed weapon confers no special bonus (but two-handed weapons do greater damage).
Engagement
Two opposing characters are said to be engaged if the following conditions are met for either or both:
- Melee weapon equipped
- Not currently moving
- Not already at their engagement limit (default 0 but may be increased by equipping a shield).
When combatants are so engaged, they will provoke a disengagement attack from the other combatant if they move outside melee range. Engagement is broken if a combatant is disabled or if an attacker engages with a different enemy.
Disengagement Attacks
Disengagement attacks are free actions. The attacker gains an Accuracy and Damage bonus.
Attack Resolution
Attack rolls are made using a d100 roll. The attacker adds their Accuracy score to the die roll and subtracts the target's defence score (which varies depending on the attack type). The final value determines the attack result as follows:
- <= 25: miss
- 25-49: graze (-50% damage and duration)
- 50-100: hit (normal damage and duration)
- > 100: critical hit (+25% damage and duration, 1.5x Penetration).
Note that the attacker's Accuracy must be greater than the target's defence to have any chance of scoring a critical hit, since the base critical chance is 0.
Some abilities and weapon properties have an additional percentage chance of modifying the resolved attack. For example, the Aware Inspiration confers a 50% chance of promoting a graze to a hit while the Intuitive Inspiration additionally confers a 25% chance of promoting a hit to a critical. Only one promotion can occur. That is, it is not possible to convert a graze to a hit and then to a critical.
Full Attack vs. Primary Attack
Abilities may indicate that they are activated through a character's Primary Attack or their Full Attack. The distinction only matters when the character is dual-wielding. In this case,
Tips
Master Pillars of Eternity II: Deadfire with essential tips on combat, character creation, skills, and more. Enhance your gameplay and overcome challenges.
General Tips
- Set Auto-Pause options to make the game less annoying. You will want to pause and stop party movement when an enemy is spotted and when a trap is detected.
- If you've not played the first game, the introductory sequence will get you up to speed on the backstory. On subsequent playthroughs, you can select "Start & Skip Intro".
- There are a bewildering number of speech icons. Since it is not at all obvious what they mean, click L3 and move the cursor over an icon. You can do the same with highlighted words and phrases for additional context.
- In combat, the R2 button will bring up an action menu. However, the abilities are represented with simple icons and it is non-obvious what each one does. Use the △ button to show the names.
- When fast travelling to an area, be aware that you can often select specific locations which saves you walking time and loading screens. When sailing on the world map, click L1 to bring up a list of known locations and click on the one you want to sail to.
- If you are in a city where you can resupply your ship, you can change party members without having to travel to an inn or return to your ship. Bring up the Area Map, click ▢ to switch to the City Map and click on Supply. One of the R2 options is party management.
- Always buy accessories which boost skills. You cannot cover all skill checks with your character, but there's nothing to prevent you dressing for the occasion when you need a boost.
- Some merchants sell crafting materials and their stock refreshes every couple of days. Keep an eye out for materials like Vithrack Brains and Antlers which don't drop from enemies.
Character Creation
- Perception is the attribute most frequently checked in interactions.
- Not all skills are equal. There are traps and locked doors and containers everywhere which makes Mechanics essential. A score of 16 (including party bonus) is required to overcome the highest challenges in the game. You will want every party member to have an Athletics skill of 10 or more (again including party bonus) to avoid injuries while exploring the world.
- Diplomacy is the most important passive skill and late-game checks require a total of 16 or so. Like Athletics, Survival is used frequently in scripted interactions so you'll want a high value on at least one of your party members.
- The Bonus Skills Berath's Blessing can be unlocked after around twenty minutes if you don't mind restarting. This doubles the starting skills for your PC and your companions giving you a total of 50 skill points which goes a long way to making gameplay smoother.
- When choosing weapon proficiencies, pay attention to itemisation. Swords, sabres and great swords have the best variety and availability. You'll want to be able to inflict Crush damage as well and flails are a good choice.
Trophies
- You can unlock the Platinum in a single playthrough - the game is long but not especially difficult (unless you want to make it so). The main thing to be careful of is that you don't lock yourself out of faction quests before you're ready. You also need to make one of your companions hate you but you can do this in the context of a temporary save.
Guide and Walkthrough (PS4) by chris-williams
Navigate the treacherous waters of Pillars of Eternity II: Deadfire with our comprehensive PS4 guide and walkthrough. Master mechanics, character creation, quests, and more.
Hey there! Welcome to the world of Pillars of Eternity II: Deadfire. This guide, originally by chris-williams, is your go-to resource for everything you'll need to conquer the Deadfire Archipelago on PS4. We'll cover the game from start to finish, including all the nitty-gritty details.
Think of this as your friendly co-pilot, helping you through the game's many systems and challenges. We'll break down character creation, dive deep into the main quests and sidequests, and even give you the lowdown on items, ship management, and the creatures you'll encounter.
Here's a look at what we'll cover:
- Game Mechanics: Understanding how the game works under the hood.
- Tips & Tricks: Essential advice to make your journey smoother.
- Character Creation: Building your Watcher from the ground up, including races, classes, attributes, and skills.
- Class Guides: In-depth looks at each playable class like Barbarian, Chanter, Cipher, and more.
- Companions: Information on recruiting and building relationships with your party members.
- Main Quests: Walkthroughs for key story arcs like 'The Veins of Eora', 'A Distant Light', 'He Waits in Fire', 'The Coming Storm', and 'The City Lost to Time'.
- Sidequests: Guidance on completing optional tasks and companion quests.
- Items: Details on unique weapons, armor, soulbound items, and more.
- Ship Management: Tips for keeping your vessel in top shape.
- Bestiary: Information on the various beasts, primordials, spirits, and other foes you'll face.
- Appendices: Useful reference material, including previous game decisions.
- Trophies: A list to help you achieve that 100% completion.
Let's get started on your adventure in the Deadfire!
Levels and Experience
Learn how to maximize your experience gains in Pillars of Eternity II: Deadfire! Discover XP sources, party size bonuses, and how inactive members gain experience.
Alright, let's talk about leveling up in Pillars of Eternity II: Deadfire. It's a bit different from other RPGs you might have played, so pay attention!
First off, you don't get XP for just mowing down enemies. That might sound weird, but it means you'll be focusing on other things to grow your characters. The main ways you'll earn experience are by completing quests and bounties. Keep an eye out for those! You'll also get a little bit of XP for exploring new areas and filling out your bestiary, which is a nice bonus.
Experience Requirements Per Level
Here's a breakdown of how much XP you'll need to hit each level:
| Lvl | XP |
| 2 | 1000 |
| 3 | 3000 |
| 4 | 6000 |
| 5 | 10,000 |
| 6 | 15,000 |
| 7 | 21,000 |
| 8 | 28,000 |
| 9 | 36,000 |
| 10 | 45,000 |
| 11 | 55,000 |
| 12 | 66,000 |
| 13 | 78,000 |
| 14 | 91,000 |
| 15 | 105,000 |
| 16 | 120,000 |
| 17 | 136,000 |
| 18 | 153,000 |
| 19 | 171,000 |
| 20 | 190,000 |
Party Size and XP Bonuses
Now, this is where it gets interesting. Running with a smaller party actually gives you an XP bonus, which is a pretty neat way to encourage different playstyles. The fewer folks you have adventuring with you, the bigger the bonus:
| Size | Bonus |
| 5 | - |
| 4 | +25% |
| 3 | +50% |
| 2 | +75% |
| 1 | +100% |
Inactive Party Members
Don't worry about your companions sitting back at your stronghold. They're not completely left out of the XP gains. Inactive party members will receive 75% of the normal XP awarded. This stacks with the party size bonus, too. So, if you're playing solo (a party of 1), your inactive companions will actually get 150% of the XP awarded (that's 2x the normal XP because of the +100% bonus, then multiplied by 0.75 for being inactive).
On top of all that, if a companion is a lower level than your main character, they get an extra bonus. For every level they're behind you, they'll receive an additional 20% XP. This really helps them catch up if you decide to swap them into your active party later on.
Similar guides you might like


100% Human-Written. AI Fact-Checked. Community Verified. Learn how AntMag verifies content