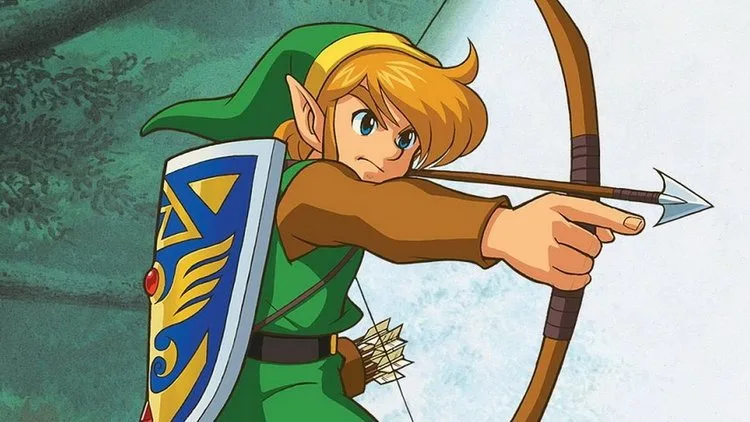
Welcome to Hyrule, my friend! In The Legend of Zelda: A Link to the Past, you'll embark on a dark, heroic journey as Link, tasked with rescuing Princess Zelda and defeating the evil Ganon. This isn't just about swinging a sword; you'll explore a vast world, delve into treacherous dungeons like the Ice Palace and Misery Mire, collect crucial items, and master intricate mechanics to overcome challenging bosses. It's a classic adventure that defined a generation of console gaming.
This guide is your trusty companion through the Light and Dark Worlds. We'll help you conquer every boss, find every secret item, and navigate the trickiest dungeons on your path to saving Hyrule. Whether you're stuck on a particular puzzle or aiming to uncover every last secret before the final confrontation in Turtle Rock, we've got the strategies and walkthroughs you need to succeed.
Guide and Walkthrough (SNES) by TheRewster
Your ultimate guide to The Legend of Zelda: A Link to the Past on SNES! Learn item locations, secrets, and complete walkthroughs for every dungeon and quest.
Welcome to The Legend of Zelda: A Link to the Past! This is the first game in the franchise to get a 16-bit release, and it would set the standard for many games in the series to come. This guide covers the original Super NES version of the game released in North America, so be aware there may be regional differences, as well as differences from the later Game Boy Advance version.
This guide is intended to be as thorough and comprehensive as I can make it. Along the way, I'll be telling you everything you can do in this game--not only every item and Piece of Heart you can collect, but also every treasure chest you can open, every secret entrance in the overworld and in the dungeons that you can open with a Bomb, each room you can fill in on your dungeon map, etc. For this reason, there may be a few (seemingly superfluous) detours for those who want to explore everything. Nevertheless, even if you just want the main items and complete each dungeon, this guide should still be of use to you too. But just be aware it's primarily written with the completionist in mind.
Before each dungeon, I'll tell you what all it's possible to have at that point in the game (after walking you through how to get everything of course), then take you room by room through the dungeons. At the end is an appendix that serves as a quick reference if you want to look up where certain things (e.g. shops) are located. After that is a quick version of the guide for those more experienced with the game who just want to know the best order for completing the adventure and have a brief list of all there is to do in the game.
Continuing and Saving
One final note, about saving and the like. Link's Life Meter is measured in hearts, and if you run out of hearts by taking damage in battle with enemies or from traps, then Link will fall, and you'll receive a game over (unless you have a Fairy in a Bottle--more on that in the main walkthrough). From the game over screen, you'll see the following options:
- Save And Continue
- Save And Quit
- Do Not Save And Continue
If you choose to "Save And Continue," then your progress will be saved and Link will start again, and where he respawns depends on a number of factors.
- If Link falls in the overworld of the Light World, then you can choose to restart from one of the following three locations: Link's House, Sanctuary, The Mountain Cave
- If Link falls in the overworld of the Dark World, then you will automatically restart from the top of the Pyramid of Power.
- If Link falls in a dungeon, then you will automatically restart from the entrance of that dungeon.
Also, note that if you choose "Do Not Save And Continue," then Link will still restart from one of the above locations--but your progress will not be saved.
If you choose to "Save And Quit," then your progress will be saved and you'll be taken back to the title screen. From the selection menu, you can choose to start up your file again, but even if you were in a dungeon, you'll still have to choose one of the three Light World respawn points (if you quit in the Light World) or the Pyramid of Power (if you quit in the Dark World). You cannot quit a game and restart from a dungeon entrance.
At any point in the game that you choose, you can press the SELECT button to bring up the following two options:
- Continue Game
- Save And Quit
To "Continue Game" merely unpauses the screen and lets you carry on as before. Selecting "Save And Quit" will save your progress and return you to the title screen.
It's important to note that the game keeps track of how many times you get a game over, save, etc. You won't be able to see this counter yourself until after the ending credits, at which point you'll see how many "games played" you have--i.e. each time you saved, whether from pressing SELECT or from the game over screen. It is possible to get a 000 count, but it requires completing the game without saving or dying once.
And now, with all that out of the way, let's start our adventure!
Guide and Walkthrough (SNES) by TheRewster (2)
The Legend of Zelda: A Link to the Past SNES walkthrough covers the Prologue, Eastern Palace, Desert Palace, and more. Find the Master Sword and enter the Dark World.
- 1Introduction
- 2Prologue
- 3Search for Sahasrahla
- 4Eastern Palace
- 5Into the Desert
- 6Desert Palace
- 7Climbing Death Mountain
- 8Tower of Hera
- 9The Master Sword
- 10Welcome to the Dark World
- 11Level 1: Palace of Darkness
- 12A Boy and His Flute
- 13Level 2: Swamp Palace
- 14Secrets in the Graveyard
- 15Level 3: Skull Woods
- 16Village of Outcasts
- 17Level 4: Thieves' Town
- 18Swordsmiths Reunited
- 19Level 5: Ice Palace
- 20Swamp of Evil
- 21Level 6: Misery Mire
- 22Return to Death Mountain
- 23Level 7: Turtle Rock
- 24Level 8: Ganon's Tower
Appendices:
- Pieces of Heart
- Item Index
- Treasure Chests
- Mini-games
- Fairy Fountains
- High-Denomination Rupees
- Dashing and Pulling for Treasure
- Shop Index
- Fortune Tellers, Storytellers, and Other Lore
- Warp Tiles and Whirlpools
Additional Sections:
- Quick Guide
- Outro
- This guide was updated on 04/12/2019 and is version 1.0.
- It is the highest-rated guide available.
Prologue
Begin your adventure in The Legend of Zelda: A Link to the Past by following Princess Zelda's telepathic call and navigating the early stages of Hyrule Castle.
Upon starting a new save file, the story begins with Princess Zelda calling out for help telepathically in the night. Once Link's uncle leaves the house, you gain control of Link yourself. Use the D-pad to move him out of bed and then open the chest in this house to obtain the Lamp. You don't have any magic power, so you can't use it just yet. Lifting the pots (press the A button) by Link's bed will give you Hearts, but since Link has max health, it won't do anything for you now. But in general, you should get in the habit of checking what's underneath pots, as it's a good way to pick up consumable items! Now leave the house through the open doorway to the south.
Link will emerge in the pouring rain. You can look around and explore if you'd like, but you can't get far without soldiers telling you to go back home. Work your way north across the bridge to the front gate of Hyrule Castle. Again, guards will prevent you from going inside. If you stay outside long enough, Zelda will speak to you again through telepathy, telling you of a hidden path. Follow the small path that winds its way to the castle's east side until it ends with a conspicuously placed bush. Lift the bush to reveal an opening! A small jingle will play to let you know you've found a secret. Now drop into the hole you've discovered.
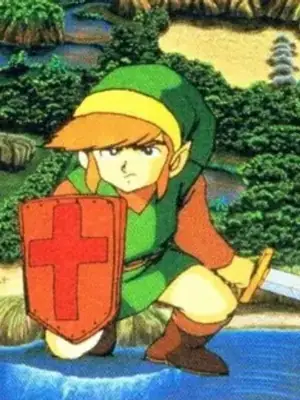
You'll land in an underground passage. Move west to find your uncle, slumped against the wall. Go up to him, and he will give you his parting words, as well as the Fighter's Sword and Fighter's Shield. These are both the most basic form of sword and shield you'll find in the game but still better than nothing! As Link's uncle instructed, holding out the sword by holding down the B button will concentrate power in the sword. Once that power (signified by a sparkling glow) reaches the sword's tip, you can release B to execute a spin attack--which has double the attack power of a regular sword slash!
In the next room, you'll face your first enemies in the game: Green Soldiers. Both their swords and shields are small, and they tend to patrol aimlessly. They're unable to block your attacks, so use your sword to cut them down (they take two hits each). To the east you'll find another chest--open it for the Lamp (if you didn't get it at Link's house) or a Blue Rupee (if you already have the Lamp). A Blue Rupee is worth 5 Rupees. Also in the pots are a couple small Magical Decanters, which give you a little bit of magic for your Magic Meter (which will be useful for your Lamp later). Now take the steps south to leave this place.
Back outside, you're now in Hyrule Castle's garden. Feel free to cut down the bushes and tall grass here--the former will sometimes drop items for you. Two more Green Soldiers patrol this garden, as well as a more dangerous Green Sword Soldier. Unlike regular Soldiers, Sword Soldiers will charge straight toward Link when they spot him, and their large swords can deflect your attacks. Fighting Sword Soldiers is all about positioning. Since, if they're charging you from the east or west, their swords are protecting the "south" part of their bodies, you'll want to position yourself a little bit north of them to strike the soldier and not their sword. You'll get the hang of it with practice! Like the ordinary Green Soldier, a Green Sword Soldier also goes down after two hits. Once you're finished here, proceed north into Hyrule Castle proper.
Hyrule Castle
Inside the castle is a plush, spacious place. But it's patrolled by both Soldiers and Sword Soldiers, so remain on guard. You can go either east or west (but don't go straight up the stairs), and it doesn't matter which route you take because both loop around to the same point. You'll want to work your way around to a room to the north with stairs leading down. Note that all the pots on this floor contain Hearts, so don't use them if you already have maximum health.
Here in the first level of the basement (i.e. B1), you'll meet a Blue Sword Soldier--who fights just like a Green Sword Soldier, but the blue variety takes three hits to subdue instead of two. Defeat this one to earn Small Key #1. Then open the chest in this room to obtain the Map. Each dungeon in the game will have its own map. Press X in a dungeon to view that dungeon's map (and for future reference, pressing X in the overworld will bring up the overworld map). I've also included the in-game map of the dungeon at the top of this section, something this guide will do for each dungeon in the game.
Use your newfound key to unlock the door leading south. More Blue Sword Soldiers patrol this large room. Not only can you defeat them with the sword, but your sword swing can even push one off the ledge into the bottomless pit below! It's especially fun to throw the two pots in this area at soldiers to knock them into the abyss. Follow the path south and then west, dispatching a pair of Green Sword Soldiers as you go. Take the door north and defeat another Green Sword Soldier to open the east door. Enter it.
The door will close behind you, trapping you in this small room with a Blue Sword Soldier. Defeat the enemy as you have before, and you'll gain Small Key #2. Open the chest for the Boomerang--a most valuable item! Toss it with the Y button, and it will return to you. You can use it to retrieve items or stun enemies--it can even destroy particularly weak enemies. (Press the START button to bring up your inventory, and you can choose whether to equip the Lamp or Boomerang.) This will make fighting Soldiers easier as you can now stun them from a distance before moving in with the sword. Now return west and go north, then down the stairs to B2. Take another set of stairs down to B3.
Defeat the Green Sword Soldier you find here, then brace yourself for a mid-boss of sorts. The Ball and Chain Trooper guards the cell of none other than Princess Zelda. You can stun him with the Boomerang, but he'll recover alm
Guide and Walkthrough (SNES) by TheRewster (3)
The Legend of Zelda: A Link to the Past guide and walkthrough for SNES, covering all dungeons, secrets, and appendices.
- 1Introduction
- 2Prologue
- 3Search for Sahasrahla
- 4Eastern Palace
- 5Into the Desert
- 6Desert Palace
- 7Climbing Death Mountain
- 8Tower of Hera
- 9The Master Sword
- 10Welcome to the Dark World
- 11Level 1: Palace of Darkness
- 12A Boy and His Flute
- 13Level 2: Swamp Palace
- 14Secrets in the Graveyard
- 15Level 3: Skull Woods
- 16Village of Outcasts
- 17Level 4: Thieves' Town
- 18Swordsmiths Reunited
- 19Level 5: Ice Palace
- 20Swamp of Evil
- 21Level 6: Misery Mire
- 22Return to Death Mountain
- 23Level 7: Turtle Rock
- 24Level 8: Ganon's Tower
Appendices:
- Pieces of Heart
- Item Index
- Treasure Chests
- Mini-games
- Fairy Fountains
- High-Denomination Rupees
- Dashing and Pulling for Treasure
- Shop Index
- Fortune Tellers, Storytellers, and Other Lore
- Warp Tiles and Whirlpools
Additional Sections:
- Quick Guide
- Outro
- This guide was updated on 04/12/2019 and is version 1.0.
- It is the highest-rated guide available.
- Navigate between sections using the Table of Contents.
Similar guides you might like


100% Human-Written. AI Fact-Checked. Community Verified. Learn how AntMag verifies content