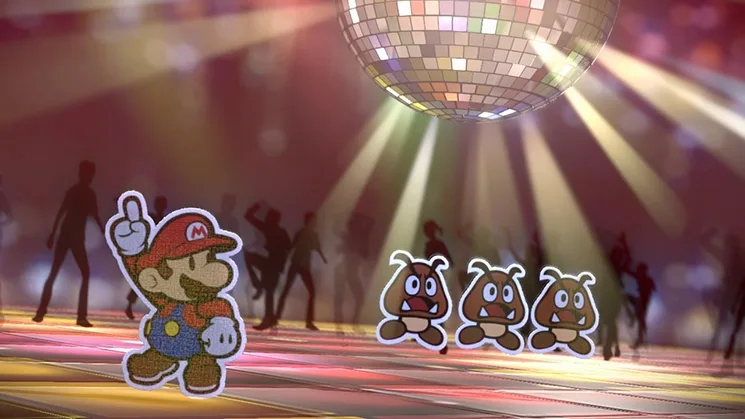
Paper Mario: Color Splash for Wii U is a vibrant adventure where you play as Paper Mario to restore Prism Island's brilliance. You'll explore colorful locations, manage your paint supply, and engage in turn-based battles using a unique card system. The goal is to overcome Bowser's schemes and bring color back to the land.
This guide covers everything you need to master the game, from basic controls and advanced paint management to a full walkthrough of rescues, battles, and boss encounters. We'll help you conquer tough enemies like Morton Koopa Jr. and Iggy Koopa, ensuring you can fully restore Prism Island.
Part 2
Navigate Part 2 of your Paper Mario: Color Splash adventure! This guide covers Chapters 2, 3, 4, 5, and 6, detailing every area and challenge you'll face.
Alright, let's dive into Part 2 of your Paper Mario: Color Splash journey! This section of the guide is going to cover a lot of ground, taking you through Chapters 2 all the way to Chapter 6. We'll be hitting up deserts, forests, snowy mountains, jungles, and even a volcano. Get ready for a wild ride!
- 1Chapter 2: This chapter kicks off in Decalburg and takes you through the Drybake Desert, including areas like the Yoshi Sphinx, Sandshifter Ruins, and the Drybake Stadium. You'll also revisit Surfshine Harbor and explore the Damp Oasis.
- 2Chapter 3: Prepare for a trek through the Leaflitter Path and The Bafflewoods. You'll visit Wiggler's Tree House, Strike Lake, Loop Loop River, and Outlook Point. The chapter also includes Rustle Burrow, Tree Branch Trail, Gauntlet Pond, and Stump Glade, with a return to The Bafflewoods and Strike Lake. Finally, you'll navigate Hither Thither Hill, Whitecap Beach, and Surfshine Harbor.
- 3Chapter 4: This chapter starts in Decalburg and Surfshine Harbor before heading to the snowy regions. You'll explore Snow Rise, Ice Flow, and The Enigmansion, followed by Shaved-Ice Cave and Whiteout Valley. The chapter culminates at Bowser's Snow Fort.
- 4Chapter 5: Back in Decalburg, you'll venture into the Shy Guy Jungle, navigate Jungle Rapids, and encounter Long Fall Falls. The journey continues through Chomp Ruins, Rugged Road, and ends at Rumble Volcano.
- 5Chapter 6: The final chapter begins in Decalburg and Gate Cliff. You'll face Bowser Jr.'s Flotilla and ultimately confront Bowser's Sky Castle.
- Keep an eye on your paint levels, especially in longer chapters like Chapter 3. Running out of paint can make battles much tougher.
- Don't forget to explore thoroughly in areas like the Drybake Desert and The Bafflewoods. Hidden paths and secrets often lead to valuable Stickers or Cards.
- Pay attention to the environment in each chapter. The snowy areas in Chapter 4 will require different strategies than the volcanic areas in Chapter 5.
Part 3
Discover the Sticker Listing, Thing Listing, and FAQ sections in Paper Mario: Color Splash Part 3. Get detailed info on items, enemies, and gameplay.
Hey there! Welcome to Part 3 of our Paper Mario: Color Splash guide. This section is all about diving deeper into the game's mechanics and resources. Think of it as your go-to for all the nitty-gritty details you might need as you play.
We'll be covering a few key areas here:
- Sticker Listing (EX.2.00): This is where you'll find all the info on the stickers you collect. It's super important because stickers are your main way of attacking and interacting in this game.
- Thing Listing (EX.3.00): Things are special items you find in the world that have unique uses, often related to solving puzzles or overcoming obstacles. This section breaks them all down.
- FAQ (EX.4.00): Got questions? This is the place to look! It covers common queries, like how to get more HP-Up Hearts, which are crucial for increasing your health.
The guide also includes sections for Version History, Legal Notices, and Credits, so you can see how the guide came together and who contributed. If you ever need to find a specific part of the guide quickly, remember you can use Ctrl+F in your browser to search for the bracketed shortcuts, like [EX.2.00] for the Sticker Listing.
Let's get into the details!
Part 4
Navigate Paper Mario: Color Splash with ease! This guide details all button controls for overworld exploration, Sticker Album management, and intense battles.
Hey there! So, you've made it to Part 4. This section is all about getting a handle on the game's controls. Think of it like learning the basic moves before a big dance – knowing what button does what will make your adventure through Prism Island SO much smoother. We'll break down how to move around, manage your stickers, and even how to fight!
Controls Overview:
Let's get you familiar with how to actually play the game. It's pretty intuitive once you get the hang of it, but knowing these upfront will save you a lot of fumbling.
Overworld Controls
This is how you'll get around Prism Island, explore new areas, and interact with the world outside of battles.
| Button | Function |
| Circle Pad | Move |
| A | Jump |
| B | Hammer |
| X | Open Menu |
| L | Talk to Kersti |
| Start | Leave a cleared course |
| Touch Screen | Engage Menu |
Sticker Album Controls
Your Sticker Album is super important – it's where you keep all your battle cards. Here's how to manage it when you're not in a fight.
| Button | Function |
| Circle Pad | Navigate |
| Y | View Details |
| X/B | Close Menu |
| L/R | Change Page |
| Touch Screen | Navigate |
Battle Controls
When enemies show up, you'll need to use your stickers effectively. These buttons help you select and use them.
| Button | Function |
| Circle Pad | Navigate Sticker Album |
| A | Select Sticker / Execute Action Command |
| X | Start Battle Spinner |
| L/R | Change Album Page |
| Touch Screen | Navigate Sticker Album |
- Don't be afraid to experiment! The best way to learn is by doing. Try out different buttons when you're in a safe spot.
- Pay attention to the on-screen prompts. The game often tells you exactly which button to press for specific actions.
- Remember that some actions have timed button presses (Action Commands) during battle. Practice these to deal extra damage or defend better!
Part 5
Your ultimate guide to Paper Mario: Color Splash Part 5, covering every detail to help you navigate the game from start to finish with ease. Get the walkthrough!
Alright, let's dive into Part 5 of our Paper Mario: Color Splash adventure! This section is where we'll tackle the nitty-gritty of getting through the game, from the very beginning all the way to the end. Think of this as your trusty co-pilot, making sure you don't get lost or stuck.
We're going to assume you've got a handle on the basic controls from the Controls section, but don't worry, we'll cover all the sticker strategies, enemy tips, and special commands as we go. There's also an 'Extra Information' section if you want to dive super deep into specific game mechanics, but this walkthrough is all about actually playing through and beating the game. We'll guide you through every chapter, from the Prologue right up to Chapter 6!
Here's how we'll break things down in each part: First, each Chapter gets a quick intro so you know what's coming. Then, you'll see headings for specific areas or levels – these have their own shortcuts in the table of contents, so they're easy to find. We'll also include checklists for each level. If you're printing this out, you can use these to mark off all the stickers you've collected. They'll even list the enemies you'll encounter, so you can look them up in the Appendix if you need more info.
The main part of the guide will be in these special tags: [Tag!]. Keep an eye out for these – they mark everything you can collect! Bosses will get their own big boxes, and important tips or strategies will be highlighted with arrows.
And finally, below all that, you'll find a complete map of the in-game world. It's pretty straightforward, but remember that you won't be able to access everywhere right away; new areas unlock as you progress through the story.
World Map Overview:
Here's a look at how the world connects. You'll be visiting different chapters and levels, and they all link up in a specific order:
Key:
- S: Shiverburn Mountain
- D: Dark Bloo Star
| Key | Level Name | Connections |
| 1-1 | Plum Park | Connects to 1-2, 1-3, 1-4, 1-5, 1-6 |
| 1-2 | Connects to 1-1, 1-3 | |
| 1-3 | Connects to 1-1, 1-2, 1-4 | |
| 1-4 | Connects to 1-1, 1-3, 1-5 | |
| 1-5 | Connects to 1-1, 1-4, 1-6 | |
| 1-6 | Connects to 1-1, 1-5 | |
| 2-1 | Connects to 2-2, D | |
| 2-2 | Connects to 2-1, 2-3, 2-4, 2-5 | |
| 2-3 | Connects to 2-2, 2-4 | |
| 2-4 | Connects to 2-2, 2-3, 2-5 | |
| 2-5 | Connects to 2-2, 2-4 | |
| 3-1 | Connects to 3-2, 3-3, 3-9 | |
| 3-2 | Connects to 3-1, 3-3, 3-4, 3-5 | |
| 3-3 | Connects to 3-1, 3-2, 3-4 | |
| 3-4 | Connects to 3-2, 3-3, 3-5 | |
| 3-5 | Connects to 3-2, 3-4, 3-6 | |
| 3-6 | Connects to 3-5, 3-7, 3-8, 3-12 | |
| 3-7 | Connects to 3-6, 3-8 | |
| 3-8 | Connects to 3-6, 3-7, 3-10 | |
| 3-9 | Connects to 3-1, 3-11 | |
| 3-10 | Connects to 3-8, 3-11 | |
| 3-11 | Connects to 3-9, 3-10, 3-12 | |
| 3-12 | Connects to 3-6, 3-11 | |
| 4-1 | Connects to 4-2, 4-3, 4-4, 4-5, 4-6 | |
| 4-2 | Connects to 4-1, 4-3 | |
| 4-3 | Connects to 4-1, 4-2, 4-4 | |
| 4-4 | Connects to 4-1, 4-3 | |
| 4-5 | Connects to 4-1, 4-6 | |
| 4-6 | Connects to 4-1, 4-5 | |
| 5-1 | Connects to 5-2, 5-3 | |
| 5-2 | Connects to 5-1, 5-3, 5-4, 5-5 | |
| 5-3 | Connects to 5-1, 5-2, 5-4 | |
| 5-4 | Connects to 5-2, 5-3, 5-5 | |
| 5-5 | Connects to 5-2, 5-4, 5-6 | |
| 5-6 | Connects to 5-5 | |
| 6-1 | Connects to 6-2, 6-3 | |
| 6-2 | Connects to 6-1, 6-3 | |
| 6-3 | Connects to 6-1, 6-2 | |
| S | Shiverburn Mountain | Connects to 6-1 |
| D | Dark Bloo Star | Connects to 2-1 |
Similar guides you might like


100% Human-Written. AI Fact-Checked. Community Verified. Learn how AntMag verifies content