
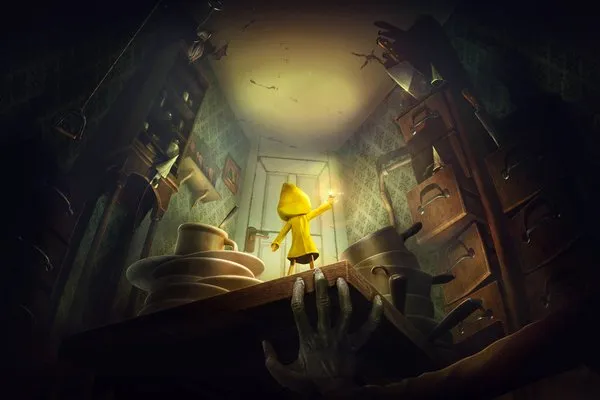
Welcome to The Evil Within, a true survival horror experience from Shinji Mikami, the mastermind behind Resident Evil. You play as Detective Sebastian Castellanos, who, after witnessing a gruesome massacre and being ambushed, finds himself trapped in a deranged world filled with grotesque creatures. Your moment-to-moment gameplay will be a desperate fight for survival, focusing on resource management and navigating terrifying environments to uncover the truth behind the evil force.
This guide is here to help you conquer every chilling challenge the game throws at you. We'll cover everything from initial escapes and mastering Sebastian's core attributes to detailed walkthroughs for each chapter, including inline mentions of every collectible and upgrade. For the hardcore players, we also provide tips for Nightmare and Akumu modes, ensuring you're prepared for the toughest encounters.
Part 1
The Evil Within Part 1 walkthrough covering gameplay, story inspirations, and tips for Nightmare and Akumu modes. Includes video support.
The Evil Within is a horror game with a focus on gore, drawing inspiration from classical horror and films like The Dark City, The Matrix, and The Cell. Its gameplay blends elements from later Resident Evil titles with stealth mechanics similar to The Last of Us.
- This guide is 100% spoiler-free.
- Video support is available at supercheats.com/the-evil-within/walkthrough/.
- Donations can be made via PayPal to [email protected] or by purchasing items through the Amazon.com referral search box at shillatime.org/amazon.
Part 2
Navigate Part 2 of The Evil Within with our expert guide. Learn stealth tactics, weapon strategies, and how to overcome every challenge Sebastian faces.
Alright, let's dive into Part 2 of The Evil Within. This section is all about getting you through the thick of it, so stick close and we'll make sure you don't waste any precious ammo or get caught off guard.
- 1General Tips: The absolute best way to survive is by using stealth whenever possible. A successful stealth kill not only saves you ammo but also matches and sometimes even health. Don't underestimate melee attacks either; they're great for stunning enemies and can even interrupt their attacks. Always grab axes and torches when you find them – torches are fantastic for setting groups of enemies on fire at once if they're bunched up.
- 2Save Hubs: Remember that when you enter a save hub (through those creepy cracked mirrors), you'll lose any melee weapons you've picked up. So, if there are any enemies left around, use those weapons on them before you step through the mirror.
- 3Shotgun Strategy: The shotgun is your go-to for crowd control. Try to line up enemies so you can hit multiple with one blast, as it spreads. This will usually knock them down, but not kill them. If you can quickly rush in and set them on fire with a torch, you'll save a lot of ammo.
- 4Trap Dismantling: It's really worth your time to disarm as many traps as you can, especially early on. The parts you get are crucial for crafting bolts for the Agony Crossbow. Later on, dismantling traps becomes much harder with tighter timing windows, so getting those parts now will really pay off. Always go for bear traps and wire traps unless you can lure an enemy into one.
- 5Health Management: Only consider upgrading your health when you're really in a bind. The health upgrade instantly refills your entire health bar, which is a lifesaver. The same goes for Medical Kits – save them for when you absolutely need them.
- 6Resource Conservation: Don't waste matches on enemies you've already stealth-killed. If you've managed to blow an enemy's head off (unless it's one of those two-headed types that need both heads removed), they won't respawn. This guide will point out which enemies might come back to life so you know where to focus your efforts.
- 7Enemy Drops: Generally, if an enemy drops an item, they're permanently dead.
- Always be aware of your surroundings for traps; they can be just as deadly as the enemies.
- Experiment with different ammo types on different enemies to see what's most effective.
- Don't be afraid to run past enemies if you're low on resources and can't afford a fight. Sometimes survival is the best option.
Part 3
Master The Evil Within Part 3! Learn the best upgrade paths for early, mid, and late game, plus a breakdown of PS4 and Xbox 360 controls to keep you alive.
Alright, let's talk about how to best spend your hard-earned Green Gel and what buttons you'll be mashing in Part 3. This section is all about making Sebastian more survivable and efficient, and understanding your controller like the back of your hand.
Upgrade Strategy:
- Early Game (First Few Chapters): Don't blow all your Green Gel! The smartest move here is to invest in upgrading your matches, handgun ammo capacity, and syringe stock. These aren't super expensive, and they'll prevent you from having to leave valuable ammo and healing items behind later. Trust me, seeing a syringe you can't pick up is a real bummer.
- Mid-Game: As the threats get tougher, so should your upgrades. Now's the time to start focusing on increasing your weapon damage output. Being able to carry the maximum amount of bolts for your crossbow is also a huge help, and don't forget to upgrade the power of those exploding bolts – they can save your bacon more times than you'd think.
- Late Game: By this point, you'll have some powerful new toys like the Sniper Rifle and the Magnum. Pour your Green Gel into increasing their damage. While maxing out ammo stocks is still good, it starts to lose priority. It's still worth maxing out Syringes, but don't over-prioritize ammo upgrades over things like increased health, improved dashing, and enhanced healing power for syringes. These latter upgrades make a significant difference, especially during those nail-biting boss encounters.
Game Controls:
Knowing your controller layout is crucial. Here's a breakdown for both PlayStation and Xbox 360:
PS3 GAME CONTROLS
Left Side:
- L2: Aim (Hold)
- L1: Trigger
- Left Analog Stick (LA): Movement
- L3 (Press): Clickable Analog Stick
- D-Pad (UP/DOWN/LEFT/RIGHT): Directional Input
- SELECT (SL): Button
Right Side:
- R2: Fire (Hold)
- R1: Trigger
- Right Analog Stick (RA): Camera Control
- R3 (Press): Clickable Analog Stick
- Face Buttons:
- Triangle (/ ): Action/Interact
- Square ([]): Reload/Action
- Circle (()): Crouch/Action
- Cross (><): Sprint/Action
- START (ST): Button
- PS Button: System Menu
XBOX 360 GAME CONTROLS
Left Side:
- LT: Aim (Hold)
- LB: Trigger
- Left Analog Stick (LA): Movement
- Left Stick Press (LP): Clickable Analog Stick
- D-Pad (UP/DOWN/LEFT/RIGHT): Directional Input
- Black Button (BK): Button
Right Side:
- RT: Fire (Hold)
- RB: Trigger
- Right Analog Stick (RA): Camera Control
- Right Stick Press (RP): Clickable Analog Stick
- Face Buttons:
- Y: Action/Interact
- X: Reload/Action
- B: Crouch/Action
- A: Sprint/Action
- White Button (ST): Button
- Xbox Button: System Menu
Part 4
Your guide to surviving Part 4 of The Evil Within. Learn how to navigate the hospital, evade the Executioner, and find crucial items to progress.
Alright, let's dive into Part 4 of The Evil Within. This section is all about navigating a particularly nasty hospital and trying to avoid a very persistent, very large man with a giant meat cleaver. Don't worry, I'll walk you through it step-by-step.
First off, before we even get into the action, let's make sure you know your controls. It's easy to get flustered when things get intense, so having these down will help a ton. Here's a quick rundown:
| Left Analog Stick | Movement |
| Right Analog Stick | Camera Movement |
| Left Analog Stick (Push) | Lantern On/Off |
| Right Analog Stick (Push) | Inventory Screen |
| Directional Pad (Up/Left/Right/Down) | Item Shortcut |
| A / X | Confirm/Interact |
| B / O | Cancel/Burn |
| X / Square | Reload |
| Y / Triangle | Melee |
| LB / L1 | Sprint |
| LT / L2 | Aim |
| RB / R1 | Sneak/Hide |
| RT / R2 | Shoot/Melee |
| Start | Pause Menu |
Remember, you can always tweak these in the Options Menu if something doesn't feel right for you.
Walkthrough: An Emergency Call [WLK-1]
You'll start by watching the opening cutscene. After that, your immediate goal is simple: get inside the building and make your way to the security room. It's not long before another scene plays, and you'll quickly realize you're in a heap of trouble.
Once you get your bearings, you'll need to swing towards the knife stuck in the corpse hanging in front of you to free yourself. Now, here's where things get tense. You can enter sneak mode (RB/R1) and try to get behind the executioner to stab him. I've tried it, and while it's possible, it definitely won't kill him. He'll catch up to you soon enough. Instead of risking it, grab the keys hanging near the table and head back to the first room you were in. Look for a door on the side and go through it. You might think you're safe, but not quite!
As you move forward, you'll accidentally trip an alarm. Your only option now is to run towards the end of the hallway. In the next room, move through the center and open the hatch you find at the end. You'll slide down, and this is a tricky part: you need to avoid the grinders by moving left and right. Keep at it until you reach the bottom, then climb out of the mess and go through the door on the other side.
You'll come to an intersection. Just move to the right; the left path is a dead end. Hop into the water and climb the ladder on the opposite side. Make your way to the body in the wheelchair and pick up the [OLD NOTE FROM SEWER] lying next to him. Don't bother with the first door on the right you passed earlier – it's also a dead end. The gates ahead are locked. Instead, go through the nearby doorway and up the ladder. You'll find a desk with a monitor; inspect it to find the [BOILER ROOM NOTE]. Press the button next to the door and proceed down the hallway.
Here's another encounter with the executioner. When he appears, your best bet is to quickly enter the locker in this room. Wait until he moves on to the next area before you come out.
Similar guides you might like


100% Human-Written. AI Fact-Checked. Community Verified. Learn how AntMag verifies content