Navigate the treacherous Mountain Paths in Pathways into Darkness. Learn about hazards, enemies, and survival tips for the Shadowed Mountains.
The Sunken Citadel, the primary dungeon of Pathways into Darkness, is a sprawling, multi-layered labyrinth filled with ancient horrors, treacherous traps, and vital secrets. This guide will walk you through its depths, from the initial descent into the corrupted temple to the final confrontation with the Master of the Citadel.
The Sunken Citadel: A Descent into Darkness
The Sunken Citadel is not a single, linear path but a complex network of interconnected levels, each presenting unique challenges and requiring different strategies. Success hinges on careful exploration, resource management, and a keen understanding of the enemy's patterns.
Level 1: The Temple Entrance
You begin your descent in the ruins of a once-sacred temple, now defiled by the Master's influence. This area serves as an introduction to the Citadel's core mechanics and its most common inhabitants. Your primary goal here is to orient yourself, gather basic supplies, and find the means to access the deeper levels.
Initial Objectives:
- Find the entrance to the deeper levels.
- Acquire basic weaponry and armor.
- Learn to manage your inventory and health.
Enemies:
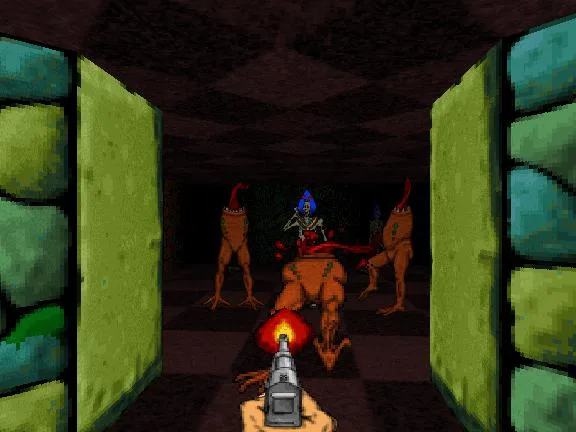
- Zombies: Slow but dangerous in numbers. Their melee attacks can quickly deplete health. They are easily dispatched with a few sword strikes or a well-aimed arrow.
- Skeletons: Armed with bows, they pose a ranged threat. Prioritize eliminating them before they can pepper you with arrows. Their skeletal frames are somewhat resistant to blunt force but vulnerable to piercing damage.
- Lurkers: Small, fast creatures that attack in swarms. They are weak individually but can overwhelm an unprepared player. Their speed makes them difficult to hit with slow projectiles.
Key Items and Locations:
- Rusty Sword: Your starting weapon. Offers minimal damage but is reliable for close-quarters combat.
- Leather Armor: Provides minimal but essential protection against physical attacks.
- Healing Potions (Small): Crucial for survival. Stock up whenever possible. These restore a small amount of health.
- Ammunition (Arrows, Bullets): Essential for ranged combat. Arrows are for the bow, bullets for the pistol.
- The Lever: This critical mechanism is located in a small, often guarded side chamber. It is typically found by exploring the main temple area, looking for any branching paths or unusual architectural features. The lever itself is usually a distinct, interactable object on a wall.
Strategy Tips:
- Conserve ammunition. Use your sword for weaker enemies and when you are cornered. Arrows are best saved for Skeletons and Lurkers at a distance.
- Always check corners and behind pillars for hidden enemies. Lurkers are particularly fond of ambushing players.
- The first few levels are about learning enemy behaviors. Don't rush; observe and adapt. The Zombies' slow advance and the Skeletons' ranged attacks require different approaches.
- Finding the Lever: After clearing the initial temple area, look for a distinct doorway or passage that deviates from the main path. This often leads to a small, self-contained room. The lever is usually mounted on the wall within this room. Be prepared for a few Skeletons or Zombies guarding it.
Level 2: The Crypts of the Fallen
Deeper within the Citadel, the air grows colder, and the architecture becomes more ancient and foreboding. This level introduces more formidable foes and environmental hazards. The layout can be more maze-like than Level 1, requiring careful navigation.
Objectives:
- Locate the key to the next section.
- Survive encounters with more aggressive undead.
- Find a more powerful weapon.
Enemies:
- Ghasts: Faster and more resilient than Zombies. They can inflict a draining curse that slowly depletes health. Their speed makes them a significant threat in close combat.
- Skeletal Archers: More numerous and accurate than their Level 1 counterparts. They can quickly overwhelm you if not dealt with promptly.
- Wraiths: Ethereal beings that can phase through walls and deal significant magical damage. They are resistant to physical attacks and can be very difficult to hit.
Key Items and Locations:
- Steel Sword: A significant upgrade over the Rusty Sword, offering increased damage.
- Crossbow: A powerful ranged weapon. Its bolts are slower but hit harder than arrows, making it excellent for taking down tougher enemies like Ghasts and Skeletal Archers from a distance.
- Key of the Crypt: Required to unlock the door to Level 3. This key is often found in a prominent, well-guarded location, such as a sarcophagus or on a pedestal.
- Hidden Alcoves: Often contain extra potions, ammunition, or sometimes even better armor.
Strategy Tips:
- Wraiths are best dealt with using magical weapons or by exploiting their brief moments of tangibility. If you have found any magical items or spells, they will be invaluable here. Otherwise, try to corner them and strike rapidly when they solidify.
- The Crypts are often maze-like. Pay attention to your surroundings and any markings you might find on walls or floors to help you navigate.
- Prioritize finding the Crossbow; it will make dealing with Skeletal Archers and Ghasts much easier and conserve your pistol ammunition.
- Locating the Key of the Crypt: The Key of the Crypt is typically found in a central, often visually distinct chamber within the Crypts. Look for areas with more elaborate sarcophagi, altars, or raised platforms. It's usually placed on a pedestal or within a large, ornate sarcophagus that might require a specific action to open or access. Expect this area to be heavily defended by Ghasts and Skeletal Archers.
Level 3: The Flooded Halls
Water is now a significant environmental factor. Many passages are partially or fully submerged, affecting movement and visibility. New aquatic and amphibious threats emerge, and navigating these areas requires careful consideration of your breath and movement speed.
Objectives:
- Navigate the flooded sections.
- Find the mechanism to drain some areas.
- Acquire a weapon effective against aquatic enemies.
Enemies:
- Giant Toads: Amphibious creatures that can leap great distances and spit corrosive goo. They are surprisingly fast and can attack from unexpected angles.
- Water Elementals: Slow-moving but powerful beings that can unleash torrents of water. They are resistant to most conventional weapons and can push you around.
- Drowned Ones: Reanimated corpses that are particularly dangerous in water, as they can move more freely than on land and can grapple you.
Key Items and Locations:
- Spear: Effective against enemies at a distance, especially useful in water where you might want to keep foes at bay.
- Amulet of Water Breathing: Allows extended underwater exploration without drowning. This is absolutely essential for navigating this level effectively.
- Drainage Lever: Activates pumps to lower water levels in certain sections, revealing new paths and items. These are often located in adjacent, drier areas or require solving a small environmental puzzle.
- The Altar of Purification: A key location where you might find a powerful artifact or information. This is often a visually distinct area, perhaps with unique architecture or a central structure.
Strategy Tips:
- The Amulet of Water Breathing is non-negotiable. Without it, you will be severely limited and likely drown.
- When fighting Giant Toads, try to keep your distance and strafe to avoid their goo attacks. Their leaps can be telegraphed, giving you a moment to dodge.
- Water Elementals are vulnerable to lightning-based attacks if you find any magical items. Otherwise, use your most powerful weapons and keep moving to avoid their water blasts.
- Draining the water can be a puzzle in itself. Look for pressure plates, levers, or switches in adjacent dry areas or on higher ground. Sometimes, you'll need to find a specific item to activate the drainage mechanism.
Level 4: The Obsidian Catacombs
This level is characterized by its dark, volcanic rock and intense heat. Obsidian shards litter the ground, and fire-based creatures are prevalent. The heat itself can be a hazard, slowly draining your health if you are not protected.
Objectives:
- Find a way to withstand the heat.
- Locate the Fire Crystal.
- Defeat the Fire Guardian.
Enemies:
- Fire Imps: Small, fast creatures that throw fireballs. They are easily killed but can be a nuisance in groups.
- Lava Golems: Slow but incredibly powerful, made of molten rock. They explode upon death, so maintain distance.
- Hellhounds: Canine creatures that breathe fire and move with surprising speed. They are aggressive and can close the distance quickly.
Key Items and Locations:
- Amulet of Fire Resistance: Crucial for surviving the extreme heat and fire attacks. This is a mandatory item for progression.
- Fire Crystal: A powerful magical component needed for later progression or a powerful weapon. It's often found in a central, well-defended location.
- Obsidian Blade: A sharp, fast sword that deals extra damage to fire-based enemies.
- The Fire Guardian: A mini-boss guarding the Fire Crystal.
Strategy Tips:
- The Amulet of Fire Resistance is non-negotiable. Without it, you will die quickly from ambient heat.
- Lava Golems are best avoided or dealt with from a very safe distance due to their explosive death. A powerful ranged weapon is recommended.
- The Fire Guardian is vulnerable to ice-based attacks or spells. If you have any, use them. Otherwise, focus on dodging its fiery onslaught and striking when it's vulnerable. Its attacks are often telegraphed, giving you windows of opportunity.
- The Obsidian Blade is an excellent weapon for this level and beyond, especially against fire-based enemies.
Level 5: The Master's Sanctum
The final approach to the Master of the Citadel. This level is a gauntlet of the Citadel's most dangerous creatures and intricate traps, designed to test your mastery of the game. Expect a significant increase in enemy density and difficulty.
Objectives:
- Navigate the final traps and ambushes.
- Find the Master's Chamber.
- Defeat the Master of the Citadel.
Enemies:
- Elite Skeletons: Heavily armored and wield powerful weapons. They are tougher than regular skeletons and can take more punishment.
- Shadow Beasts: Fast, stealthy creatures that can teleport and inflict heavy damage. They are difficult to track and can appear suddenly.
- Demons: Powerful beings with several devastating attacks, including fire and dark magic. They are some of the most dangerous enemies before the final boss.
- The Master of the Citadel: The final boss.
Key Items and Locations:
- Master Key: Unlocks the Master's Chamber. This key is usually found after a challenging encounter or puzzle within the Sanctum.
- The Master's Chamber: The arena for the final boss fight. It's often a large, open space with some cover.
- The Master of the Citadel: A multi-phase boss fight requiring all your skills and resources.
Strategy Tips for the Final Boss:
- Phase 1: The Master will use rapid melee attacks and summon lesser demons. Focus on dodging and using your most powerful weapons. Keep moving and try to thin out the summoned adds quickly.
- Phase 2: The Master will gain ranged magical abilities, including powerful energy blasts. Seek cover and exploit any openings. Use the environment to your advantage to block projectiles.
- Phase 3: The Master becomes more desperate, unleashing devastating area-of-effect attacks. This is often a race against time to finish him off. Try to bait out his attacks and then unleash your strongest offensive capabilities.
- Recommended Loadout: A powerful ranged weapon (like a rifle or magic staff), a strong melee weapon (like the Obsidian Blade), and as many healing potions as you can carry. Ensure you have a good supply of ammunition for your primary ranged weapon.
- Weaknesses: The Master is generally vulnerable to focused fire. Exploiting his attack patterns and striking during his recovery animations is key. Some sources suggest he may have elemental weaknesses, so if you've collected any potent magical items, this is the time to use them.
General Tips for the Sunken Citadel:
- Save Frequently: The game allows saving at the start of each level. Use this to your advantage. If you find a particularly difficult section, save before entering it.
- Explore Thoroughly: Hidden areas often contain vital supplies, keys, or lore that can aid your progress. Don't be afraid to backtrack or check every nook and cranny.
- Resource Management: Ammunition and healing potions are finite. Use them wisely. Prioritize using melee weapons against weaker foes and save ammunition for tougher enemies or when you are in a pinch.
- Learn Enemy Patterns: Each enemy has distinct attack behaviors. Observing and learning these is crucial for survival. This is especially true for bosses and mini-bosses.
- Listen Carefully: Sound cues are vital for detecting hidden enemies or impending traps. The distinct sounds of Skeletons drawing bows, Ghasts hissing, or Lurkers skittering can alert you to danger.
- Don't Be Afraid to Retreat: If a situation is overwhelming, sometimes falling back to a safer position to regroup, heal, or reassess your strategy is the best course of action.
100% Human-Written. AI Fact-Checked. Community Verified. Learn how AntMag verifies content