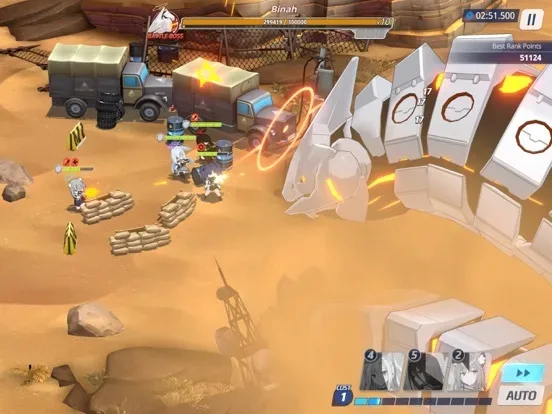
The Clockwork Flower Pavilion is not just a structure; it's a sentient, self-repairing entity. To stop the anomalies, you must disable its core. This is the chapter's boss battle, requiring careful team composition and strategy.
- Location: Millennium Science School - Central Server Farm - The Clockwork Flower Pavilion Core.
- Objective: Defeat the "Clockwork Core."
- Boss: Clockwork Core (Lv. 8, Special Armor)
- Weakness: Mystic (deals 200% damage to Special Armor)
- Resistances: Explosive (deals 50% damage), Piercing (deals 50% damage)
Boss Strategy: Clockwork Core (Node 1-5)
The Clockwork Core is your first major challenge, demanding a team built around Mystic damage. Its Special Armor type means Explosive and Piercing attacks will be heavily resisted.
- Enemy Type: Clockwork Core (Special Armor)
- Enemy Level: Lv. 8
- Recommended Damage Type: Mystic (deals 200% damage)
- Recommended Students (Early Game Focus):
- Haruna (Mystic, Striker): An exceptional Mystic damage dealer, perfect for this fight. Her EX Skill, "Crimson Slash," deals high single-target Mystic damage.
- Izuna (Mystic, Striker): If you have her, Izuna is another strong Mystic DPS. Her EX Skill, "Ninja Arts: Shadow Clone," can provide sustained Mystic damage.
- Hoshino (Explosive, Tank): While her damage is resisted, Hoshino's survivability as a tank is crucial. Her EX Skill, "Relax Time," provides a shield and heal, keeping your team alive.
- Yuuka (Piercing, Tank): Similar to Hoshino, Yuuka's tanking abilities are more important than her damage output here. Her shield is invaluable.
- Serina (Healer): Her EX Skill, "Emergency Treatment," provides crucial single-target healing, which will be necessary to counter the Core's sustained damage.
- Hanae (Healer): Her EX Skill, "Healing Prayer," offers AoE healing, useful if multiple students are taking damage.
- Aru (Mystic, Striker): A strong Mystic DPS, her EX Skill, "Bad End," deals significant single-target damage.
- Boss Abilities:
- Data Stream (Basic Attack): Deals moderate single-target Mystic damage to your front-line student.
- System Overload (Skill 1): Charges for 3 seconds, then releases an AoE blast dealing moderate Mystic damage to all students. Can apply a "System Glitch" debuff, reducing attack speed by 10% for 5 seconds.
- Self-Repair Protocol (Skill 2): Every 20 seconds, the Core activates a self-repair, regenerating 5% of its maximum HP over 5 seconds. This can be interrupted by dealing a burst of damage.
- Clockwork Barrage (EX Skill): Targets your highest damage dealer, firing a rapid volley of projectiles dealing high Mystic damage over 4 seconds. This is its most dangerous attack.
- Strategy:
- Team Composition: You absolutely need at least 2-3 Mystic damage dealers. Pair them with a strong Tank (Hoshino or Yuuka) and at least one Healer (Serina or Hanae).
- Focus on Mystic Damage: This is paramount. Your Mystic students will be doing the heavy lifting. Save their EX Skills for when the Core is vulnerable or when you need to burst through its Self-Repair Protocol.
- Tank Management: Keep your tank healthy. The Clockwork Core's basic attacks and "System Overload" can chip away at their HP quickly. Use your tank's EX Skill (e.g., Hoshino's shield) to mitigate damage.
- Healer Priority: Your healer should be ready to use their EX Skill, especially after "System Overload" or during "Clockwork Barrage." Prioritize healing your tank or any student targeted by "Clockwork Barrage."
- Interrupt Self-Repair: When "Self-Repair Protocol" activates, unleash your Mystic EX Skills to deal a burst of damage. If you deal enough damage within the 5-second window, you can interrupt the repair, preventing the Core from healing.
- Dodge "Clockwork Barrage": While you can't manually dodge, be prepared to use healing or defensive EX Skills on the targeted student immediately after the "Clockwork Barrage" animation begins. This attack can be devastating.
- Manage "System Glitch": The "System Glitch" debuff from "System Overload" reduces attack speed. While annoying, it's generally manageable. Focus on healing through the damage rather than trying to cleanse the debuff unless you have a student with a specific cleanse ability (unlikely at this early stage).
- Common Pitfalls:
- Ignoring Armor Type: Trying to brute-force with Explosive or Piercing teams will lead to a very long and likely failed fight.
- Lack of Healing: The Clockwork Core deals consistent damage. Without a dedicated healer, your team will quickly be overwhelmed.
- Not Interrupting Self-Repair: Allowing the Core to heal repeatedly will extend the fight unnecessarily and drain your resources.
Rewards for Node 1-5 Completion (Boss Battle):
| Item | Quantity | Notes |
|---|---|---|
| Credits | 120,000 | Significant currency reward. |
| Advanced Tactical Data (Mystic) | 10 | Crucial for upgrading Mystic-type students' skills. |
| Large Activity Report | 1 | Used for increasing student EXP. Provides 10,000 EXP. |
| Pyroxene (First Clear) | 20 | One-time reward for clearing the boss node. |
| Eligma | 10 | Used for purchasing student elephs. |
| Clockwork Core Fragment | 1 | Unique material used for crafting specific T1 equipment or future student enhancements. |
100% Human-Written. AI Fact-Checked. Community Verified. Learn how AntMag verifies content