Build your first playable level in Geometry Dash. This guide walks you through editor setup, object placement, and essential testing for creators.
Welcome, aspiring creator! Crafting your own Geometry Dash level is a rewarding experience, allowing you to express your creativity and challenge other players. This guide will walk you through the essential steps to build your very first playable level, from the initial setup to basic object placement and testing.
1. Entering the Editor
To begin your creative journey, navigate to the main menu and tap the "Editor" button. From there, select "New" to create a fresh, blank canvas for your level. You'll be prompted to name your level and select a song. For your first level, choose a simple, recognizable song like "Stereo Madness" or "Back on Track" to help you synchronize your gameplay with the music.
2. Understanding the Editor Interface
The editor can seem daunting at first, but it's logically laid out. Familiarize yourself with these key areas:
- Build Mode (Hammer Icon): This is where you'll spend most of your time, placing and manipulating objects.
- Edit Mode (Pencil Icon): Used for selecting multiple objects, moving them, rotating them, and adjusting their properties.
- Delete Mode (Eraser Icon): For removing unwanted objects.
- Test Mode (Play Button): Crucial for playing through your level to check for flow, difficulty, and bugs.
- Object Categories (Bottom Bar): These tabs organize all the available blocks, spikes, portals, and other elements.
- Colors Tab (Paint Palette Icon): For customizing the colors of your objects and the background.
- Options Menu (Gear Icon): Accesses level settings, including starting game mode, background, ground, and music offset.
3. Laying the Foundation: Basic Block Placement
Let's start with the most fundamental element: blocks. These form the platforms and walls of your level.
- Select a Block: In Build Mode, click on the first tab in the bottom bar (the one with basic blocks). Choose a standard 1x1 block (often the first one displayed).
- Place Blocks: Tap on the grid to place individual blocks. Hold and drag to place multiple blocks in a line.
- Create a Path: Build a simple, straight path of blocks for your cube to traverse. Aim for a length of about 10-15 seconds to start.
- Introduce Gaps: After a short path, leave a small gap (1-2 blocks wide) to introduce your first jump.
- Add Landing Platforms: Place more blocks after the gap for your cube to land on.
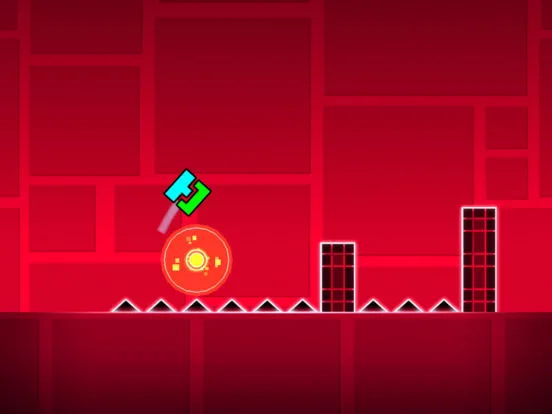
4. Introducing Obstacles: Spikes and Hazards
Now, let's add some challenge!
- Select Spikes: Go to the second tab in the bottom bar (the one with spikes and hazards). Choose a standard spike.
- Place Spikes: Place a spike in the middle of a gap you created, or on top of a block to create an obstacle that must be jumped over.
- Vary Placement: Experiment with placing spikes in different configurations – single spikes, rows of spikes, or spikes on elevated platforms.
5. Testing Your Progress
This is perhaps the most important step in level creation: constant testing.
- Enter Test Mode: Tap the Play Button (triangle icon) to instantly jump into your level.
- Play Through: Control your cube and try to complete the section you've built.
- Identify Issues:
- Are jumps too difficult or too easy?
- Are there any "blind jumps" where You can't see what's coming?
- Does the gameplay feel smooth and responsive?
- Exit Test Mode: Tap the Stop Button (square icon) to return to the editor.
- Adjust and Repeat: Use Edit Mode (Pencil Icon) to select and move blocks or spikes. You can drag a selection box around multiple objects to move them together. Make adjustments based on your testing and then test again.
6. Adding Basic Game Mode Portals
Portals change your character's form, adding variety to your level.
- Select a Portal: Go to the fourth tab in the bottom bar (the one with portals).
- Place a Ship Portal: Choose the blue Ship Portal. Place it on your block path.
- Create a Ship Section: After the portal, build a short section of blocks and spikes suitable for ship gameplay (e.g., narrow corridors, flying over obstacles).
- Place a Cube Portal: At the end of your ship section, place a green Cube Portal to revert to the cube form.
- Test Thoroughly: Play through your level again, paying close attention to the transition between game modes and the flow of the ship section.
7. Saving Your Level
save your hard work!
From the editor, tap the Pause Button (two vertical lines) in the top right corner, then select "Save and Play" or "Save and Exit". Your level will be stored locally under the "Saved" tab in the editor menu.
Congratulations! You've just created your first Geometry Dash level. Keep experimenting with different objects, game modes, and timings. The more you build and test, the better your levels will become!
100% Human-Written. AI Fact-Checked. Community Verified. Learn how AntMag verifies content