Navigate Clutterfunk, an Insane Geometry Dash level. Master the mini-UFO and mini-Ball sections with precise timings and rapid speed changes.
Clutterfunk, the tenth official level in Geometry Dash, lives up to its "Insane" difficulty rating and its very name. This level is a relentless gauntlet of tight spaces, rapid speed changes, and a dizzying array of game modes, often transitioning with little warning. Mastery of the mini-UFO and mini-Ball sections, in particular, is crucial, as they demand extreme precision and quick reflexes. Prepare for a challenging, yet ultimately rewarding, experience.
Objectives:
- Complete the level.
- Collect all 3 Secret Coins.
General Strategy and Common Pitfalls:
Clutterfunk is a test of adaptability and memorization. Unlike earlier levels that might focus on one or two mechanics, Clutterfunk throws everything at you. Here are some overarching strategies:
- Practice Mode is Your Best Friend: use practice mode extensively to break down the level into smaller, manageable segments. Focus on mastering each tricky transition and game mode change individually before attempting full runs.
- Speed Changes: Pay close attention to the speed portals. Clutterfunk frequently shifts between normal, fast, and very fast speeds, which drastically alters jump timings and flight paths. Anticipate these changes.
- Mini-Modes: The mini-UFO and mini-Ball sections are notorious for their difficulty.
- Mini-UFO: Requires precise tapping to navigate narrow corridors and avoid spikes. Often, a rhythm of quick taps or holds is more effective than erratic tapping.
- Mini-Ball: Demands quick gravity flips. Many sections require near-instantaneous changes in gravity to avoid obstacles. Memorize the sequence of flips.
- Tight Spaces: Many sections feature extremely narrow gaps and corridors. Focus on keeping your icon centered and making minimal movements. Over-correcting is a common cause of death.
- Visual Clutter: The level's design, while iconic, can sometimes be visually distracting. Try to focus on the immediate path ahead and the hitboxes of obstacles rather than the background elements.
- Patience and Persistence: Clutterfunk will likely take many attempts. Don't get discouraged by repeated failures. Each attempt helps build muscle memory and understanding of the level's flow.
Step-by-Step Walkthrough and Secret Coin Locations:
This walkthrough will guide you through the most challenging sections and provide precise instructions for collecting all three Secret Coins.
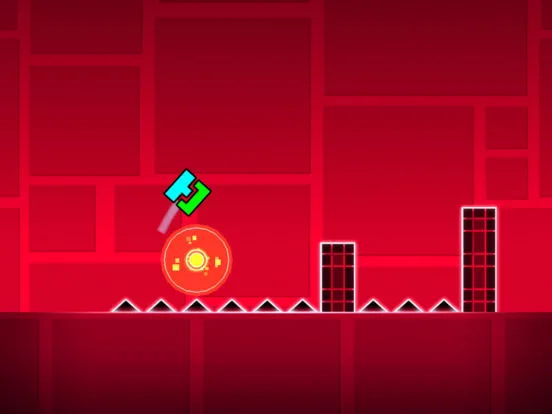
- 0-10% (Cube & Ship): The level starts with a standard cube section, quickly transitioning into a ship. The ship section has tight gaps, so maintain a steady flight path.
- 10-20% (Mini-UFO & Cube): This is your first encounter with the mini-UFO. It's a short, precise section with small jumps. Immediately after, you return to cube mode with some tricky jumps over spikes.
- 20-30% (Mini-Ball & Cube - Coin 1):
- Coin 1 (Approx. 25%): As you enter the first mini-Ball section, you'll navigate a series of gravity flips. After the initial few flips, you'll encounter a segment where you need to flip gravity to the ceiling, then immediately back to the floor to pass under a spike. Instead of flipping back to the floor, stay on the ceiling for an extra beat. This will allow you to land on a hidden platform above the main path, where the first Secret Coin awaits. After collecting it, quickly flip back down to rejoin the main path.
- The subsequent cube section has some challenging timing jumps.
- 30-40% (Mini-UFO & Ship): Another mini-UFO segment, this one slightly longer and more intricate. It leads into a ship section with a few tight squeezes.
- 40-50% (Cube & Mini-Ball): A demanding cube section with numerous triple-spike jumps and precise timings. This transitions into a mini-Ball section that requires very fast gravity flips to navigate a series of vertical corridors.
- 50-60% (Mini-UFO & Cube - Coin 2):
- Coin 2 (Approx. 55%): Following a challenging mini-UFO section with several quick taps to ascend, you'll transition into a cube. Almost immediately, you'll encounter a series of three yellow jump orbs leading to a higher platform. Instead of hitting all three orbs to go high, hit only the first two. This will cause you to land on a lower, hidden platform directly below where the third orb would have taken you. The second Secret Coin is located on this platform. After collecting it, simply jump off the platform to continue.
- The following cube section is fast-paced with many small jumps.
- 60-70% (Ship & Mini-UFO): A fast ship section with narrow passages, followed by another mini-UFO segment that requires careful, rhythmic tapping to avoid spikes above and below.
- 70-80% (Mini-Ball & Cube - Coin 3):
- Coin 3 (Approx. 78%): This section begins with a very challenging mini-Ball segment featuring rapid gravity changes and tight corridors. After navigating a series of vertical flips, you will transition to a cube. You'll immediately encounter a series of three yellow jump pads on the ground, designed to launch you over a set of spikes. Instead of hitting the first jump pad, intentionally miss it and fall into the small gap directly before it. This hidden path will lead you to a small, dark tunnel where the third and final Secret Coin is located. After collecting it, you'll be forced back onto the main path.
- The final cube section before the ending is tricky, with several fake-out jumps and hidden spikes.
- 80-100% (Ship & Final Cube): The final ship section is a high-speed gauntlet of obstacles, requiring sustained focus. The very end of the level features a few final cube jumps before the "Level Complete" screen.
Rewards:
- 10 Stars
- 1 Secret Coin (per coin collected)
- New Cube Icon (upon completion of the level)
100% Human-Written. AI Fact-Checked. Community Verified. Learn how AntMag verifies content