
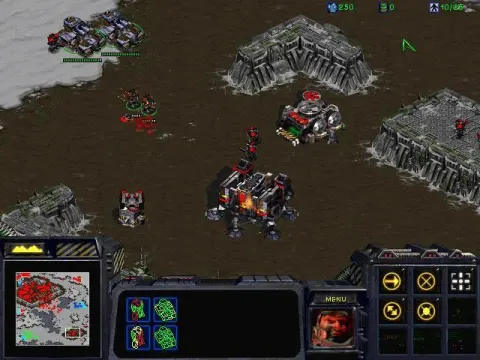
Welcome to Deus Ex, a groundbreaking RPG from 2000 where you play as JC Denton, an augmented agent fighting global conspiracies. You'll navigate corrupt cityscapes, from the docks of Liberty Island to the Smuggler's Den, using a blend of stealth, combat, and cybernetic enhancements. Every choice matters, influencing how you approach missions and the game's multiple endings.
This guide will help you master JC's cybernetic enhancements and tactical choices. We detail every stealthy approach and combat encounter, offering expert tips on builds, weapons, and defeating formidable foes like the initial bosses you'll face. Whether you're aiming for a perfect playthrough or just trying to get past a tough spot, we've got you covered.
Part 1
Complete walkthrough and companion guide for Deus Ex Part 1, covering the Training Mission. Learn about UNATCO, game mechanics, and essential tips for new players.
- 1If you are new to Deus Ex, play the Training mission from the menu. It functions as a tutorial and an introduction to UNATCO and the game's world. You begin with no skills and no equipment.
- 2The first room resembles the shootout arena in The Matrix. Observe the UNATCO logo above the North door and unlock it.
- 3In the next room, you'll see NPCs observing you. Facing East, the right NPC is Jaime Reyes, your friend and medic, who will instruct you via your Infolink. The left NPC is an unknown figure, a high-ranking official in Washington.
- The Training Mission is highly recommended for new players to familiarize themselves with the game's mechanics and world.
- Pay attention to the Infolink instructions provided by Jaime Reyes.
- Note the UNATCO logo as an early environmental cue.
Part 2
Master the Part 2 training missions in Deus Ex. Learn to use nanokeys, lockpicks, multitools, and navigate hazards like LAMs and security bots.
Continue your training in Deus Ex, mastering essential tools and navigating complex scenarios. This section covers key objectives and challenges you'll face.
- 1Grab the TRAINER DOOR NANOKEY and proceed through the West door.
- 2In the next room, find a CROWBAR and a COMBAT KNIFE. Two supply crates contain LOCKPICKS, each capable of opening doors with up to 10% strength.
- 3In the following room, find a DataCube with the code 0012. Use this code on the Keypad to the North.
- 4In the next room, use a MULTITOOL on the Keypad. Untrained, a Multitool bypasses 10% of a Keypad's strength.
- 5In the subsequent room, find the MEDICAL ROOM NANOKEY on an Unconscious colleague. You can pick up and carry bodies if you are not holding anything.
- 6Navigate through a dark room and a room with a Repair Bot, jumping across platforms and climbing a ladder.
- 7In the water room, find and use the HAZMAT SUIT to swim across.
- 8To the East, you will meet Joseph Manderley. Use the Medical Bot to heal.
- 9You will encounter Gunther Hermann. Grab the PISTOL and press the Switch. Notice aim improves with stillness; this can be trained in the Skills menu. Reload with 10MM AMMO.
- 10You will practice with the Sniper Rifle, raising your Weapons: Rifle skill. Scopes can be attached to other weapons later.
- 11Learn about LAMs (proximity mines/grenades). Throw them carefully; ensure JC's hand grip alters before releasing. Disabling LAMs can be tricky, but Torso Health won't drop below 10. Raising Weapons: Demolition skill increases time to pocket armed grenades.
- 12Anna Navarre will oversee your next test. Avoid Troopers' line of sight and sound. Wait for the East corridor Trooper to turn, then follow while crouched. Use Lab Flasks to distract enemies by throwing them. Enemies also respond to light.
- 13Jaime Reyes contacts you for the final test against a Page Industries Bravo-3 Peacebringer bot. Bots have line of sight but no hearing.
- 14Find a CROWBAR in the Southeast corner near barrels.
- 15A DataCube between barrels on the Eastern Wall provides the bridge code: 0089.
- 16A PISTOL is in the Northeast corner; it can destroy TNT Crates. Bots are nearly immune to bullets.
- 17A MULTITOOL is in a crate further Northeast; break the crate with a weapon.
- 18Destroy the Bot by placing a TNT crate in its path and shooting it when the bot is near.
- 19Use a TNT crate as a jumping point onto Cardboard boxes to the South, then walk over pipes to the other side. Use the Multitool or code 0089 to lower the bridge.
- 20Stack crates and items to reach the window. Jaime will have dialogue.
- 21Learn about UNATCO, NSF, bots, and the distinction between nano-augmented and mech-augmented agents.
- 22Push a protruding brick between the UNATCO Trooper and bot holograms to open a secret room to the North. Press the Switch inside.
- 23Leave West for a final hologram with Bob Page.
- Cardboard boxes and barrels do not contain items.
- When placing LAMs, wait for JC's hand to change grip before releasing.
- Enemies respond to both sound and light.
- Bots are immune to bullets; use explosives like TNT crates.
- You can stack items to reach higher areas.
Part 3
Your first steps in Deus Ex Part 3! Learn how to tackle Liberty Island, find Harley Filben, rescue Gunther, and choose your starting gear wisely. Master the early game!
Alright, so you've made it to Part 3, and we're diving headfirst into the action on Liberty Island. This is where things really start to open up, and you'll get a feel for how you want to play JC Denton. Remember, this guide suggests a build, but don't be afraid to experiment, especially on future playthroughs. For now, let's focus on making solid choices.
The build I'm recommending for a first-timer is an all-rounder, focusing on non-weapon skills, with a strong emphasis on Low-Tech (like melee) and Pistols. We want to hit two key points early: being able to smash through objects like cameras and alarm panels with the Dragon's Tooth Sword (requires 50 Hardness) and getting Level 4 Vision Enhancement. By the end, your skills should look something like this:
- Heavy: Untrained
- Pistol: Master
- Rifle: Untrained
- Low-Tech: Advanced
- Demolitions: Trained
- Environmental Resistance: Advanced
- Lockpicking: Advanced
- Electronics: Advanced
- Medicine: Untrained
- Computer: Advanced
- Swimming: Trained
When you start, you get 5000 skill points. I'd suggest putting points into Lockpicking, Hacking (for computers, security terminals, and ATMs), and a little bit into Demolitions to help you deal with those pesky LAMs. You'll also start with basic Pistol training. This leaves you with 1175 points to invest later.
Djibriel's First Time Player Pick: Set Computer, Lockpicking, Swimming, and Demolition to Trained.
Oh, and there's a little bug you might want to know about: if you downgrade your Pistol skill, you get back the 1575 skill points it costs to train it. Since the game starts you with Pistol at Trained anyway, it's like getting free points. I'm not using this bug in the 'standard' build, but it's good to be aware of!
Just a heads-up, your 'Real Name' doesn't really matter much. Characters will call you JC Denton, which makes sense given the context.
3.1 Liberty Island, New York City
This first area is packed with opportunities to earn skill points, totaling 1690:
- 25 SP EXPLORATION BONUS: Enter UNATCO Communication Van
- 50 SP EXPLORATION BONUS: Enter UNATCO Antenna Shaft
- 150 SP: Finding Harley Filben
- 50 SP EXPLORATION BONUS: Enter Sunken ship
- 250 SP EXPLORATION BONUS: Bypass Power Box in Bunker
- 150 SP: Free Gunther
- 150 SP PROGRESS BONUS: Climb stairs to command post
- 750 SP CRITICAL LOCATION BONUS: Enter command post of Statue of Liberty
- 115 SP PROGRESS BONUS: Reaching UNATCO Headquarters
You can also find an Augmentation Canister for Combat Strength / Microfibral Muscle, and you can buy Weapon Modifications (Accuracy x2, Clip, Laser, Reload, Scope) for 700 credits.
Primary Goal: The NSF are causing trouble from the Statue. Get inside and figure out what's going on.
Secondary Goals:
- Meet UNATCO informant Harley Filben at the North Docks. He's got the key you need for the Statue.
- One of UNATCO's top agents is captured inside the Statue. Rescue him, and he'll help you fight the NSF.
Notes: That intro sequence you saw? It's packed with characters and places you'll see later. It's pretty cool to rewatch it after you've finished the game!
The line about the "mythical city on the hill" is a biblical reference, often used to talk about America as a model nation. Interesting stuff, but not directly tied to Aquinas as far as I can tell.
So, your UNATCO contact, Alex Jacobson, will call you and tell you to find your brother, Paul. But hey, take a moment to enjoy the view – Paul will show up on his own soon enough. Your first bit of gear is a bit underwhelming: a MEDKIT, a RIOT PROD, and a PISTOL. Paul's going to offer you a choice between a SNIPER RIFLE, a GEP GUN, or a MINI-CROSSBOW. Since you'll find the crossbow and sniper rifle pretty easily later on, I highly recommend the GEP GUN. It's a blast!
You can chat with Paul a couple more times about his past in Hong Kong and your parents. Corporal Collins will fill you in on Gunther, the 'top agent' who got himself captured by ignoring orders. Take a look at the Satellite Photo of Liberty Island – you're at the South Dock and need to head to the North Dock to meet that UNATCO contact who can get you into the Statue.
Once you're on the docks, keep an eye out for a CROWBAR. You can use it to break open a couple of things right away.
Part 4
Navigate Liberty Island in Deus Ex Part 4. Find Lockpicks, Binoculars, Multitools, and more. Uncover secrets at the UNATCO HQ and comm van.
- 1From the docks, find adjacent crates containing a LOCKPICK and BINOCULARS.
- 2In the water, two crates hold a MULTITOOL and a BIOELECTRIC CELL.
- 3Near the docks' entrance, bash three crates for 4 DARTS (for Minicrossbow), a PROD CHARGER (4 charges), and 6 rounds of 10MM AMMO.
- 4Alex advises shooting NSF on sight, contrasting with JC's non-lethal directives.
- 5Leaving the docks, a right turn leads to the Lady of Liberty's back entrance, but another route is recommended.
- 6Ahead, NSF troopers guard the path to UNATCO headquarters. You can engage them or avoid them. If pursued, head to the dock where the UNATCO patrol bot and Paul can assist.
- 7Near the ground, loot a BATON from a fallen UNATCO trooper.
- 8The Combat Supply Crate to the left when leaving the docks contains a GAS GRENADE.
- 9The lowest metal container has a panel labeled 'UNATCO MEDLAB'. Use a Lockpick to open it and find a MEDICAL BOT that restores Health and installs Augmentation Canisters.
- 10Going East, you'll find one or two NSF hostiles, a PEPPER GUN on a UNATCO body, and a MULTITOOL in a crate.
- 11Further East, overhear an NSF conversation about Gunther Hermann. Return to the dock and head North.
- 12Walk ahead and turn left to find UNATCO headquarters.
- 13On the way, loot a MINI-CROSSBOW and Tranquilizer Darts from an NSF terrorist's body.
- 14Tech Sergeant Kaplan patrols UNATCO headquarters. If you mention 'cleaning the place out', he provides ammo locations and the comm van code: 0451.
- 15Kaplan offers items for sale: SCOPE MOD (700 credits), 10MM AMMO (5x) (200 credits), and TRANQUILIZER DARTS (60 credits). Buying Tranq. Darts is recommended with 500 credits.
- 16In the back, near the UN-001 satellite, find a CROWBAR and a General Supply Crate containing a MULTITOOL.
- 17Open the comm van using the code 0451 or a Multitool. This grants 25 SP EXPLORATION BONUS.
- 18Inside the comm van, find TRANQUILIZER DARTS and the Security Computer Terminal. A hidden Datapad provides login: Login: SATCOM, password UNATCO_001. Hacking can also be used. Set 'Door Status' to Open and/or 'Door Access' to Unlocked. Be aware the terminal drains Bioelectric Energy.
- 19Behind the comm van, a crate contains a LOCKPICK. Find the UNATCO COMPOUND HATCH NANOKEY nearby to open the antenna shaft.
- 20Enter the previously locked shaft using hacking or the Nanokey for 50 SP EXPLORATION BONUS.
- The code 0451 is a reference to System Shock and Fahrenheit 451.
- The comm van and compound were modeled after high-security satellite communications stations.
- The Baton is a good early weapon for silent takedowns and opening crates.
- Tranquilizer Darts are very useful for non-lethal incapacitation.
- The Medical Bot is useful for healing and installing Augmentation Canisters.
- 25 SP EXPLORATION BONUS (Enter UNATCO Communication Van)
- 50 SP EXPLORATION BONUS (Enter Antenna Shaft)
Similar guides you might like


100% Human-Written. AI Fact-Checked. Community Verified. Learn how AntMag verifies content